はじめに
これは 環境構築から始めるテスト駆動開発 ~ プログラミング環境の共通基盤を構築する ~ の開発言語セットアップ記事です。Windows 10 Home で共通基盤が構築されていることを前提としています。
インストール
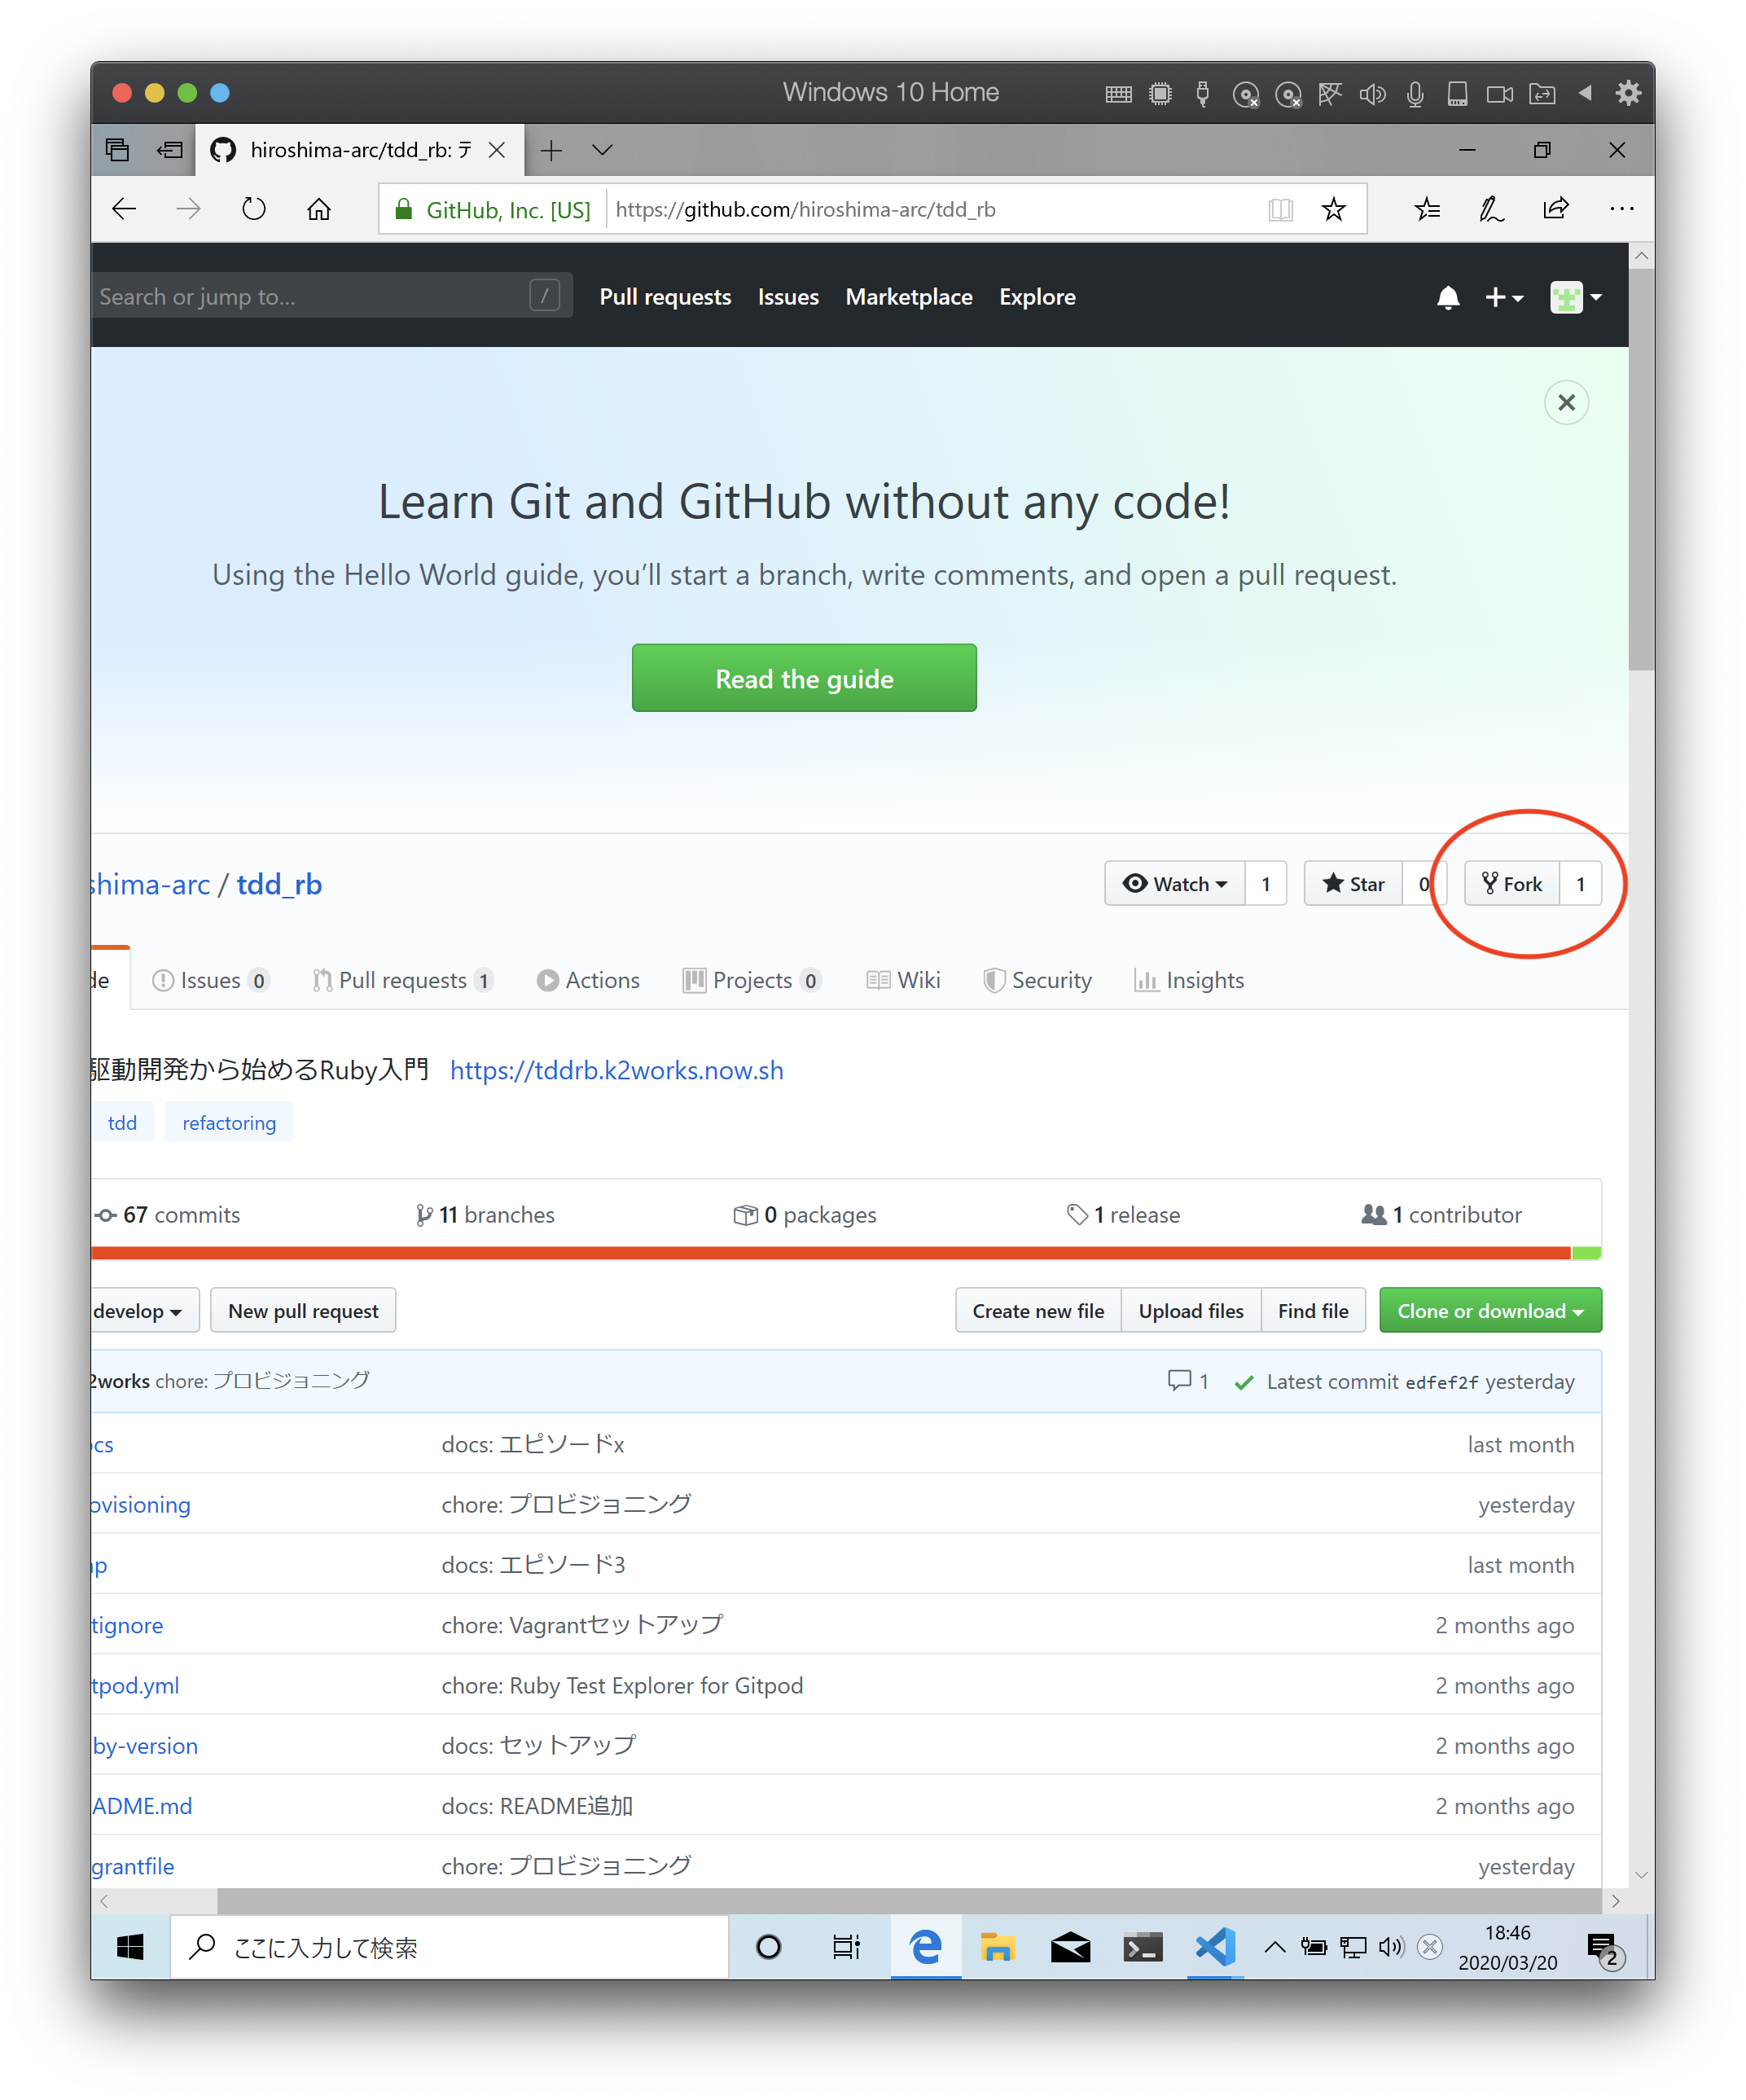
Ruby 開発環境の自動構築をするため以下のレポジトリを自分のレポジトリにフォークします。
Fork を押します。
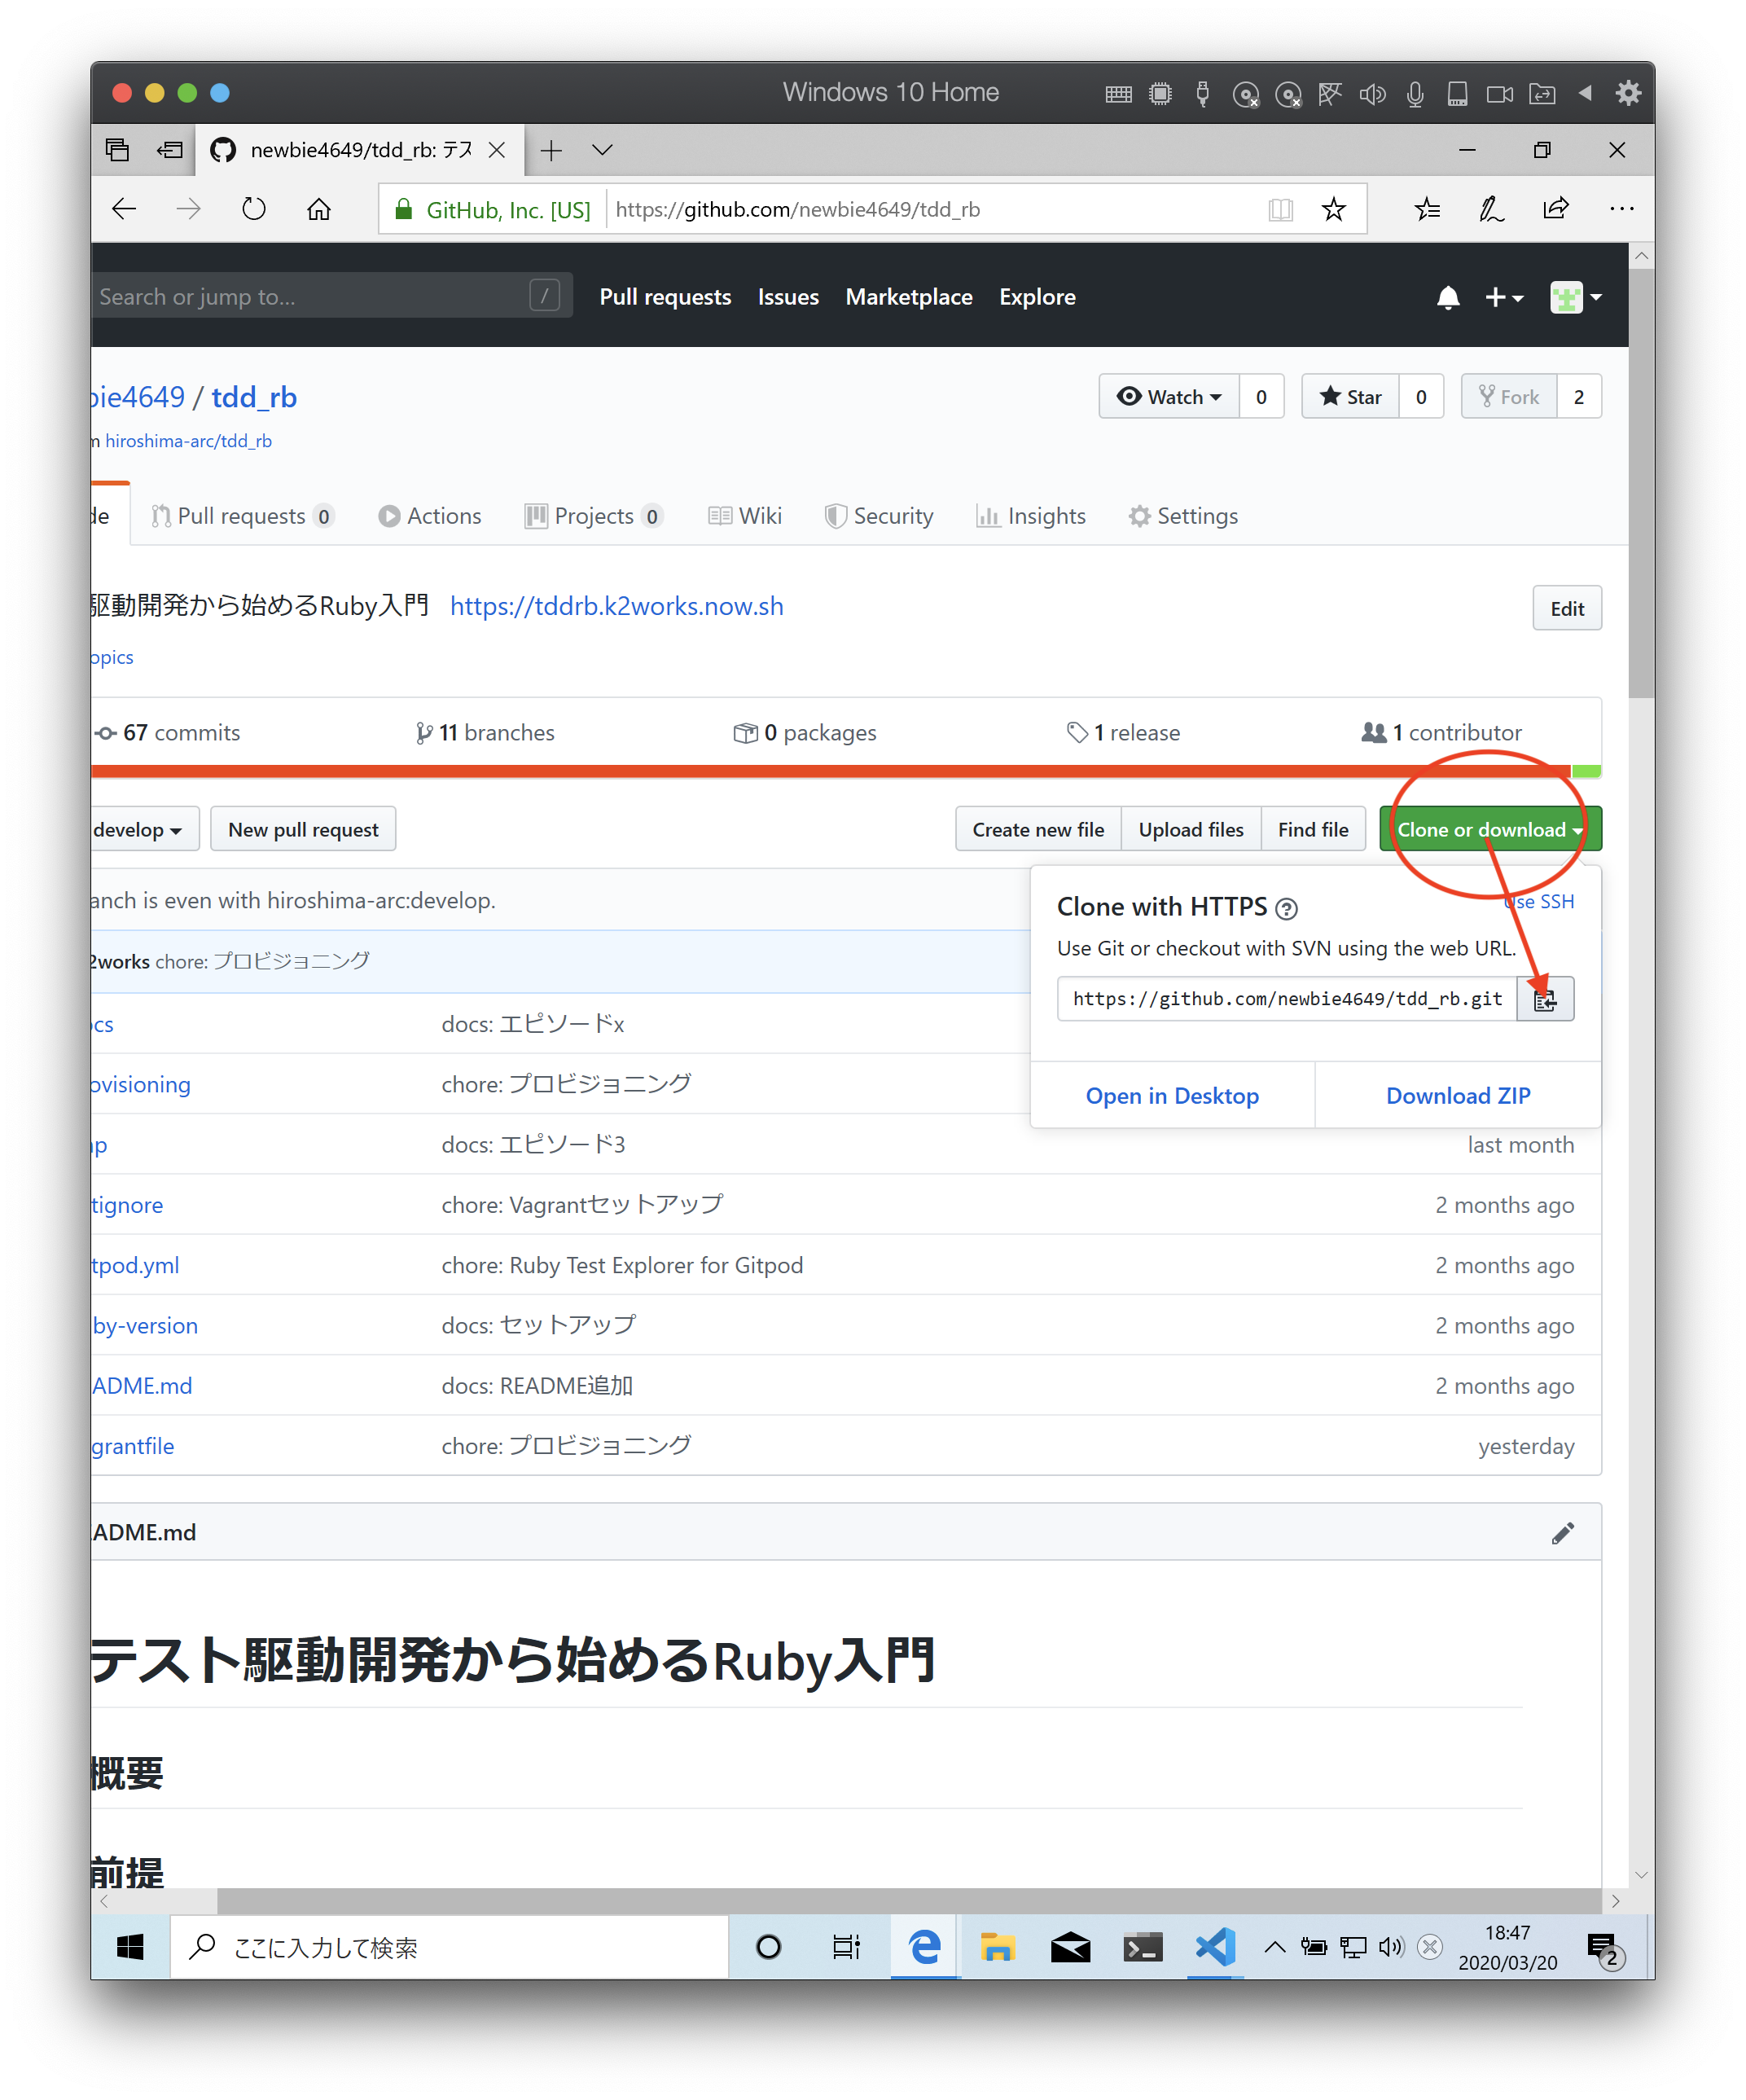
Fork が完了して自分のレポジトリにコピーされたら Clone or download を押してレポジトリの URL をコピーします。
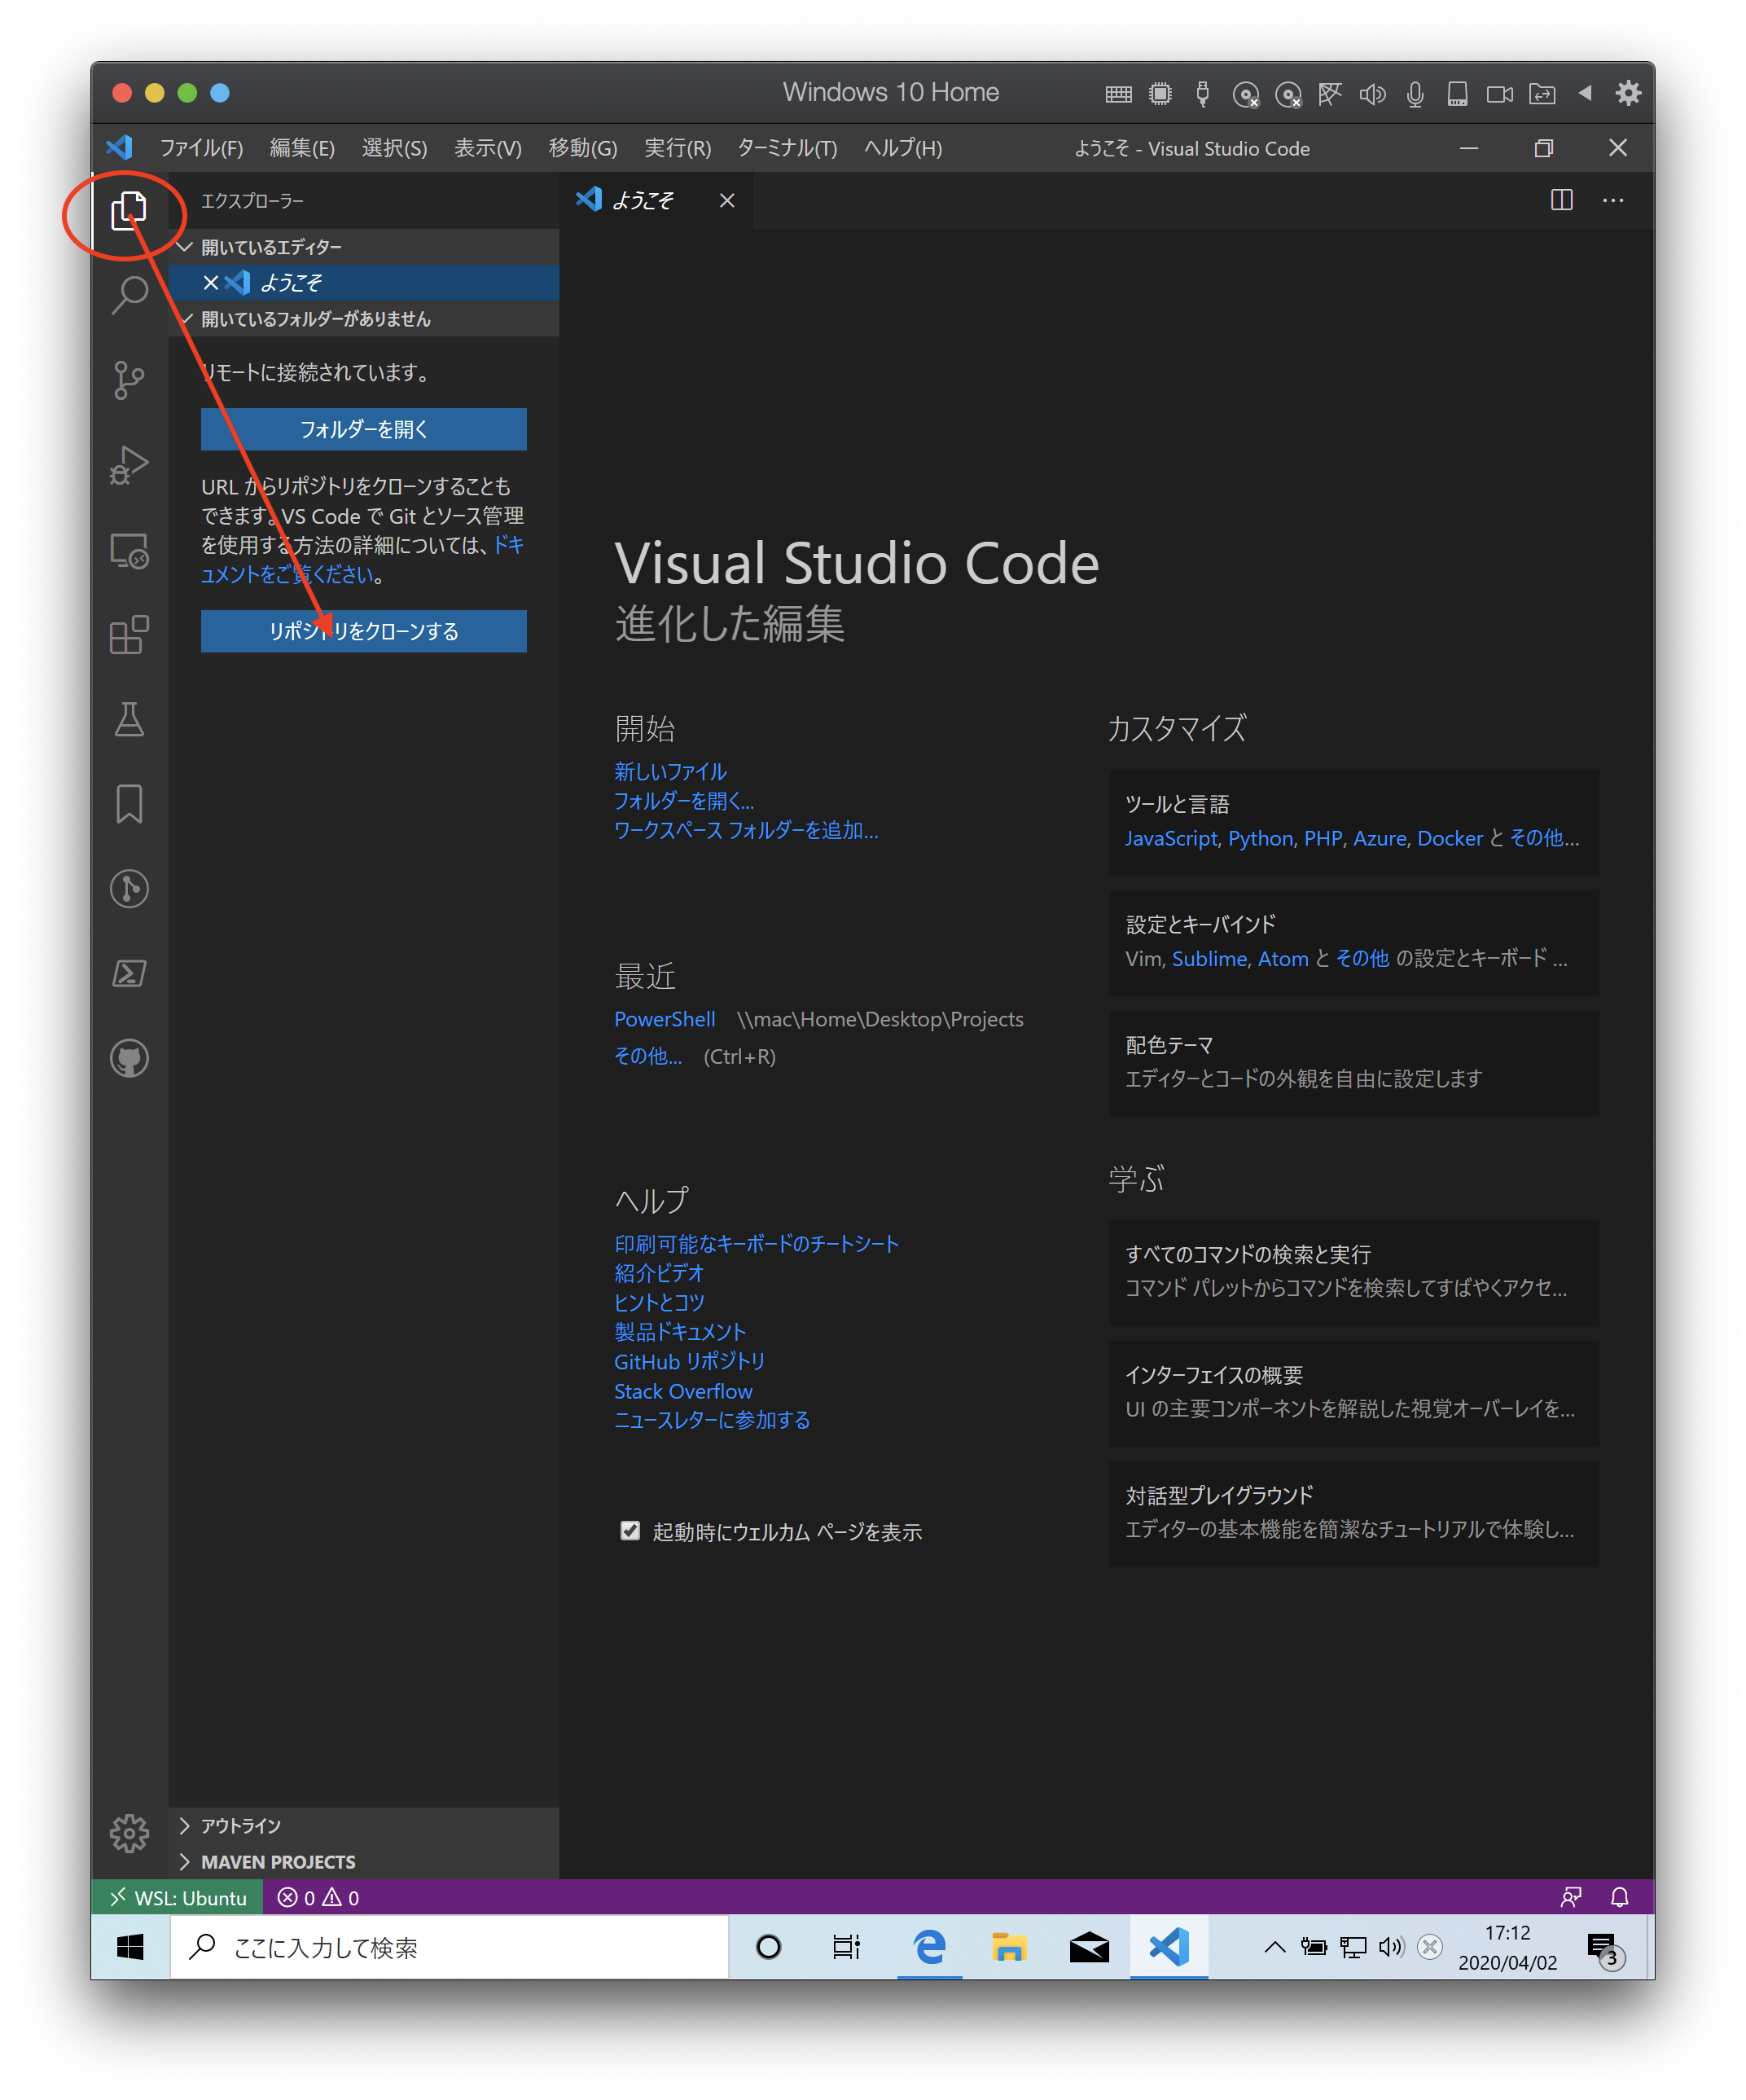
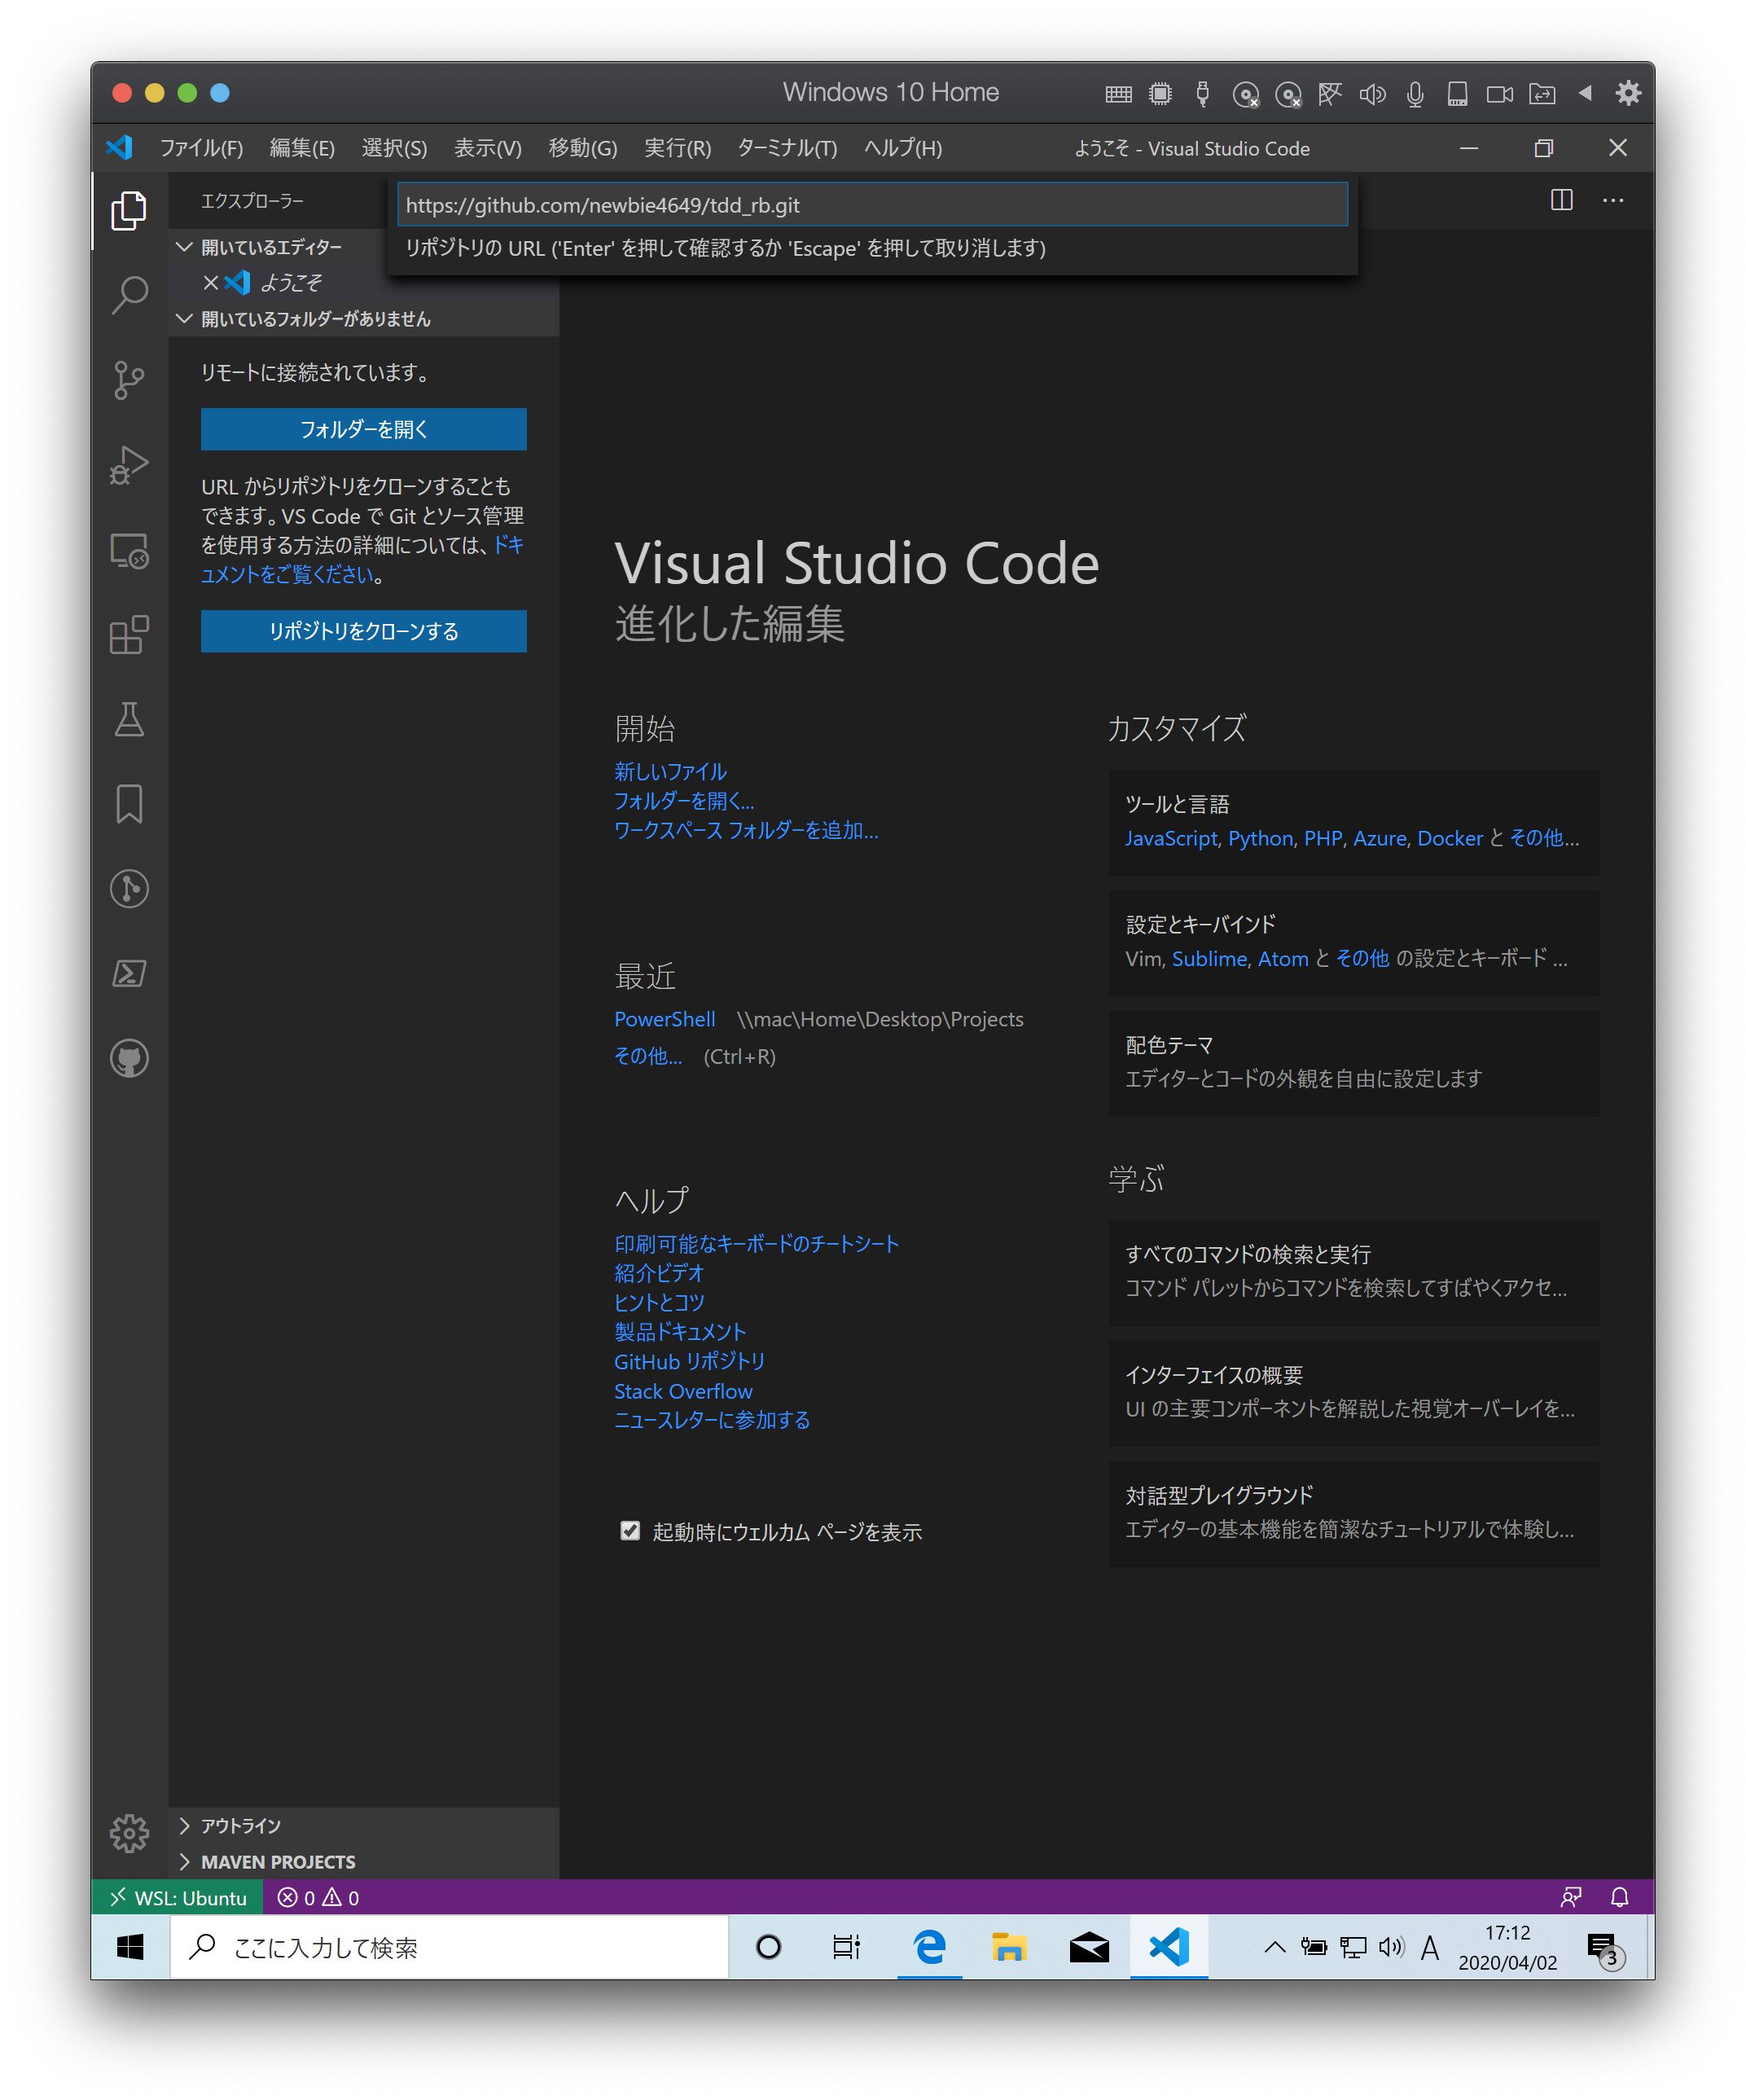
エクスプローラアイコンメニューから レポジトリをクローンする を押します。
先程コピーしたレポジトリの URL を貼り付けます。
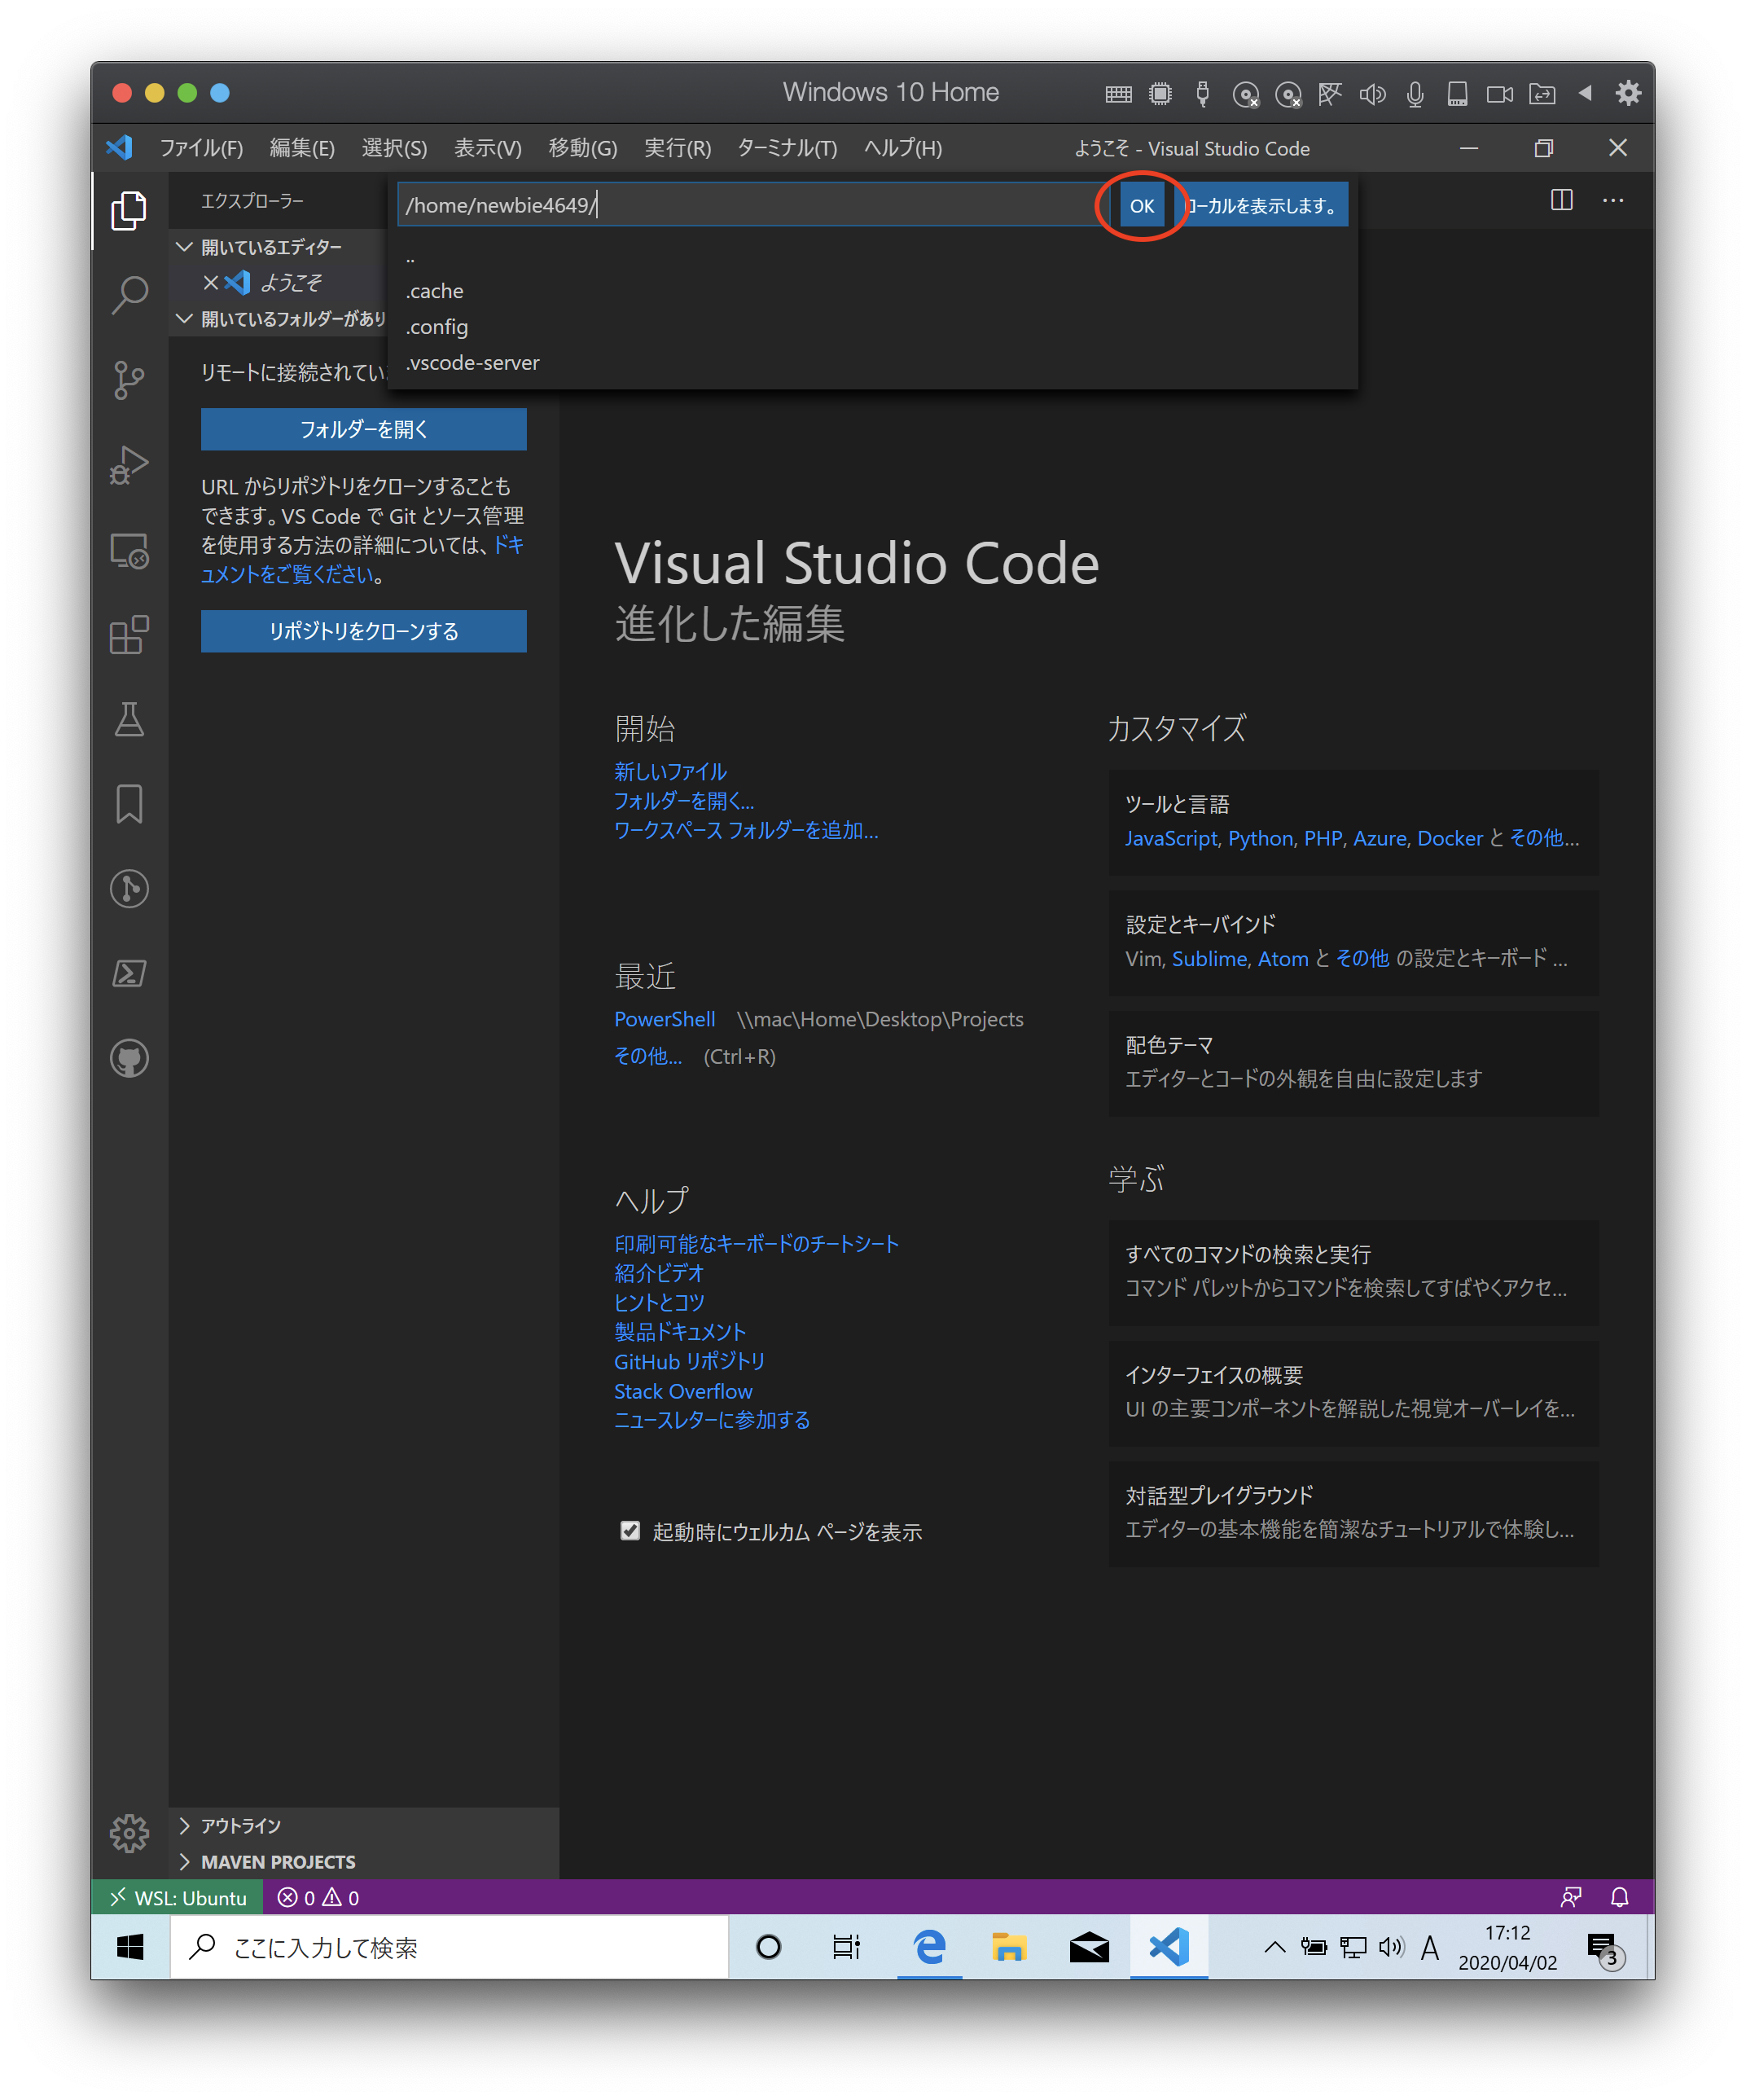
保存先はそのままで OK を押します。
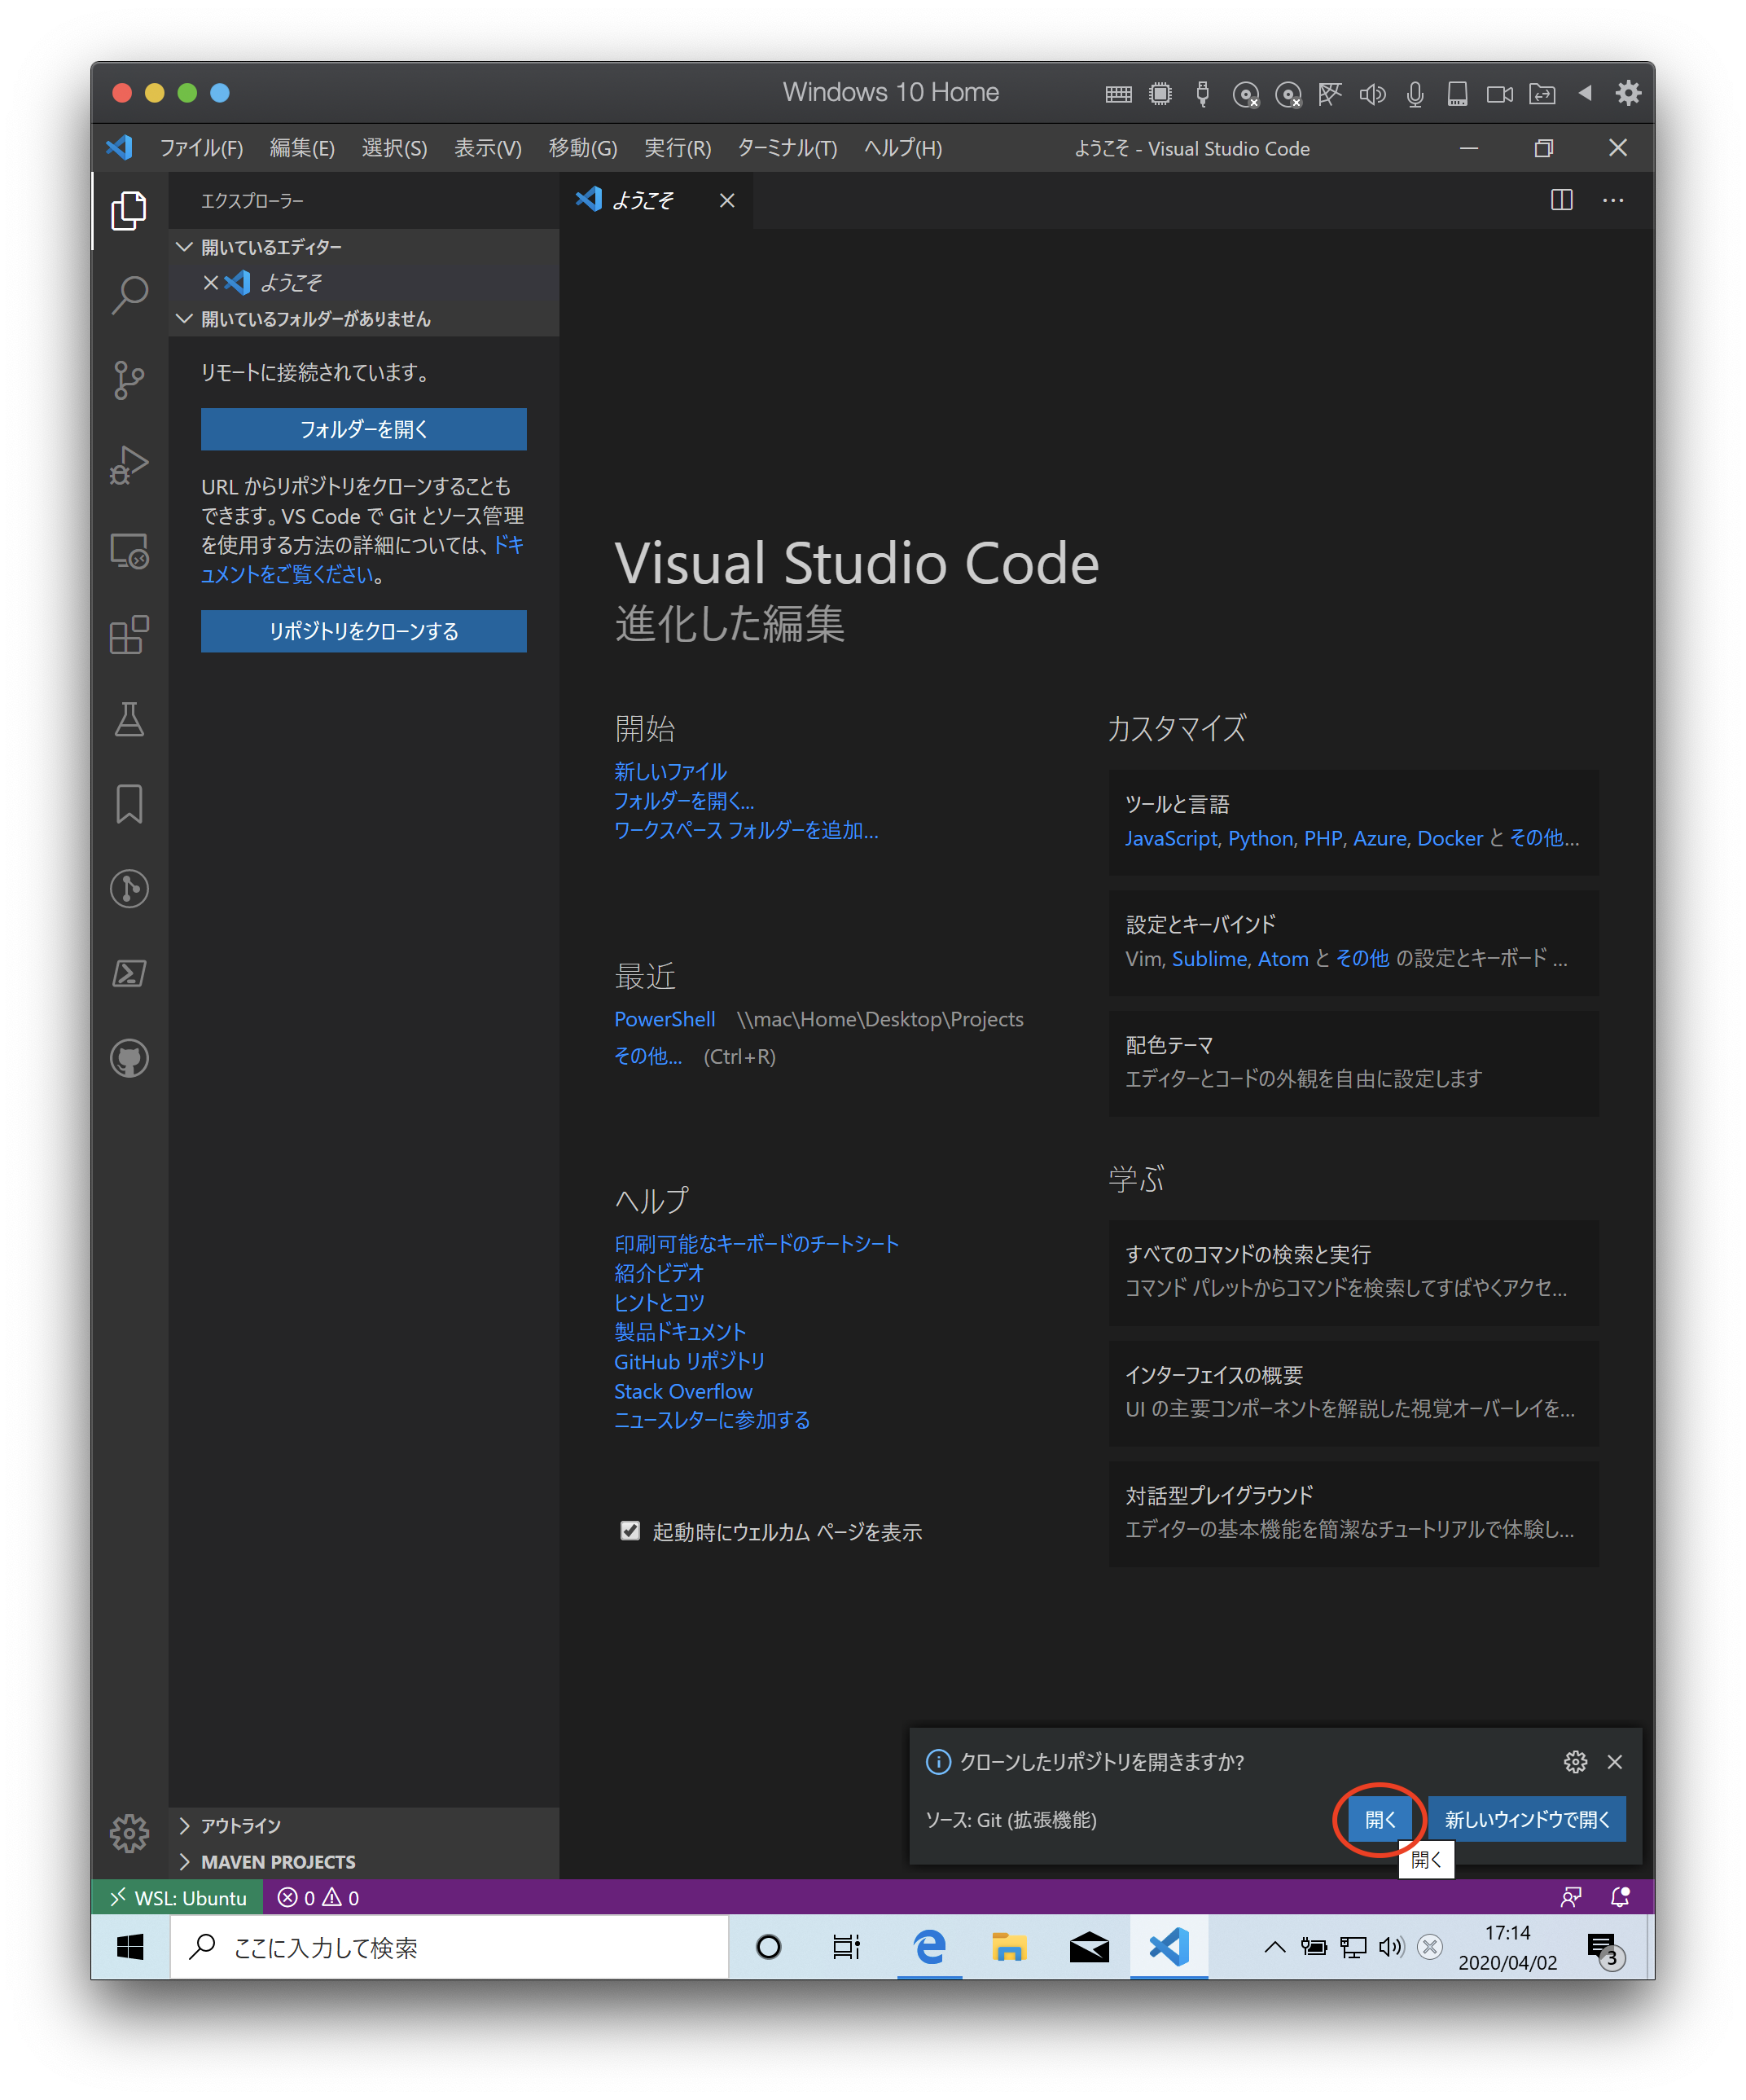
開く を押します。
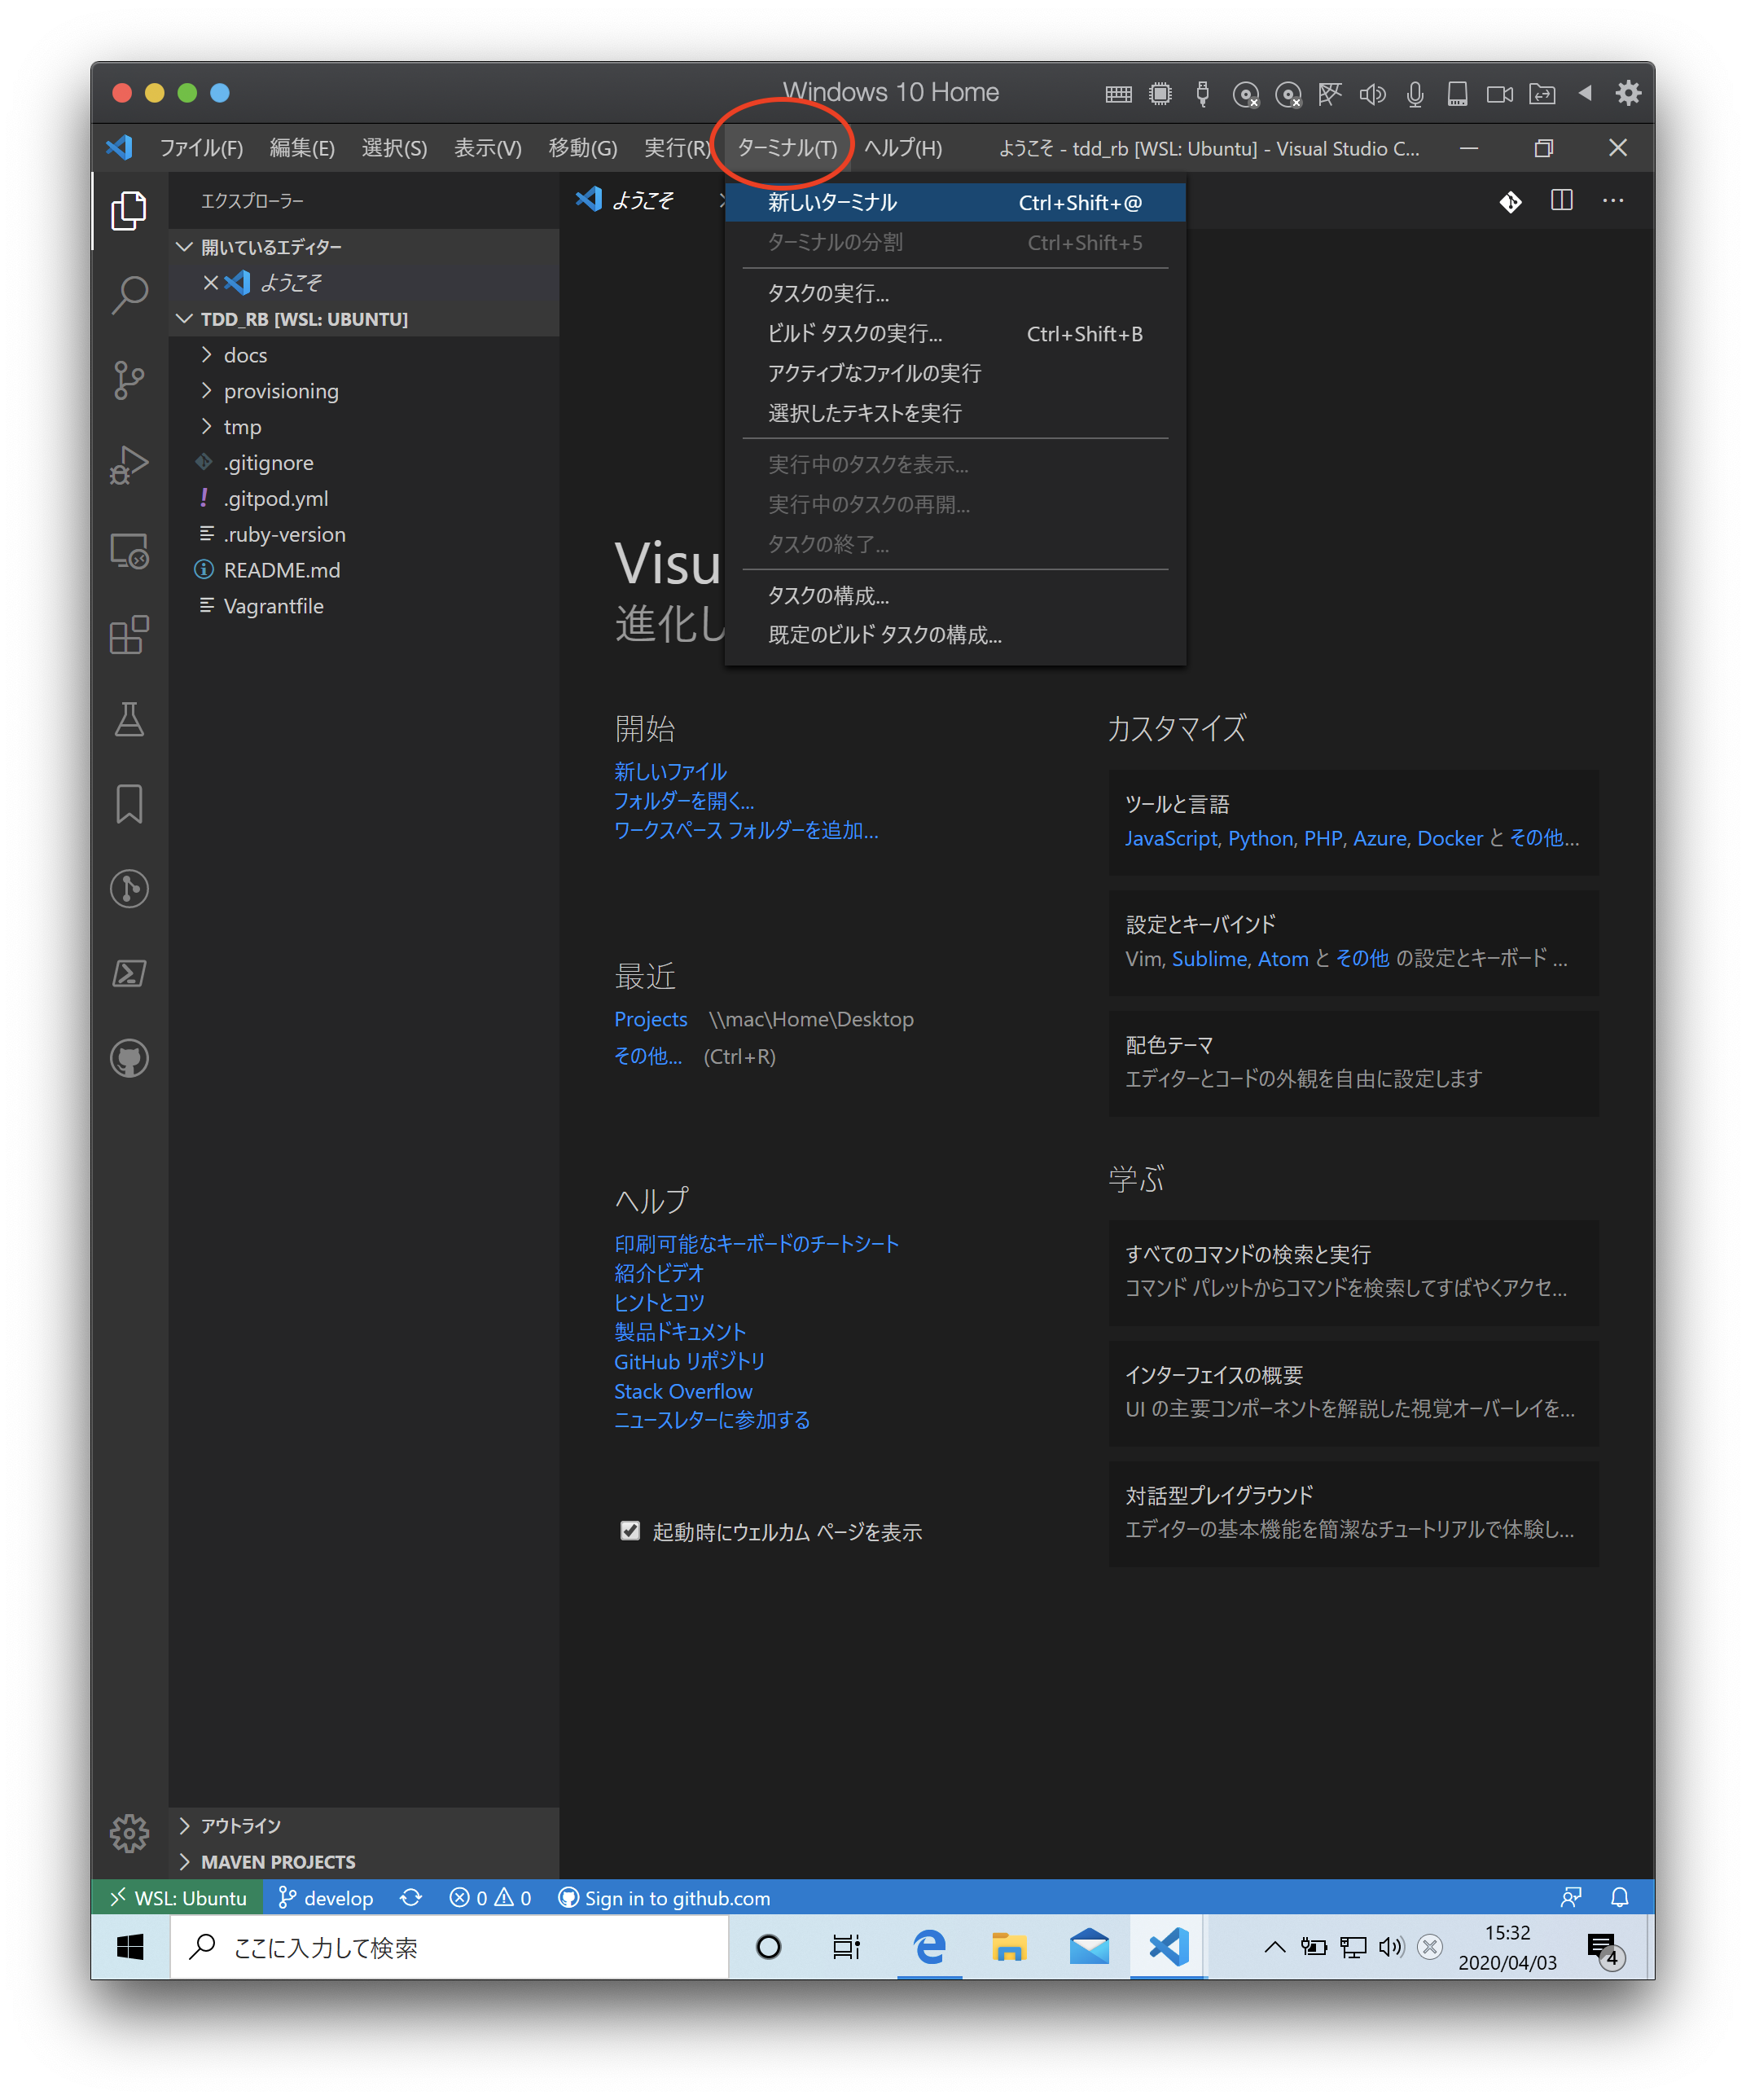
メニューから ターミナル 新しいターミナル を選択します。
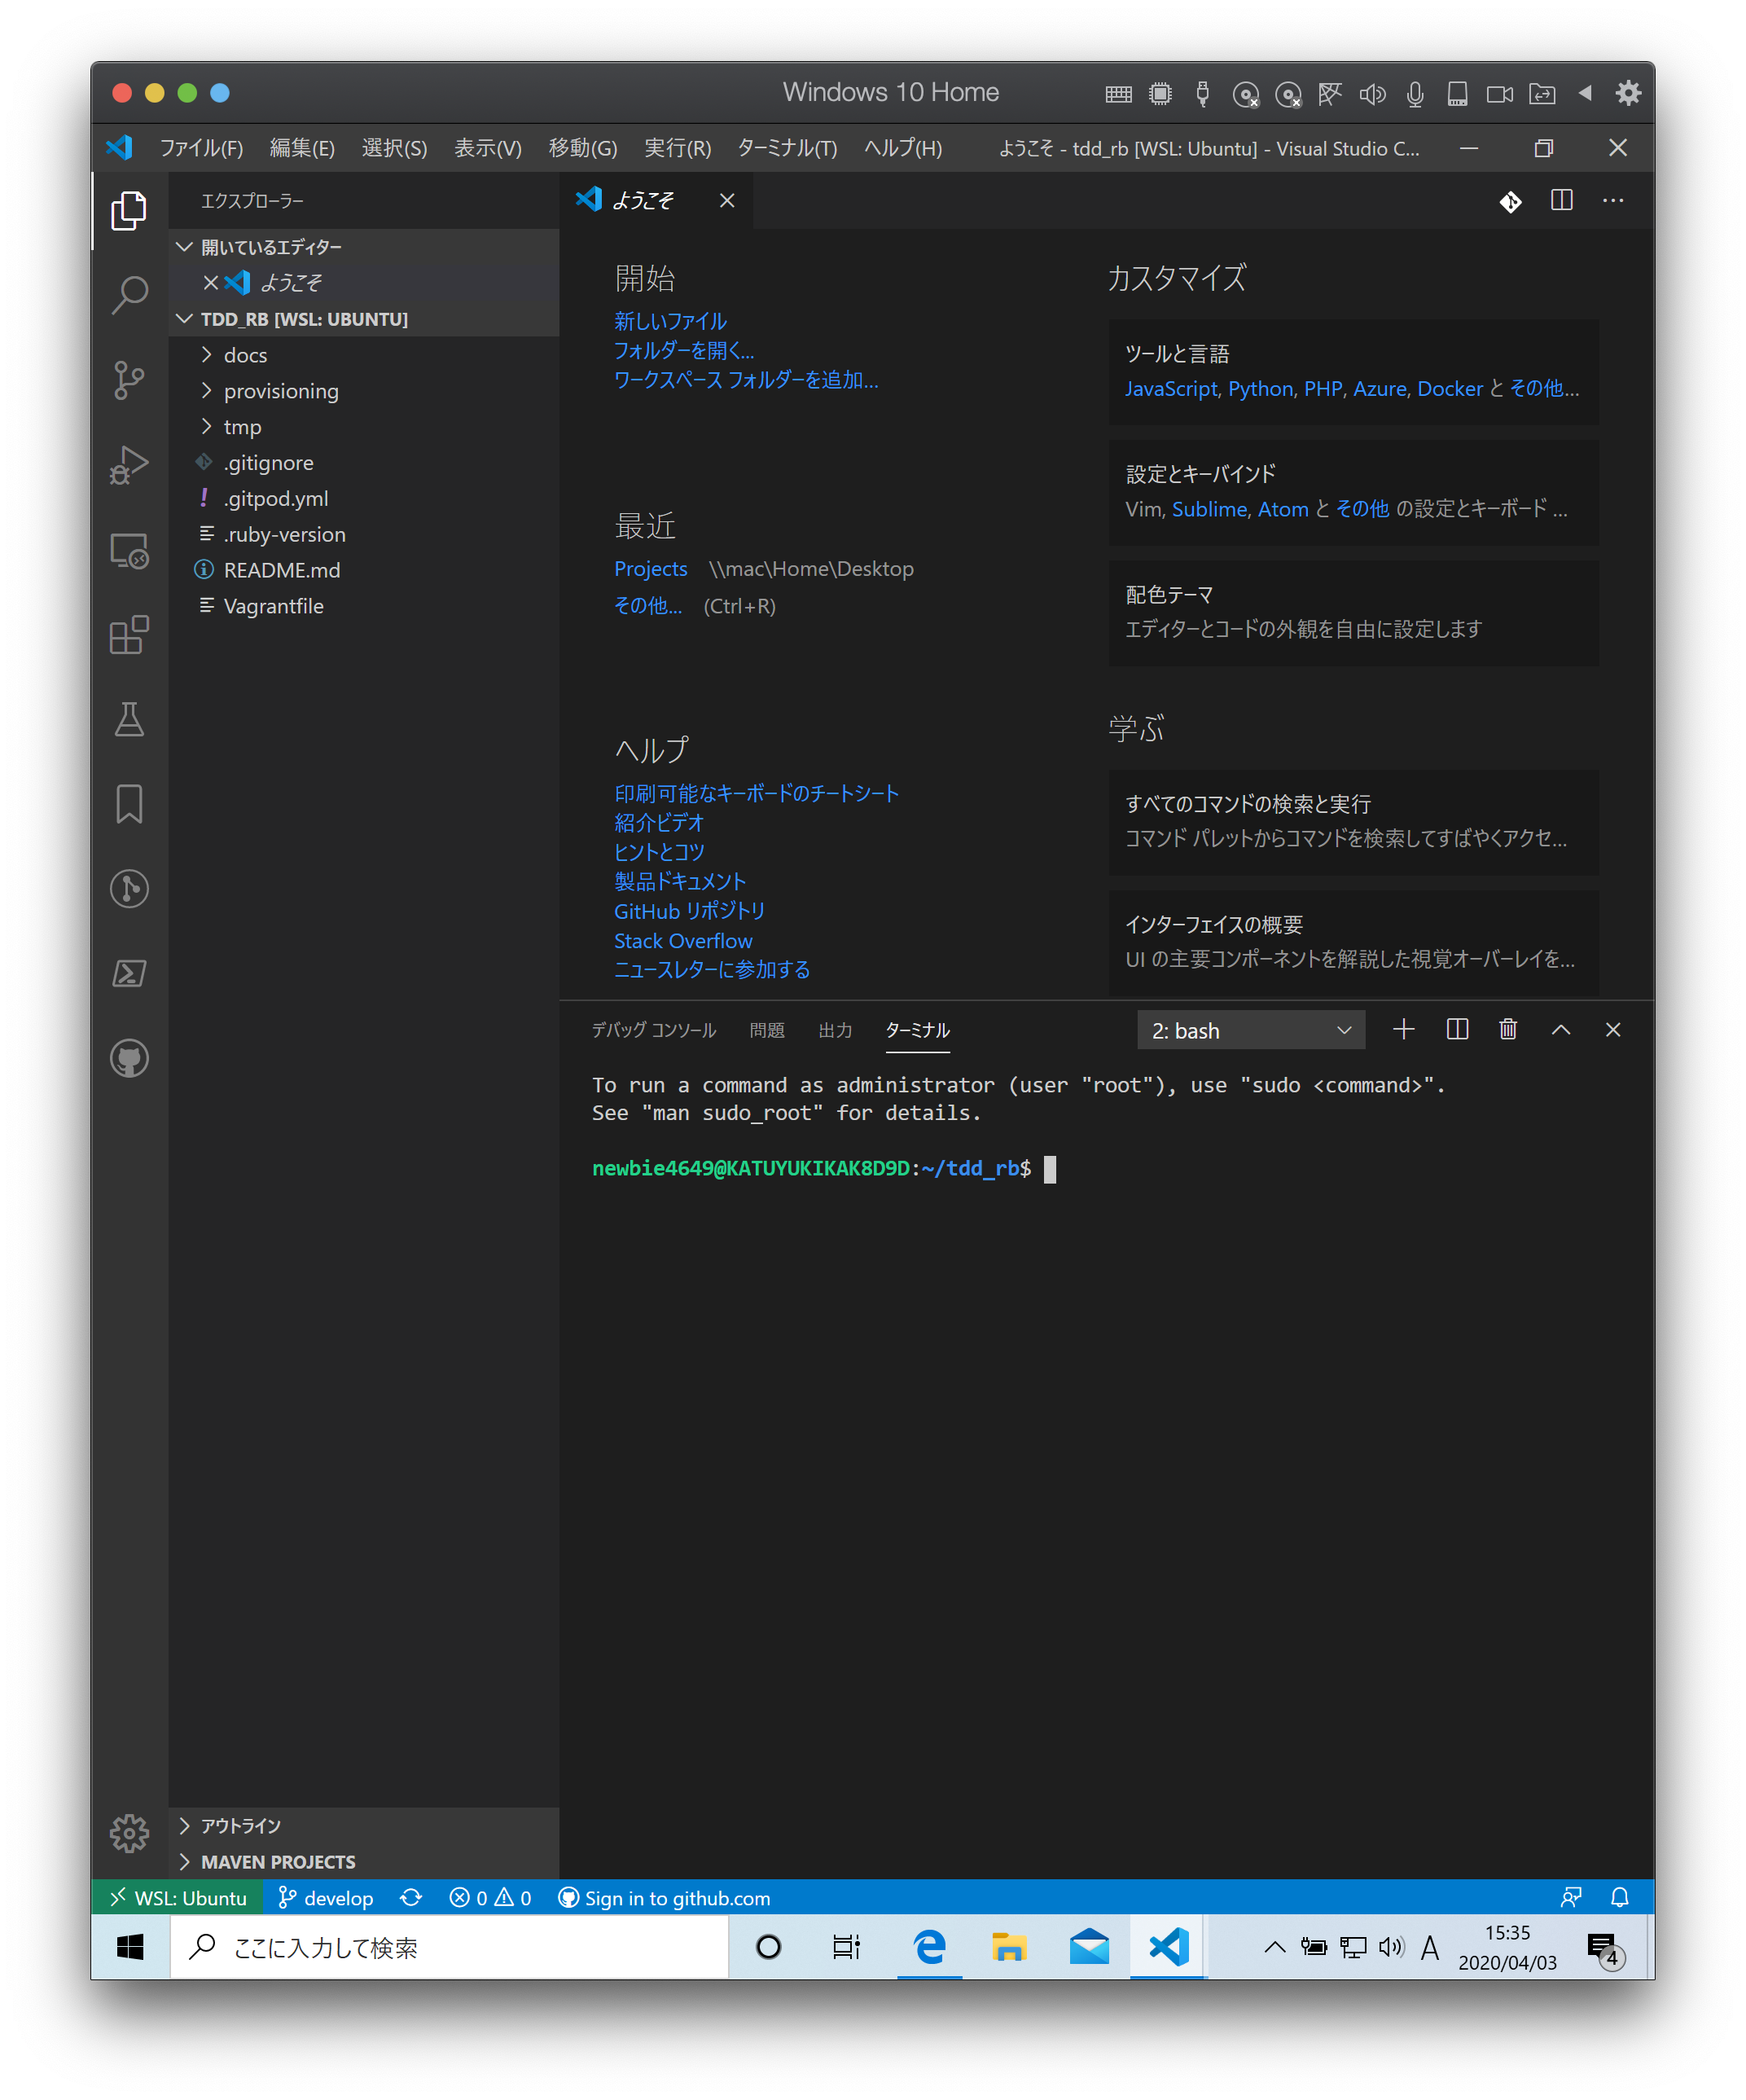
ターミナルに以下のコマンドを入力します。実行時にパスワード入力が求められるので WSL で設定したパスワードを入力してください。
1 | $ sudo apt-get update -y |
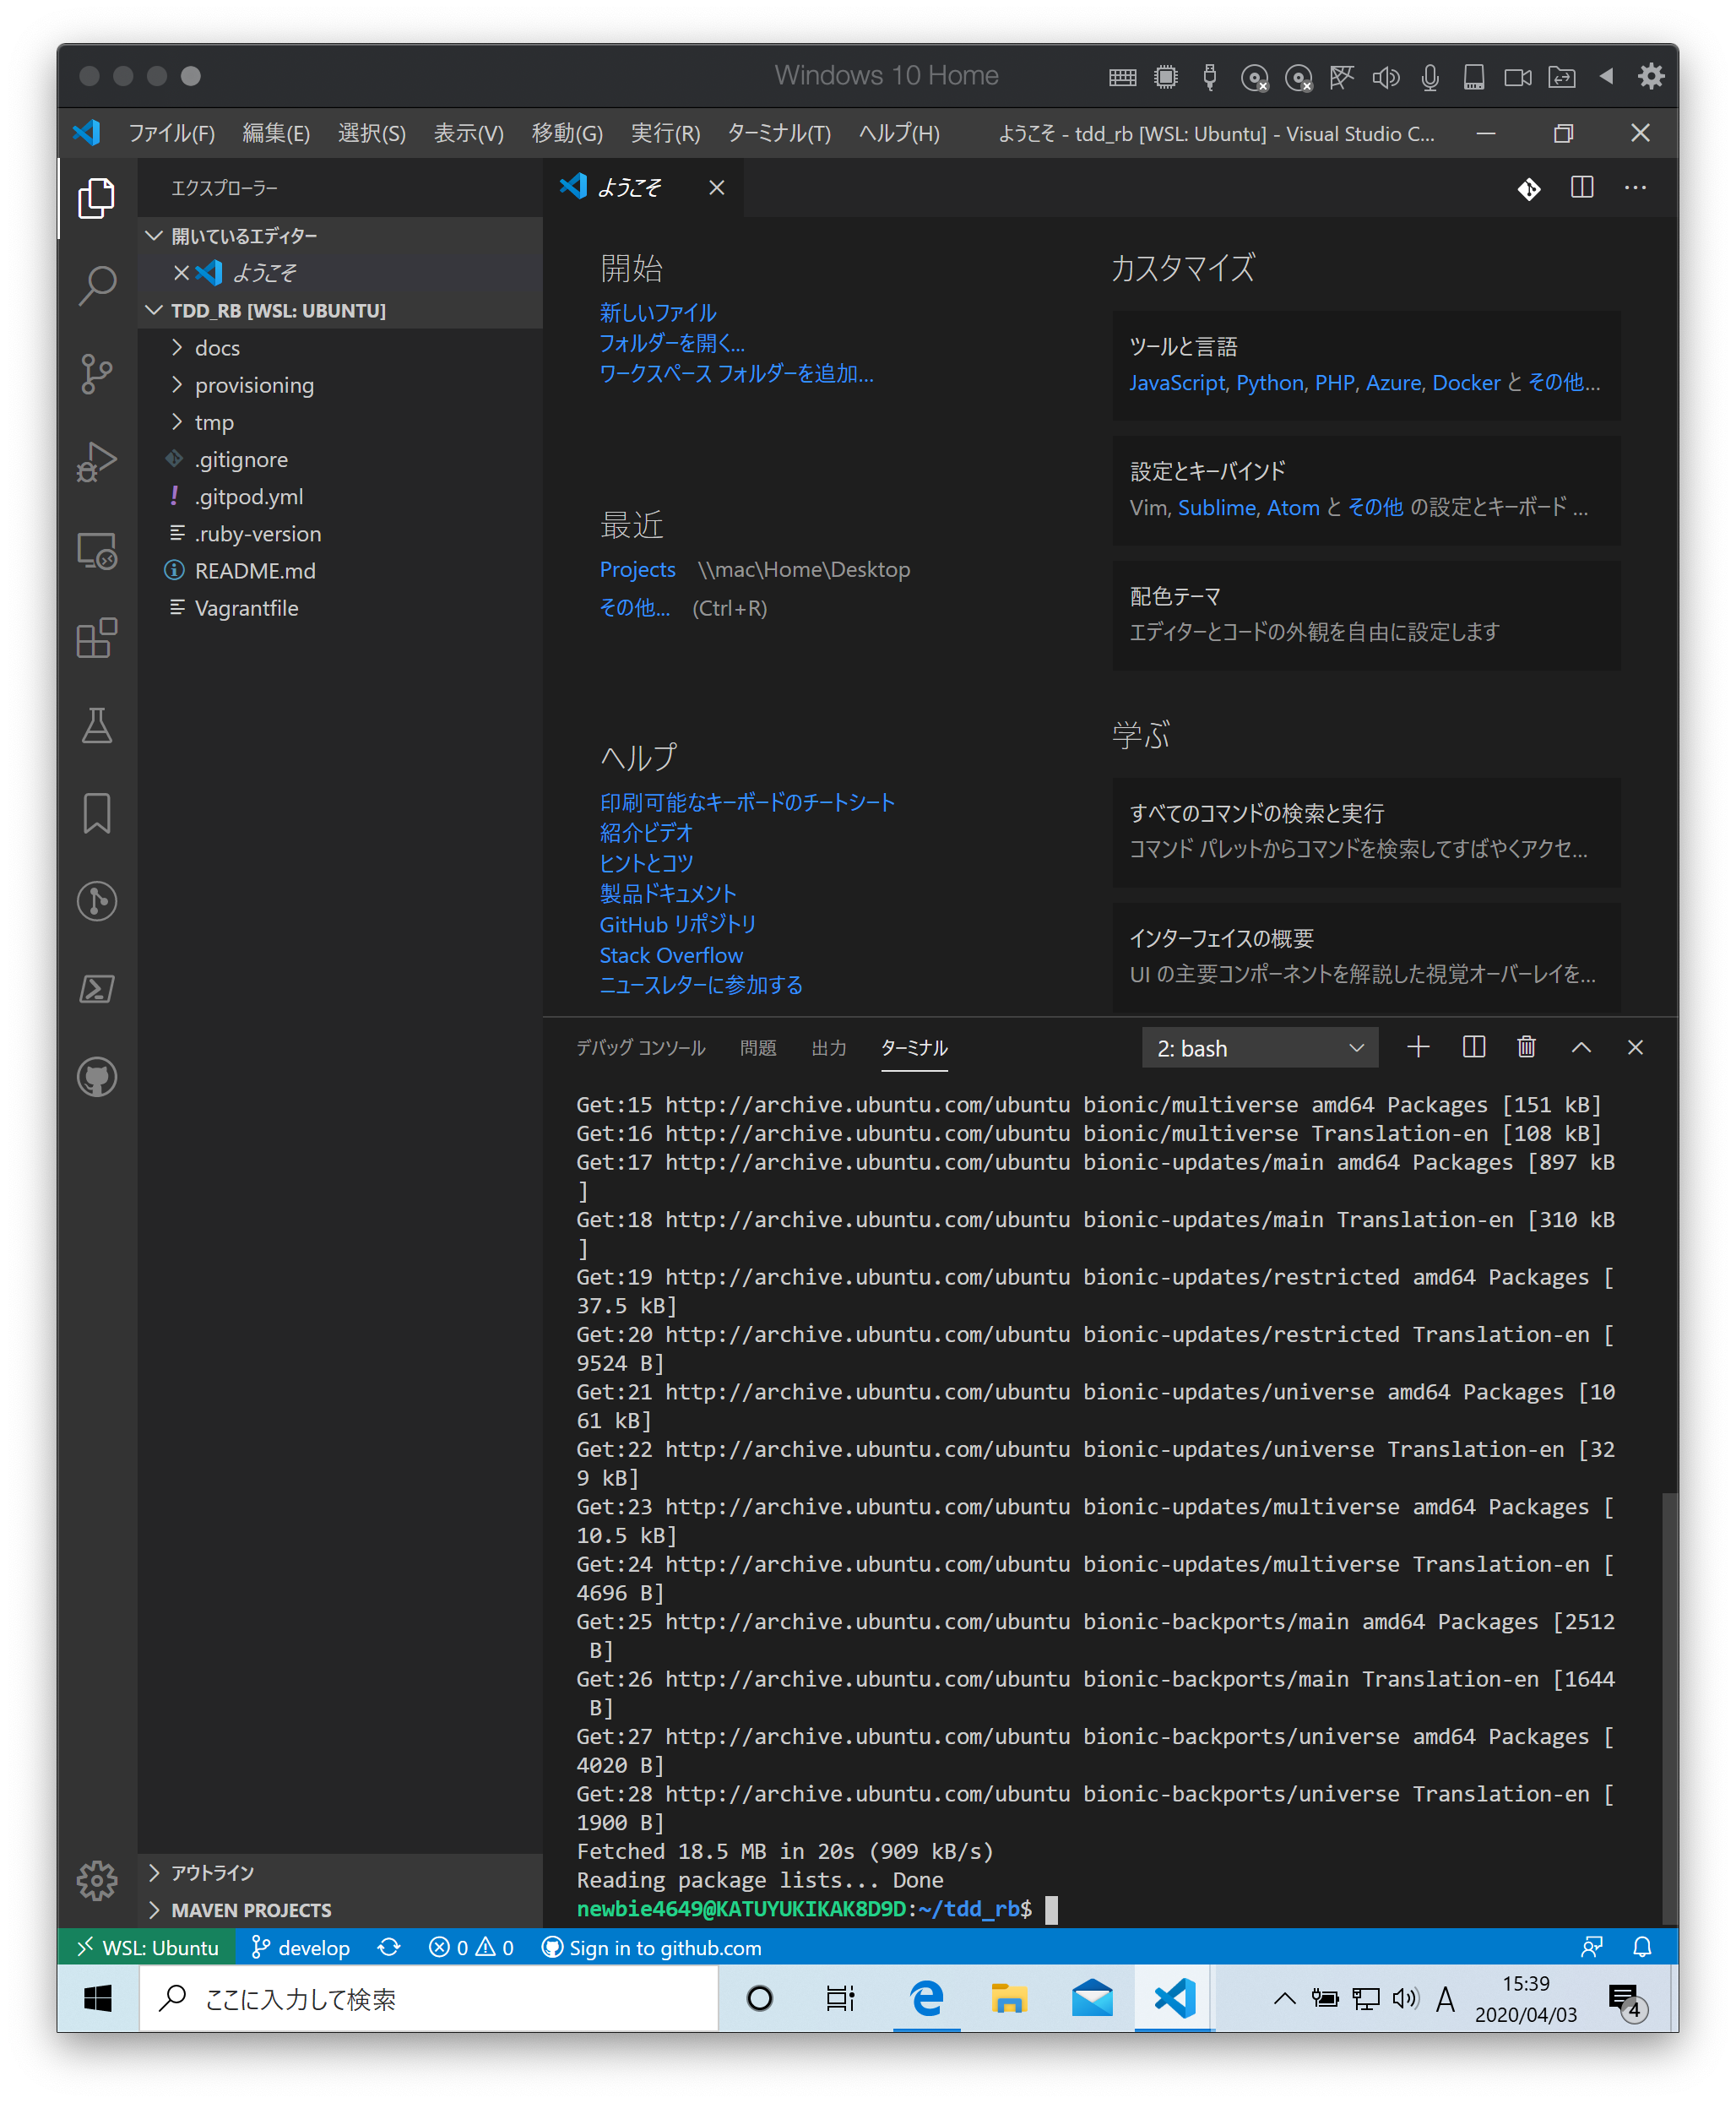
続いて、ターミナルに以下のコマンドを入力します。
1 | $ sudo apt install ansible -y |
続いて、エクスプローラから provisioning/vars/site.yml をファイルを開いて user: の名前を WSL で設定したユーザー ID に変更します。
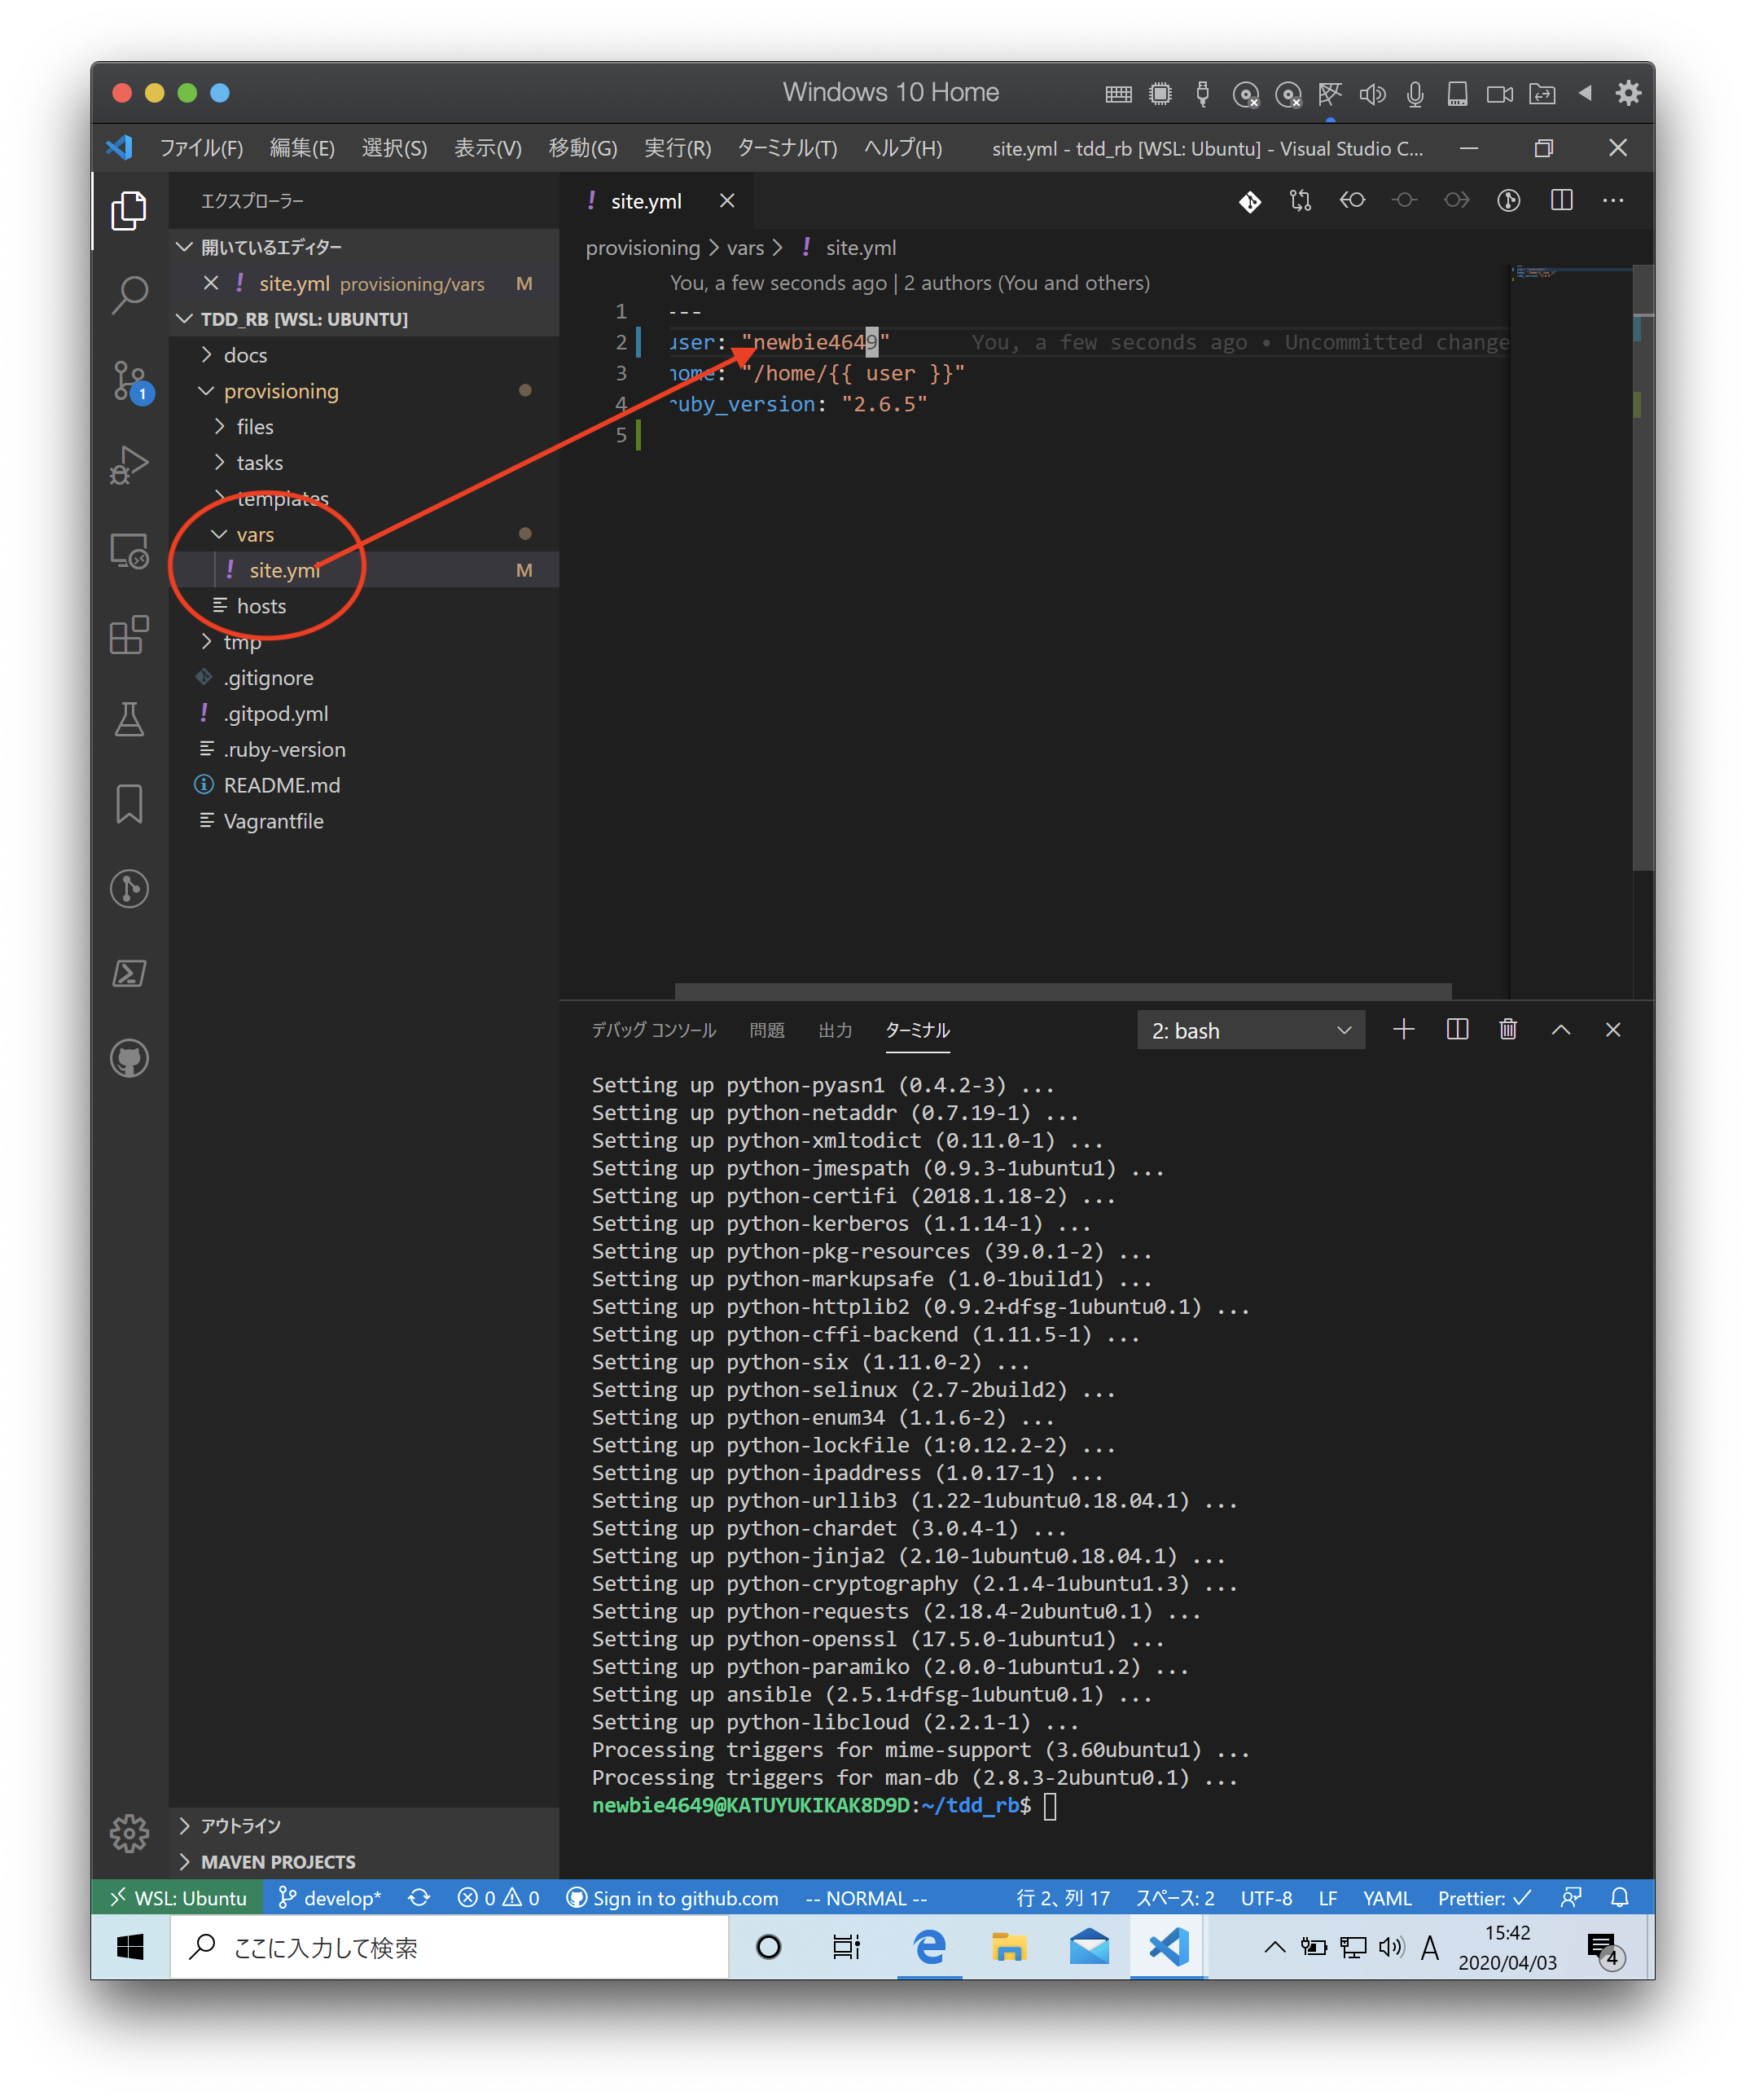
変更を保存したらターミナルに以下のコマンドを入力します。
1 | $ cd provisioning/tasks/ |
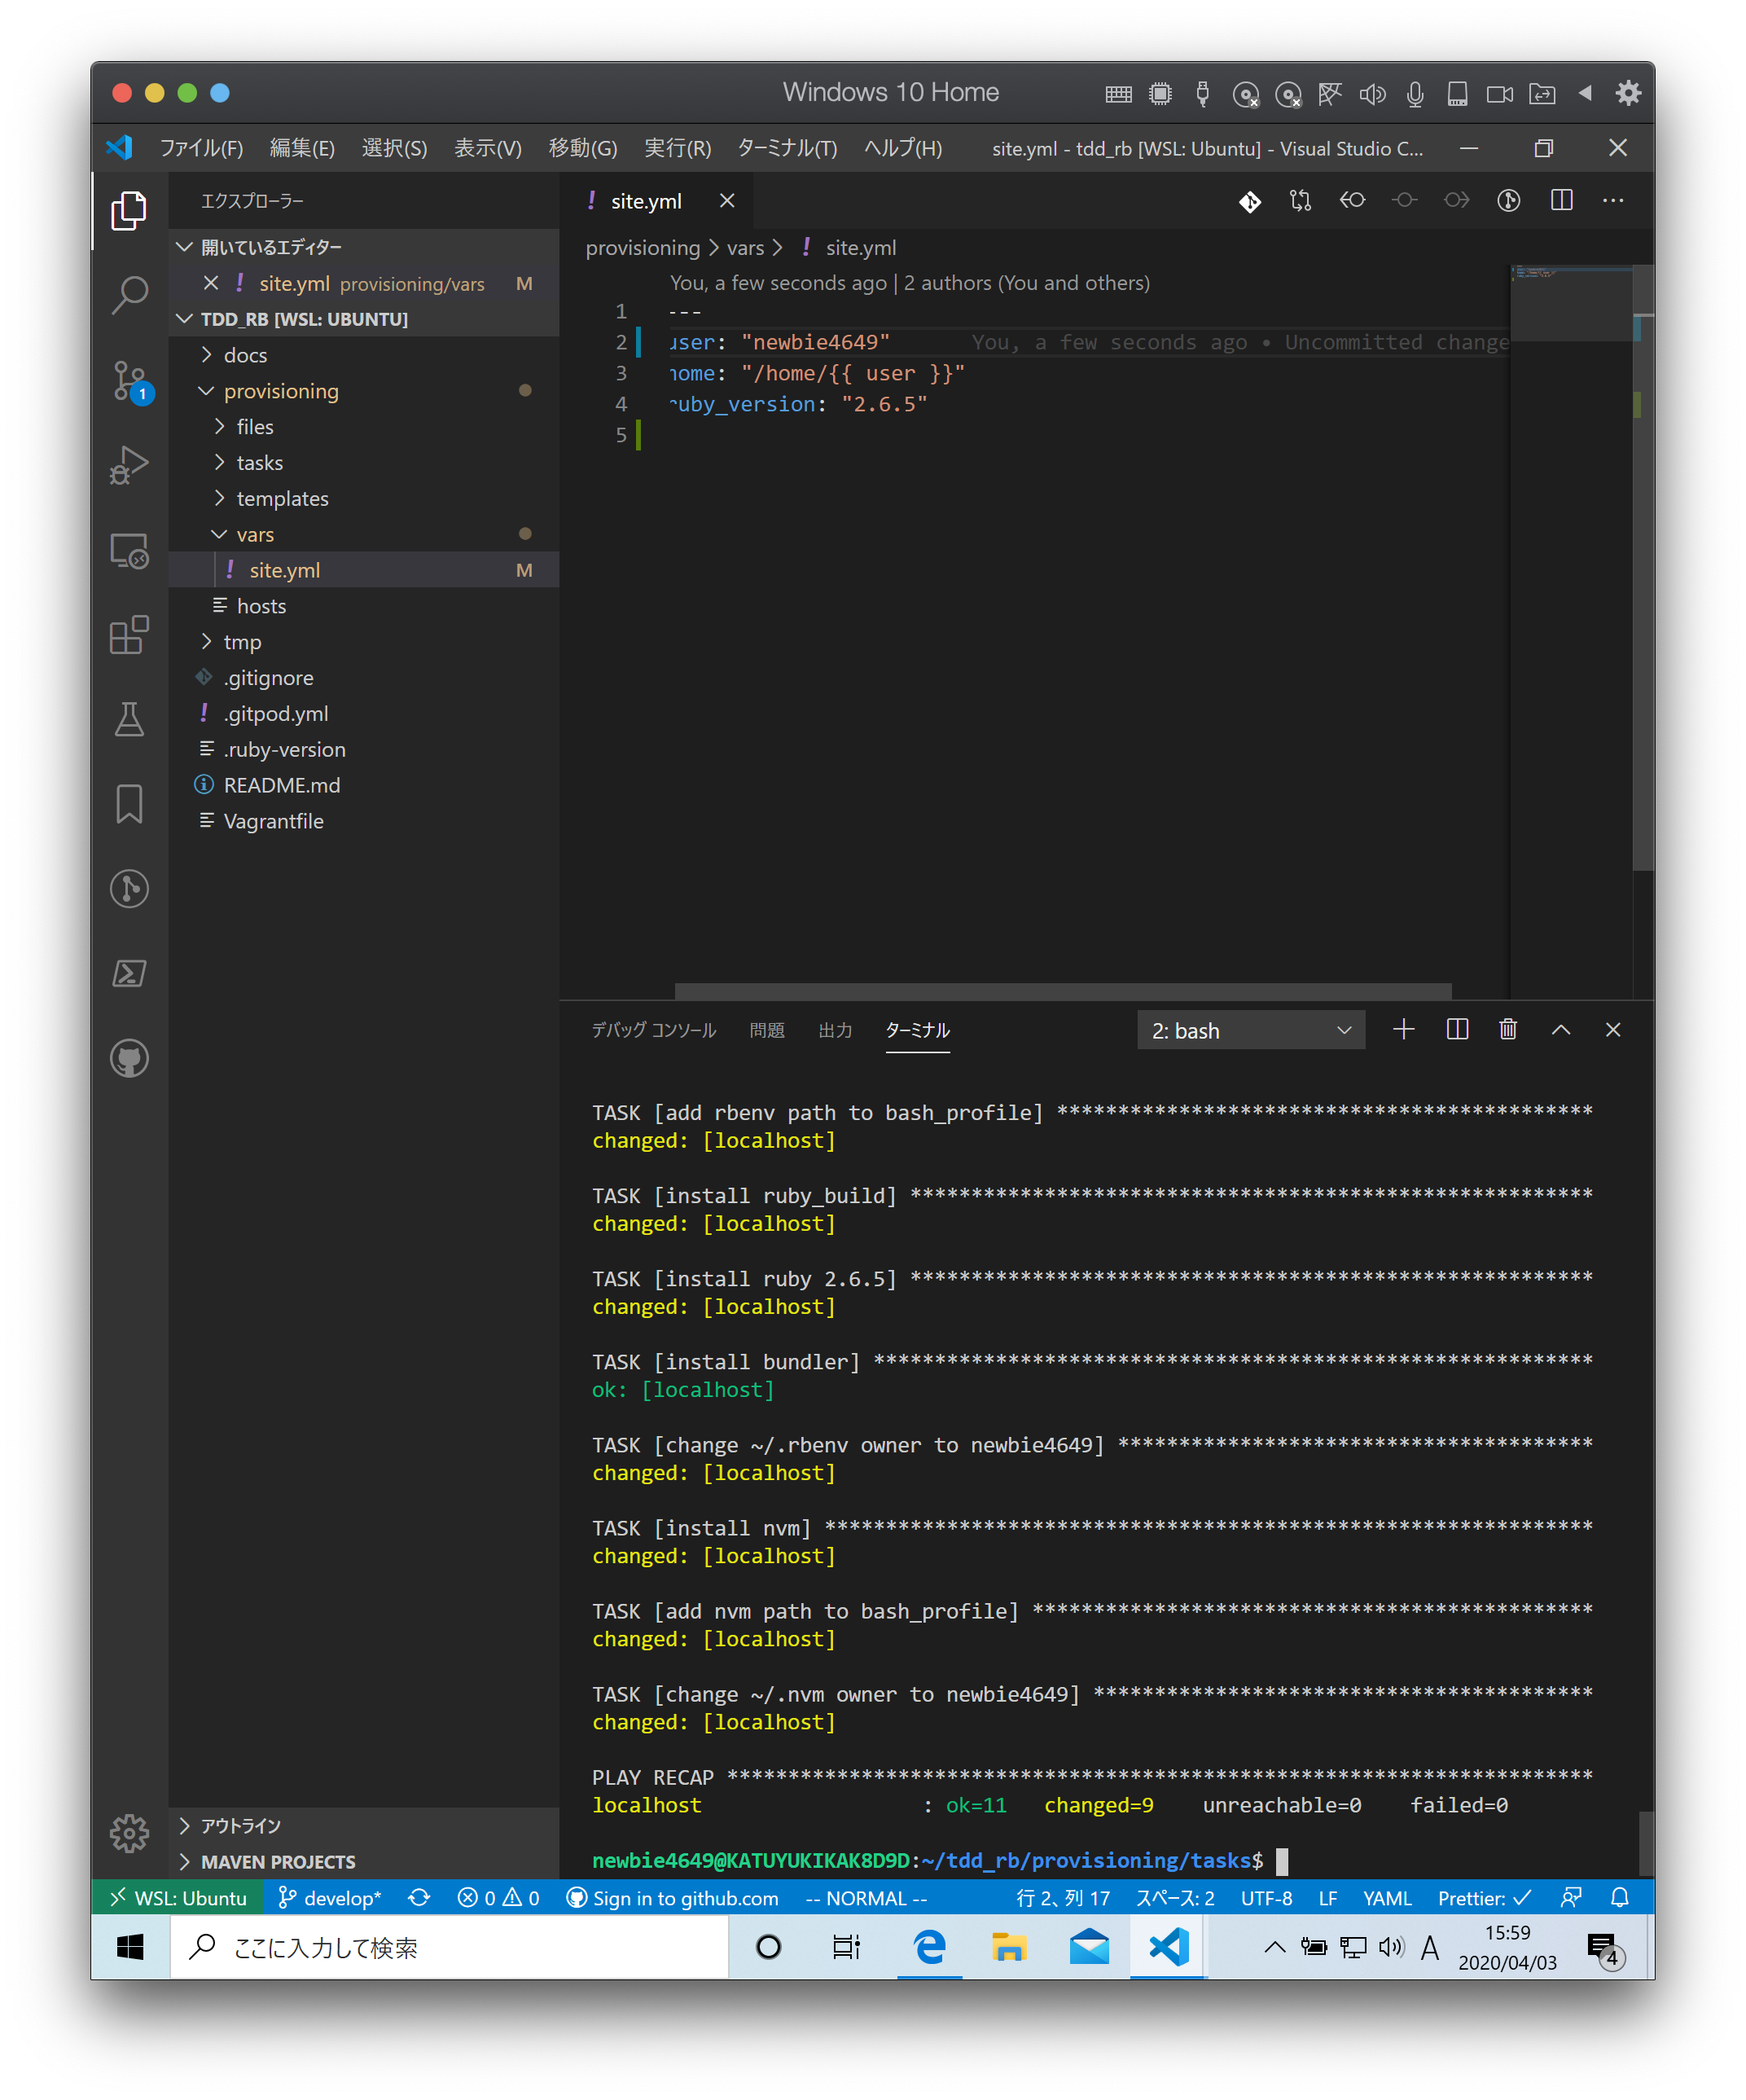
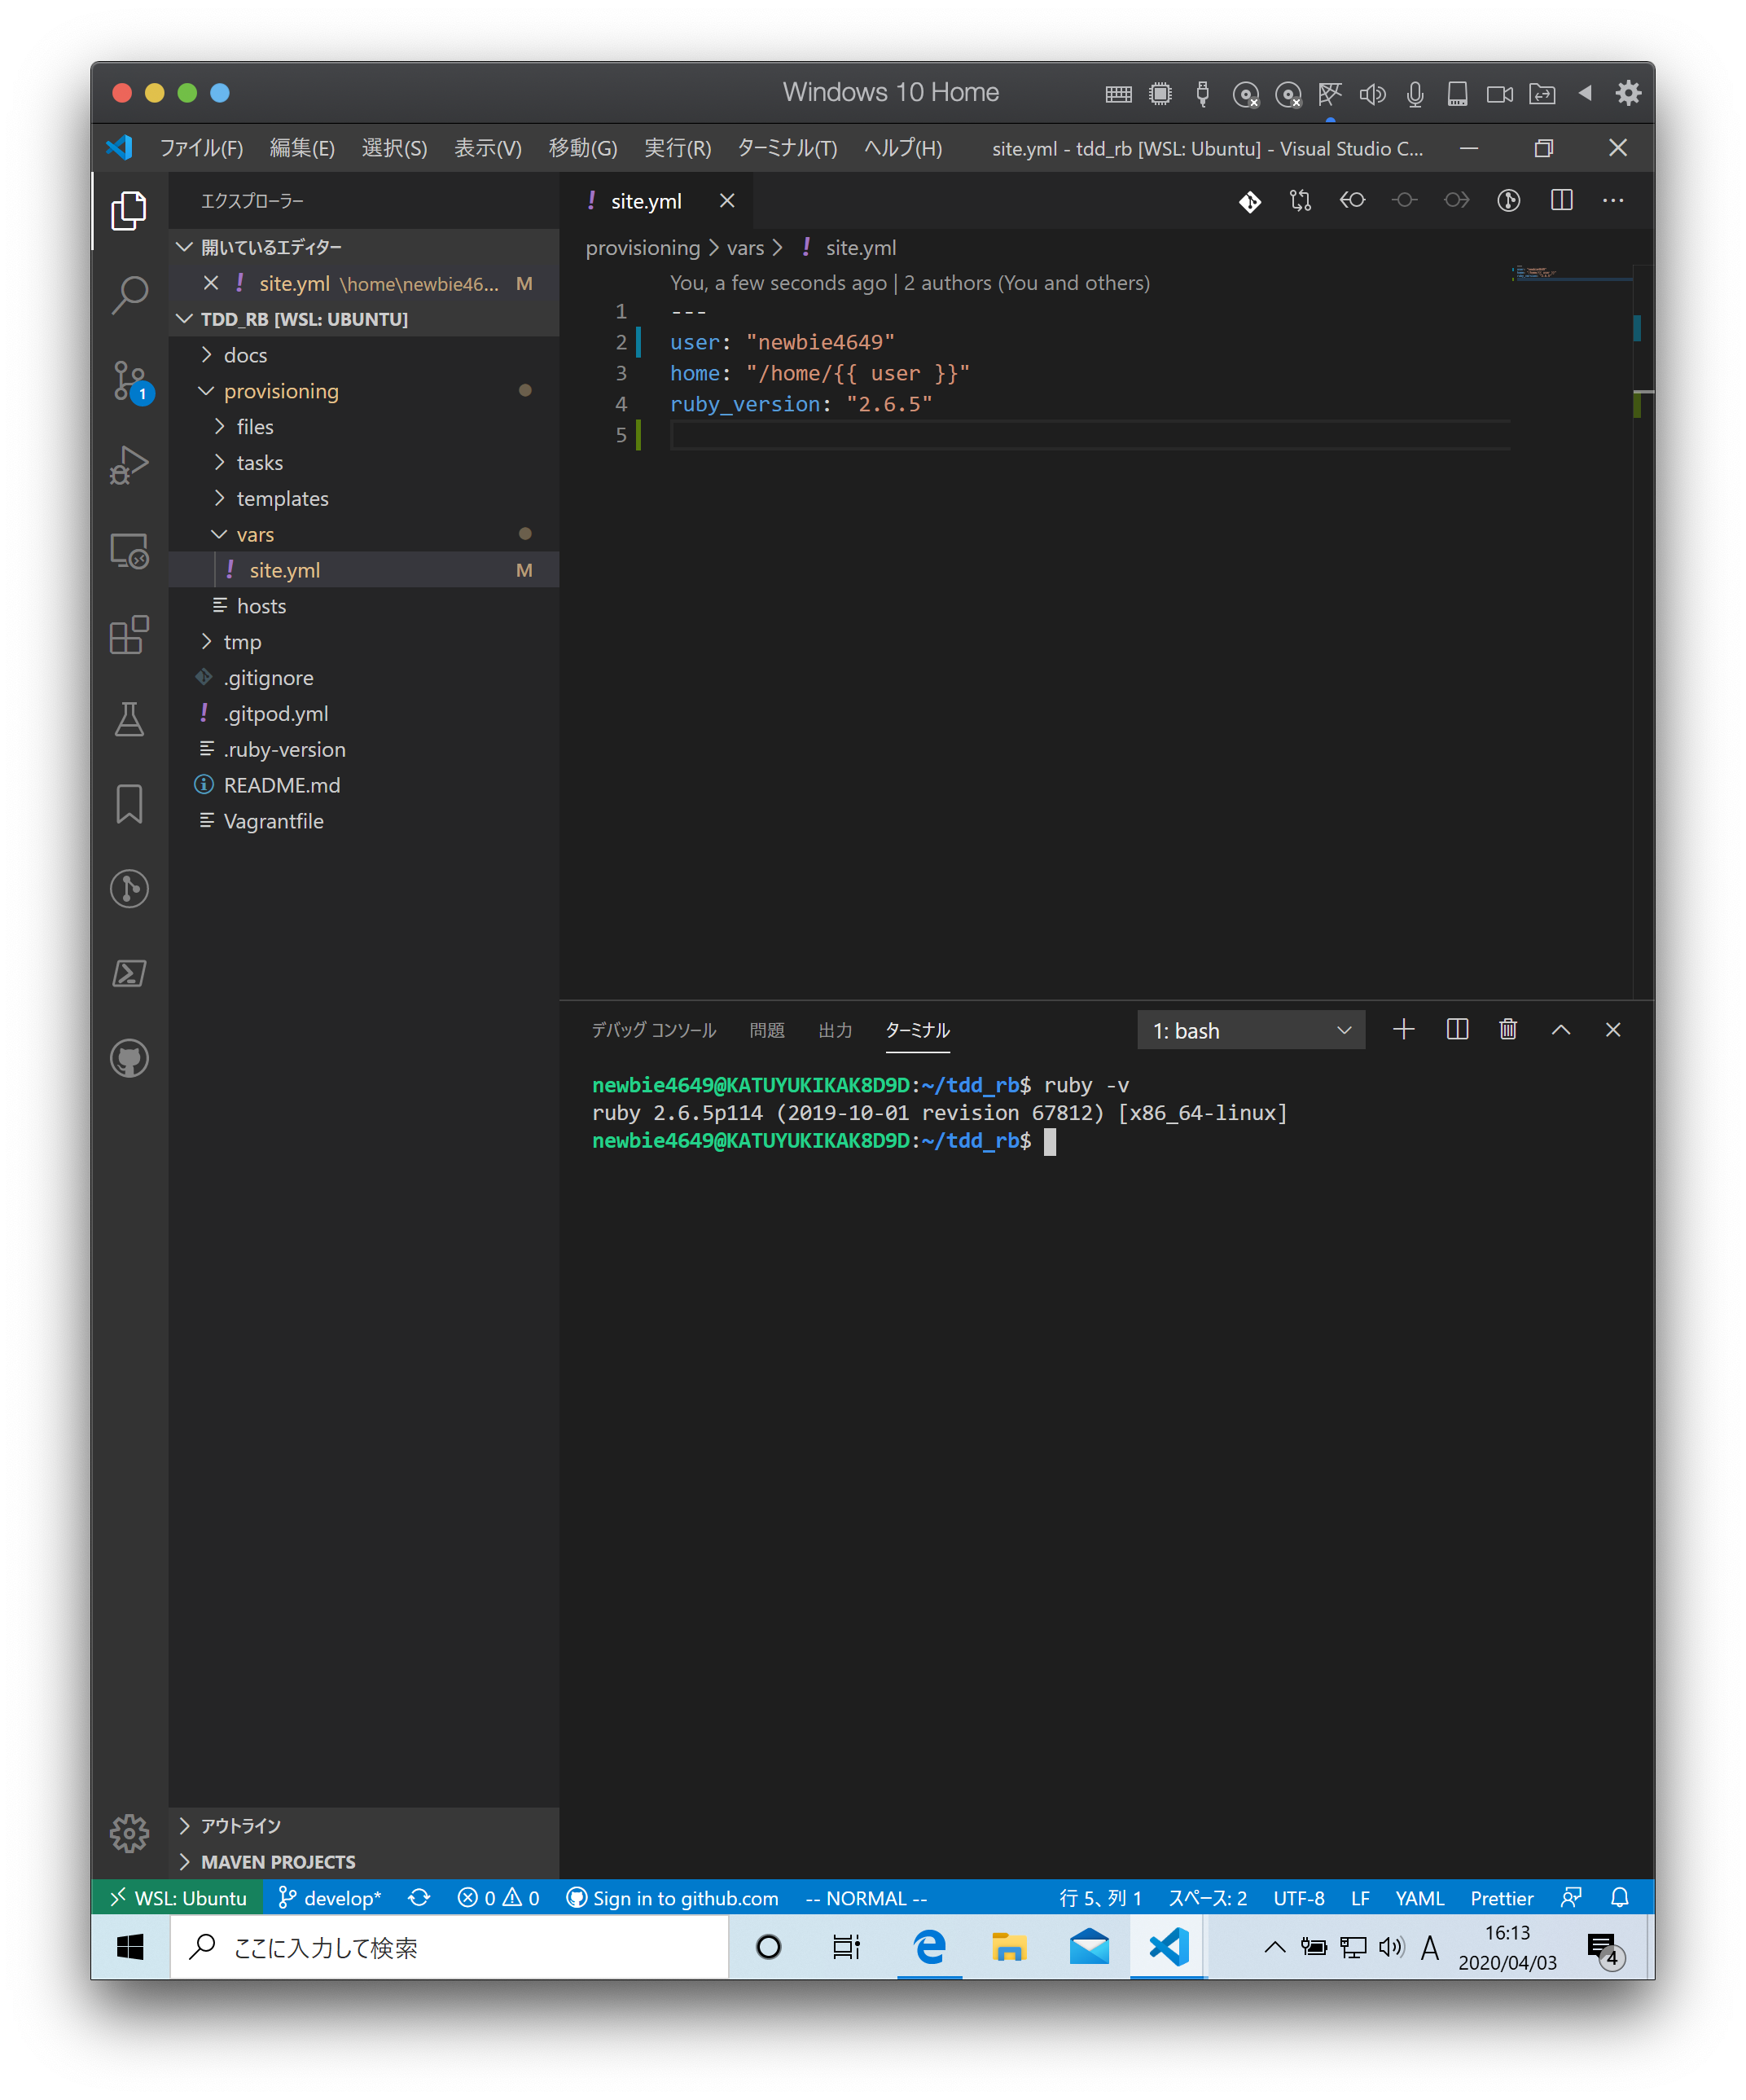
セットアップが完了したらエディタを再起動してプロジェクトを開きます。
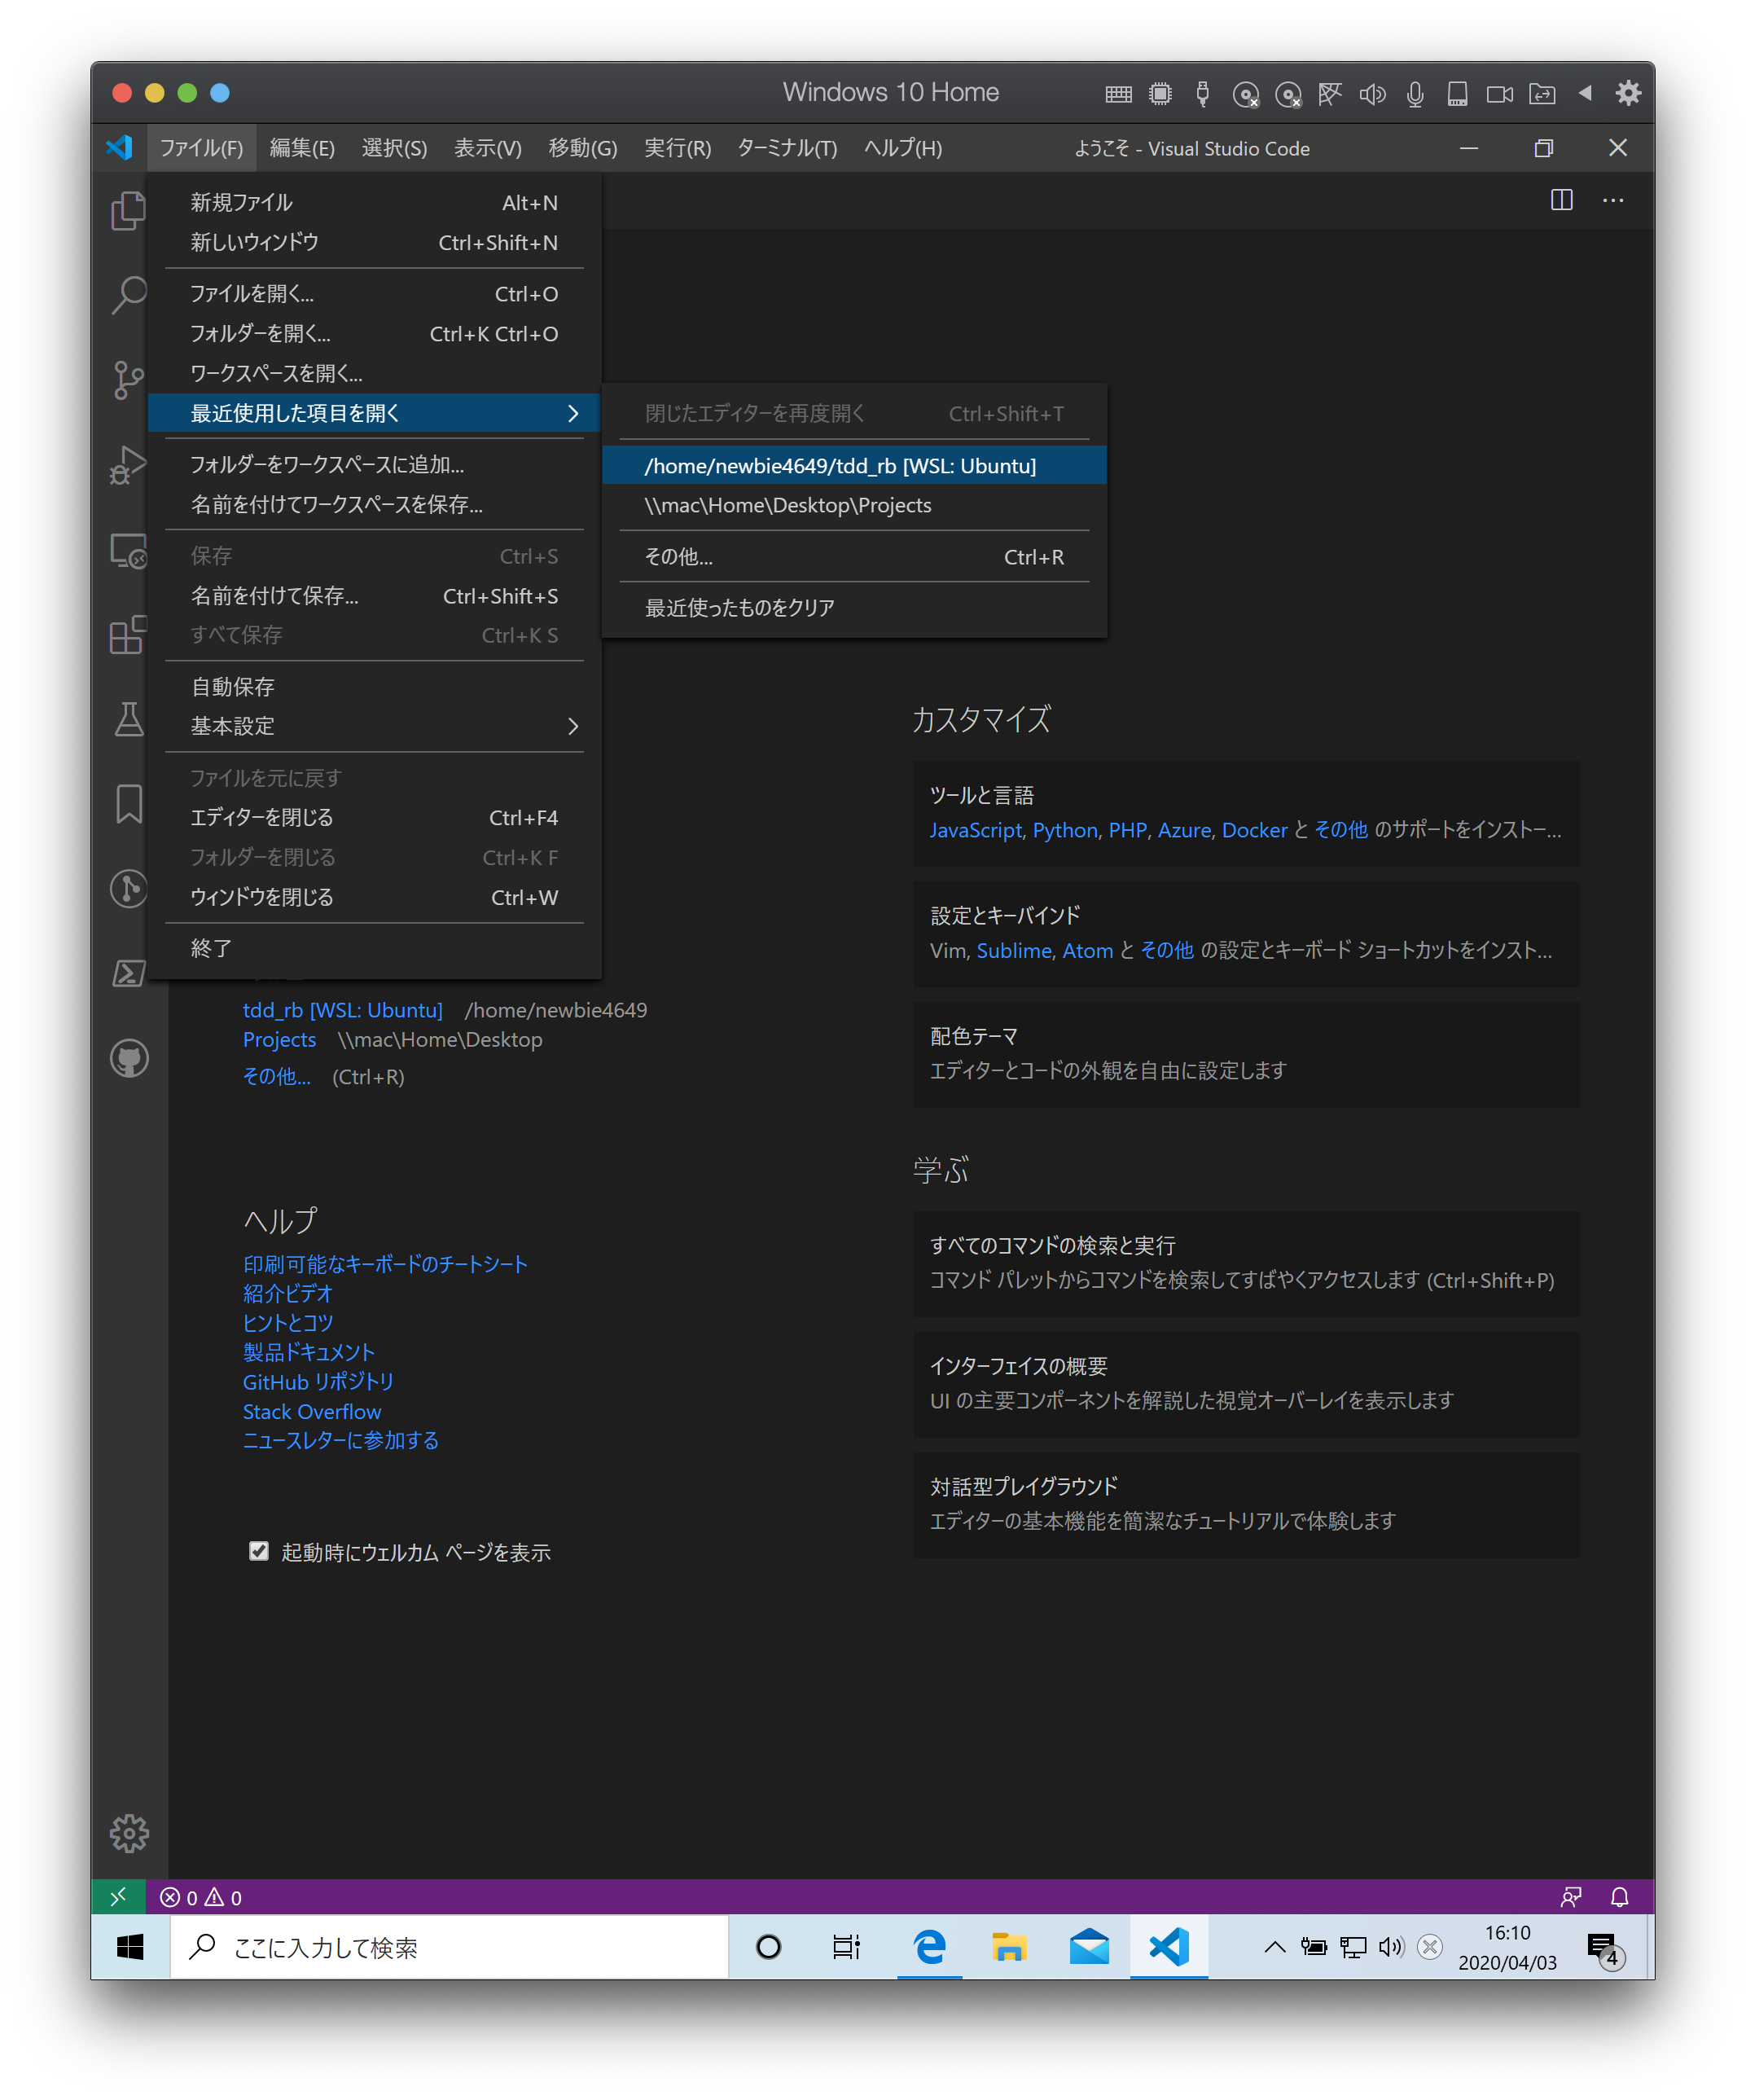
以下のコマンドを入力して Ruby がセットアップされていることを確認します。
1 | $ ruby -v |
続いて、ターミナルに以下のコマンドを入力します。
1 | $ code ~/.bashrc |
表示されたファイルの一番最後に以下のコードを追加して保存します。
...
export NVM_DIR="$HOME/.nvm"
[ -s "$NVM_DIR/nvm.sh" ] && \. "$NVM_DIR/nvm.sh"  # This loads nvm
[ -s "$NVM_DIR/bash_completion" ] && \. "$NVM_DIR/bash_completion" # This loads nvm bash_compl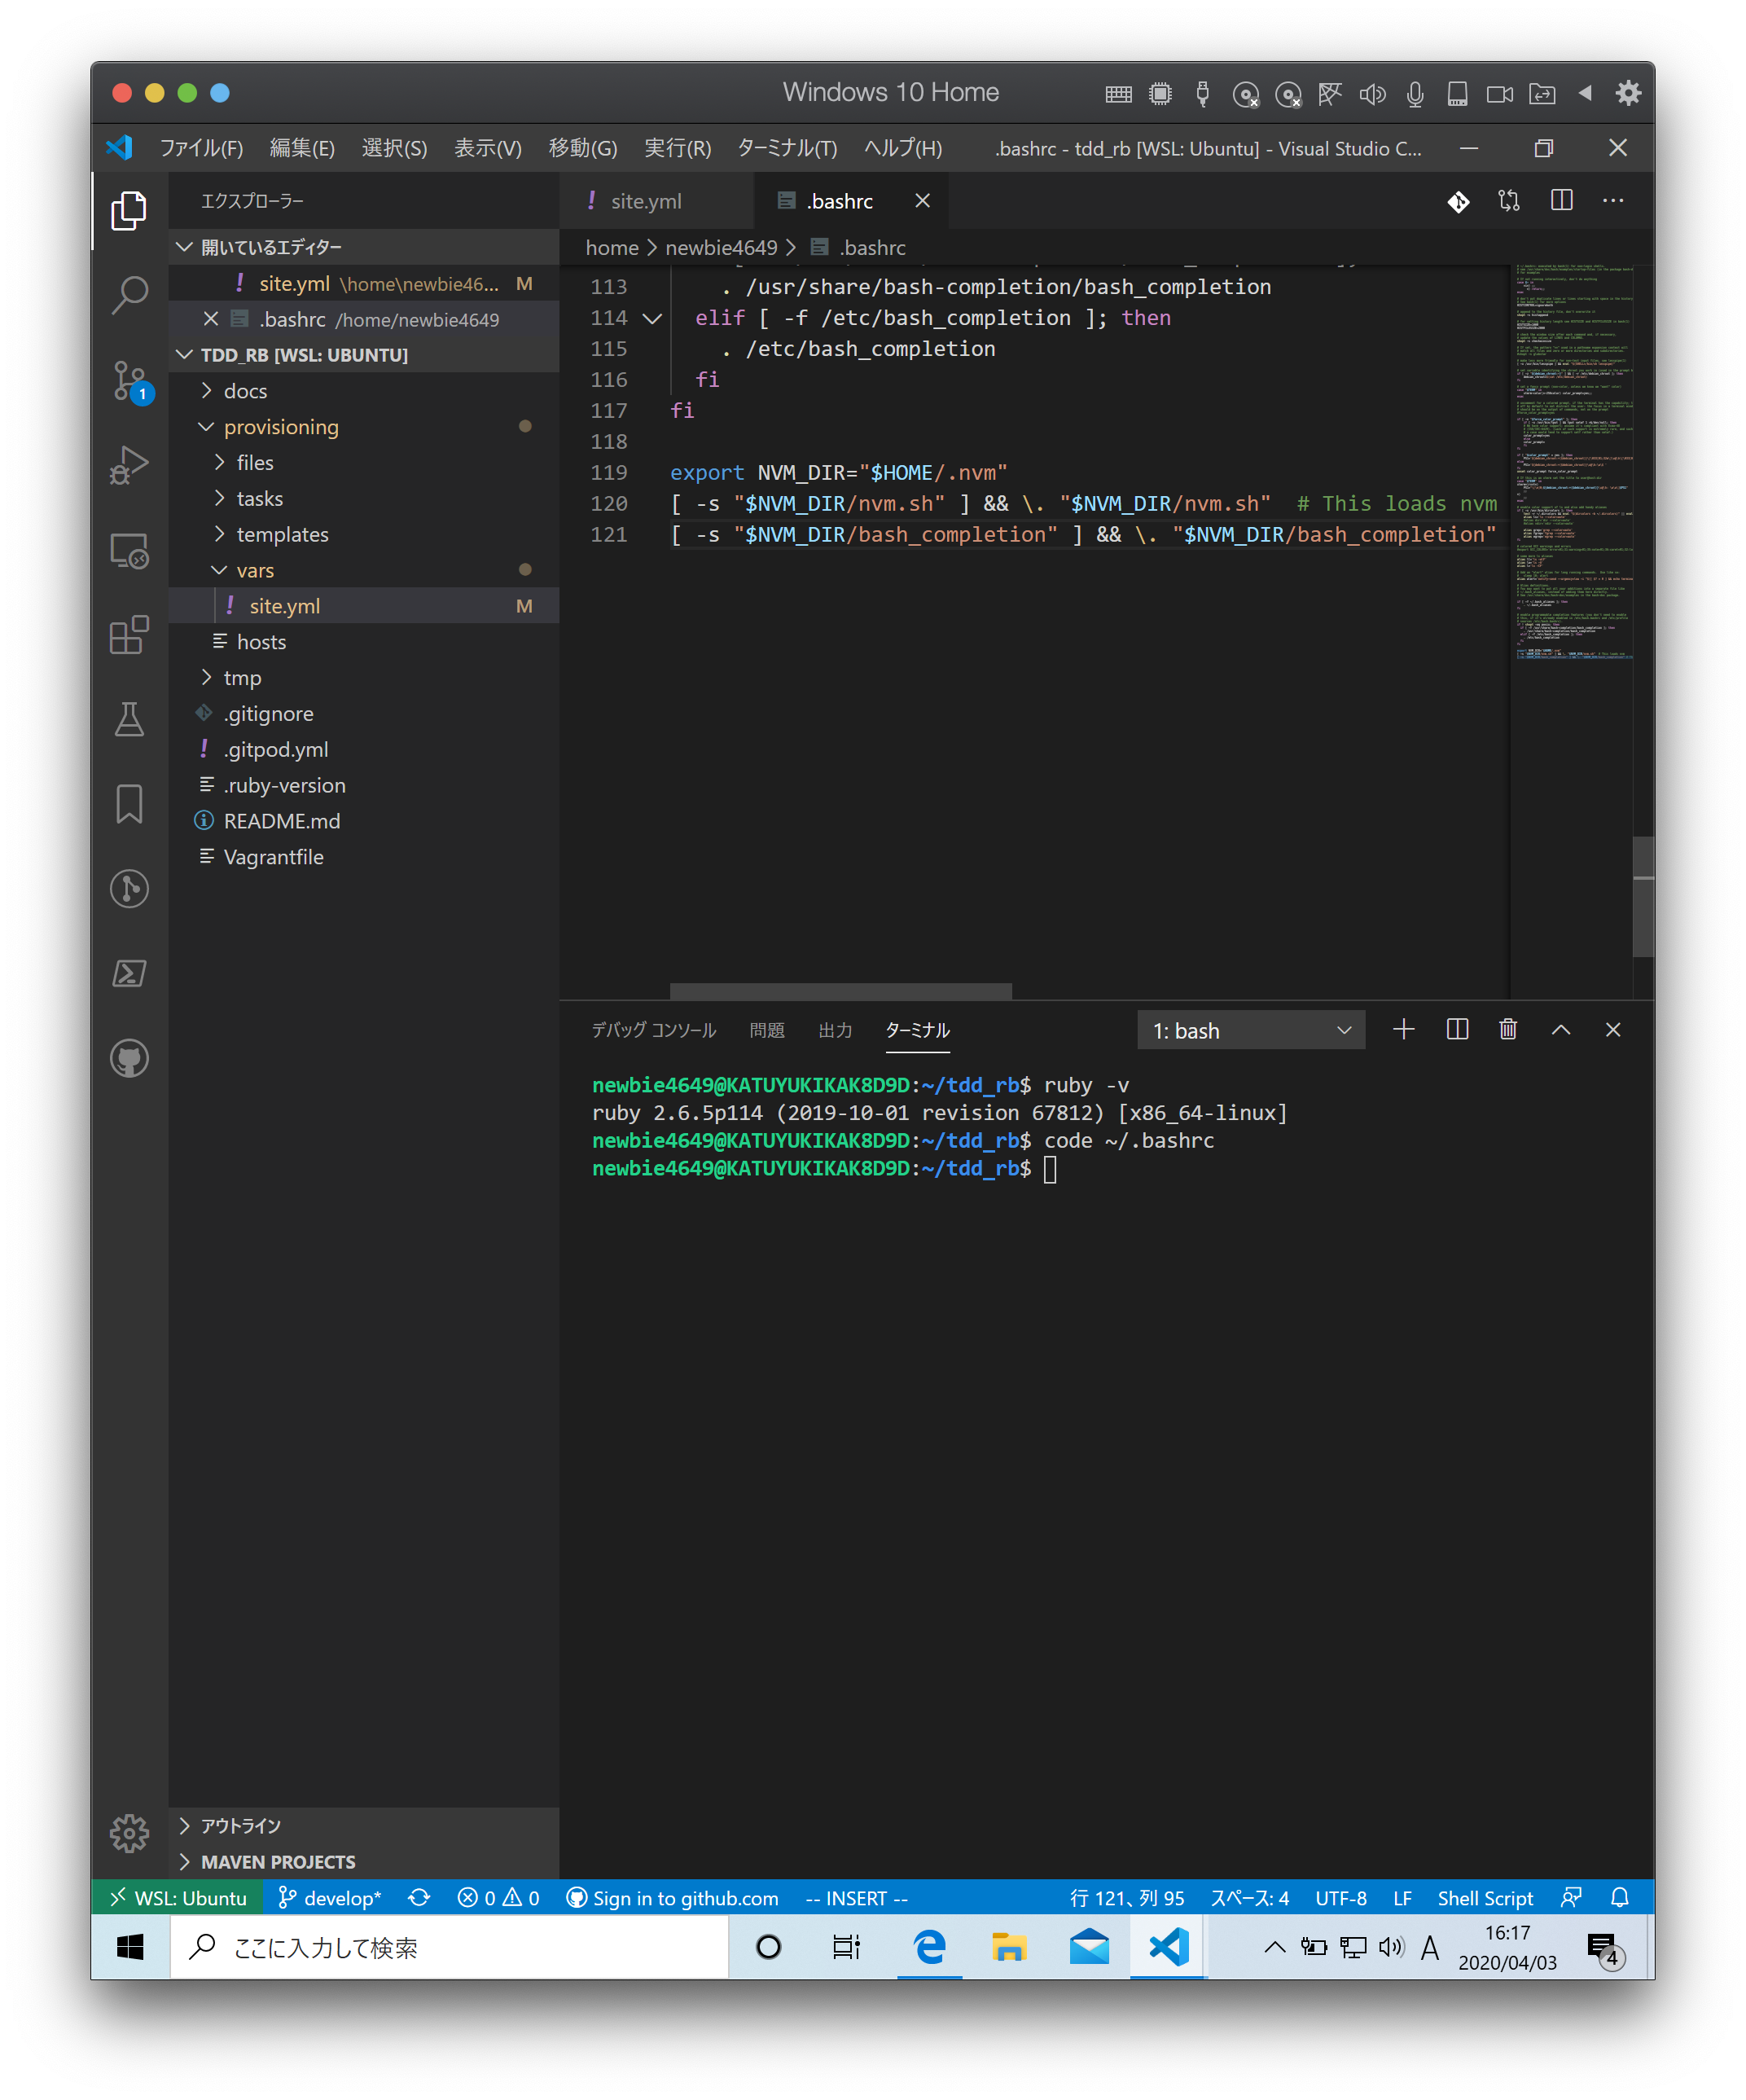
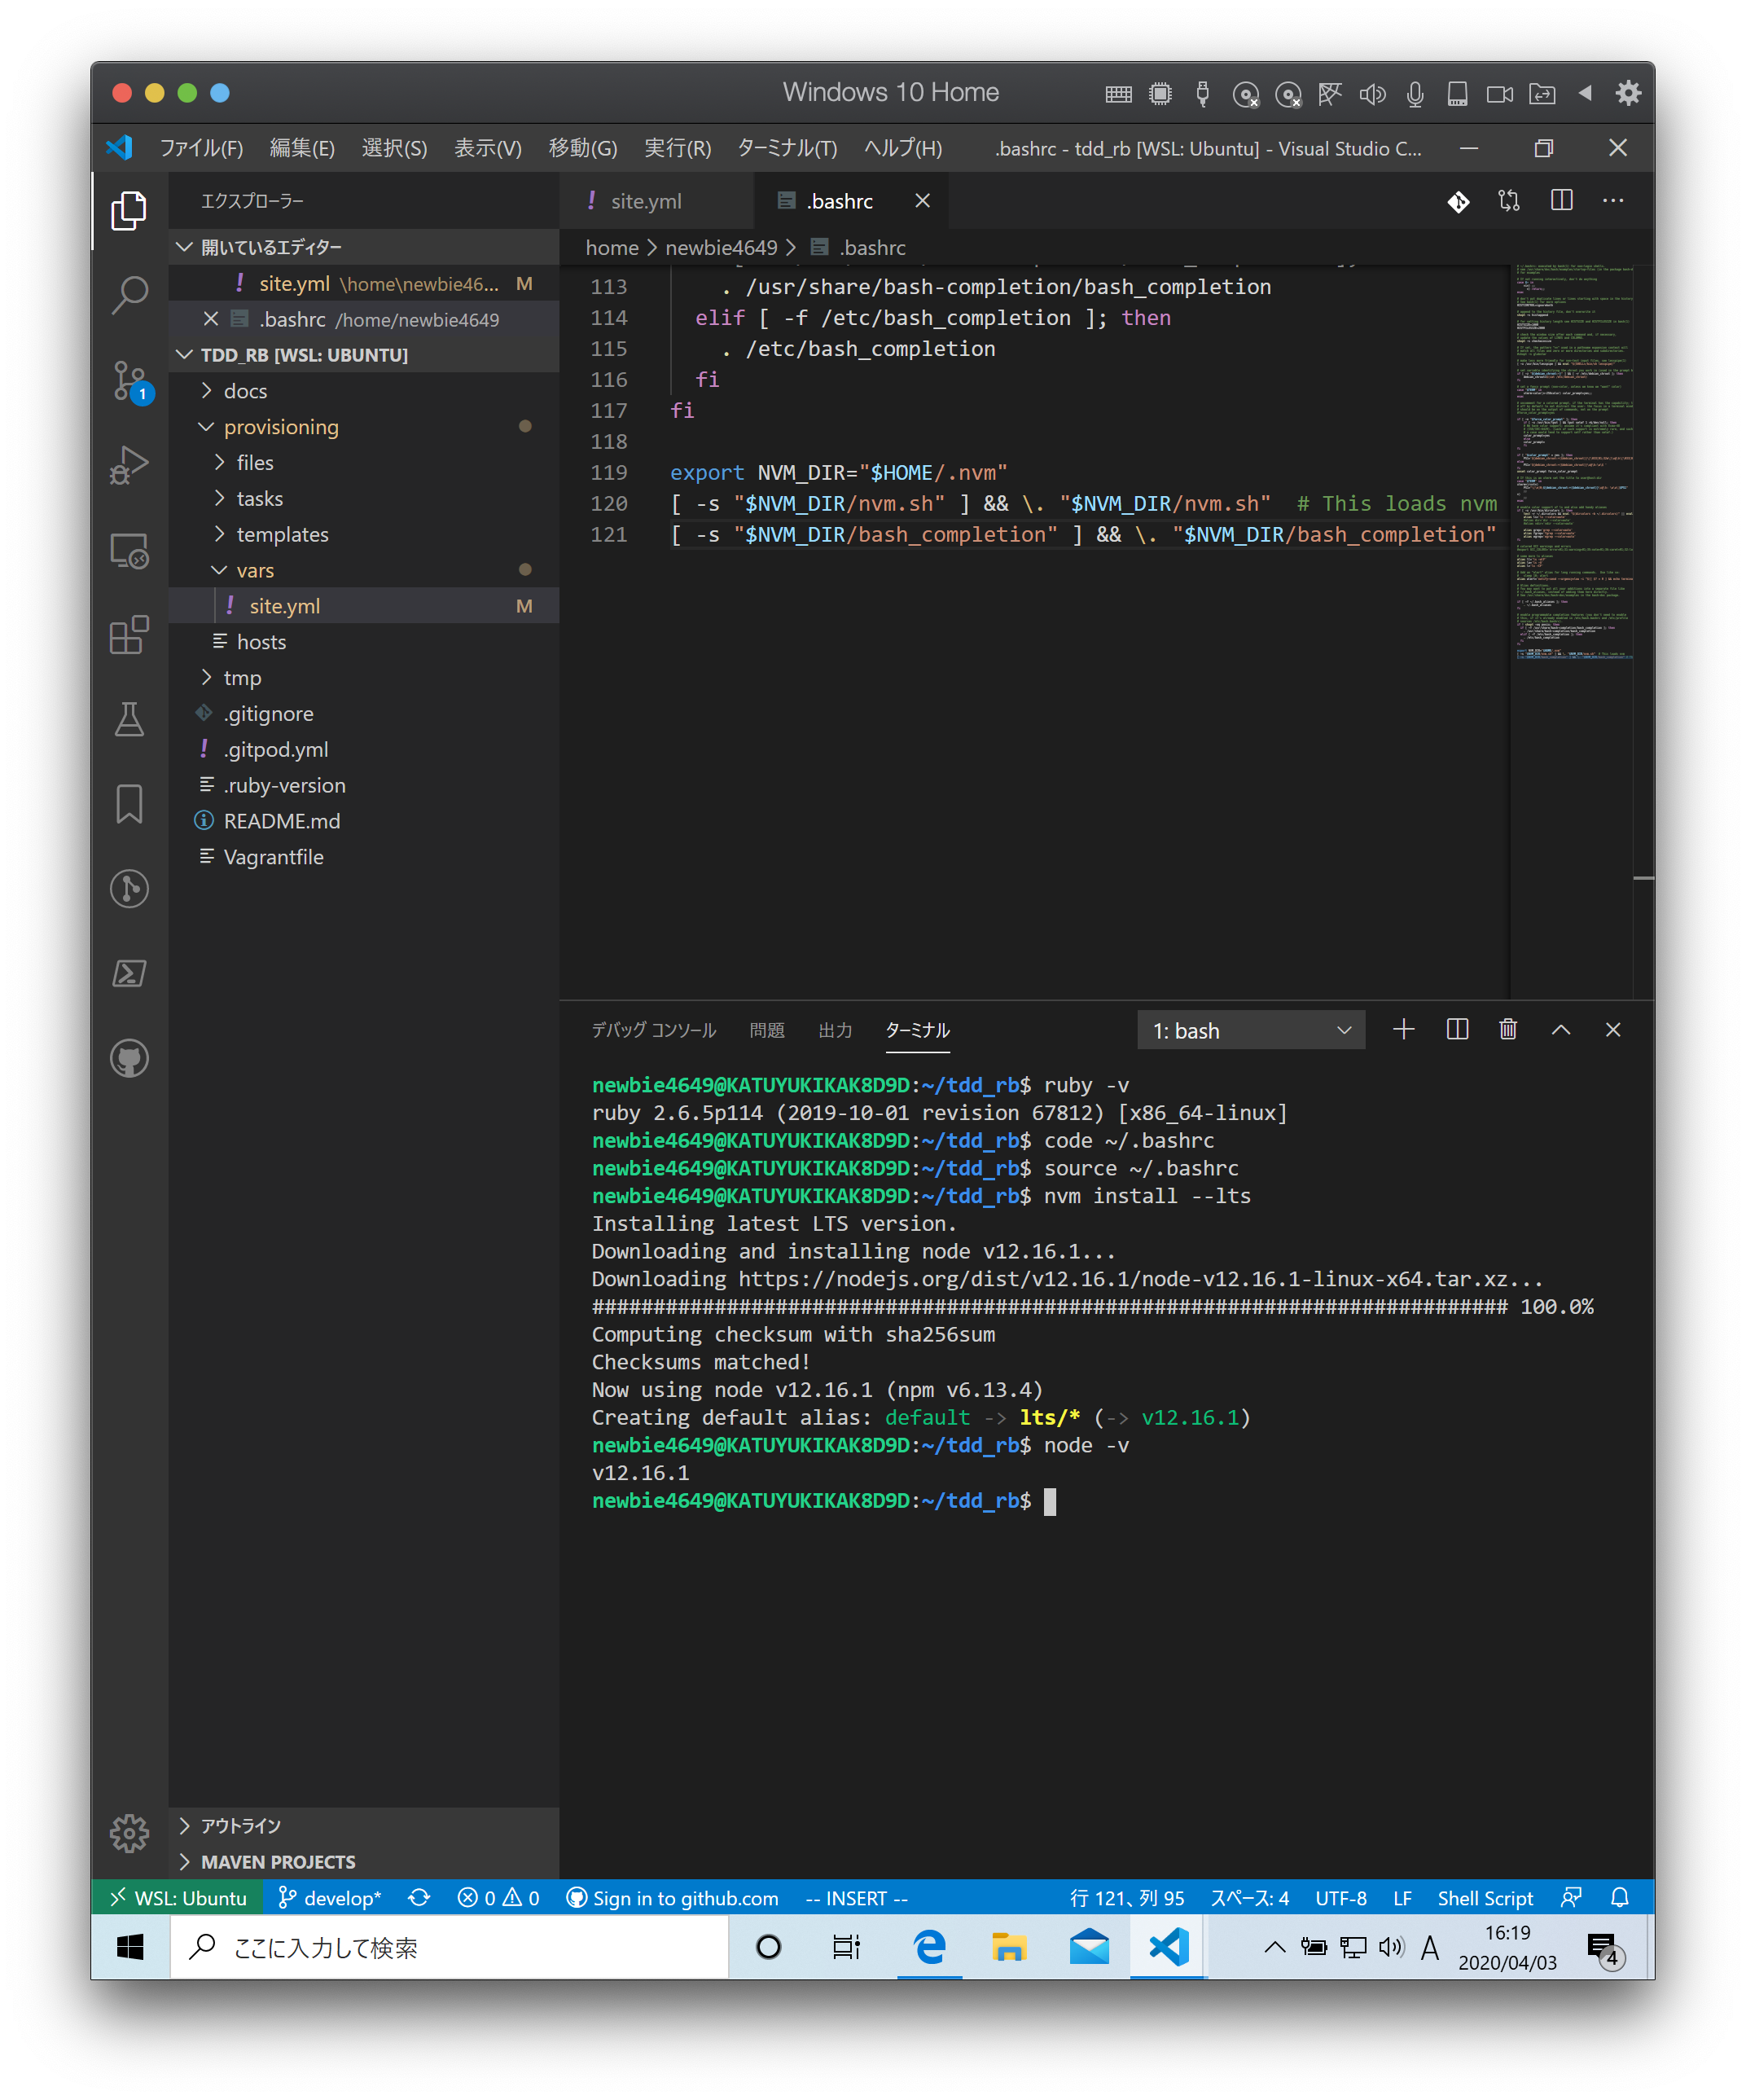
保存したら以下のコマンドを実行して Node.js のバージョンが表示されたらセットアップ完了です。
1 | $ source ~/.bashrc |
追加パッケージのインストール
ターミナルに以下のコマンドを入力します。
1 | gem install rubocop |
Hello world
プログラムを作成する
REAMD.md を選択してから 新しいファイル 作成アイコンを押します。
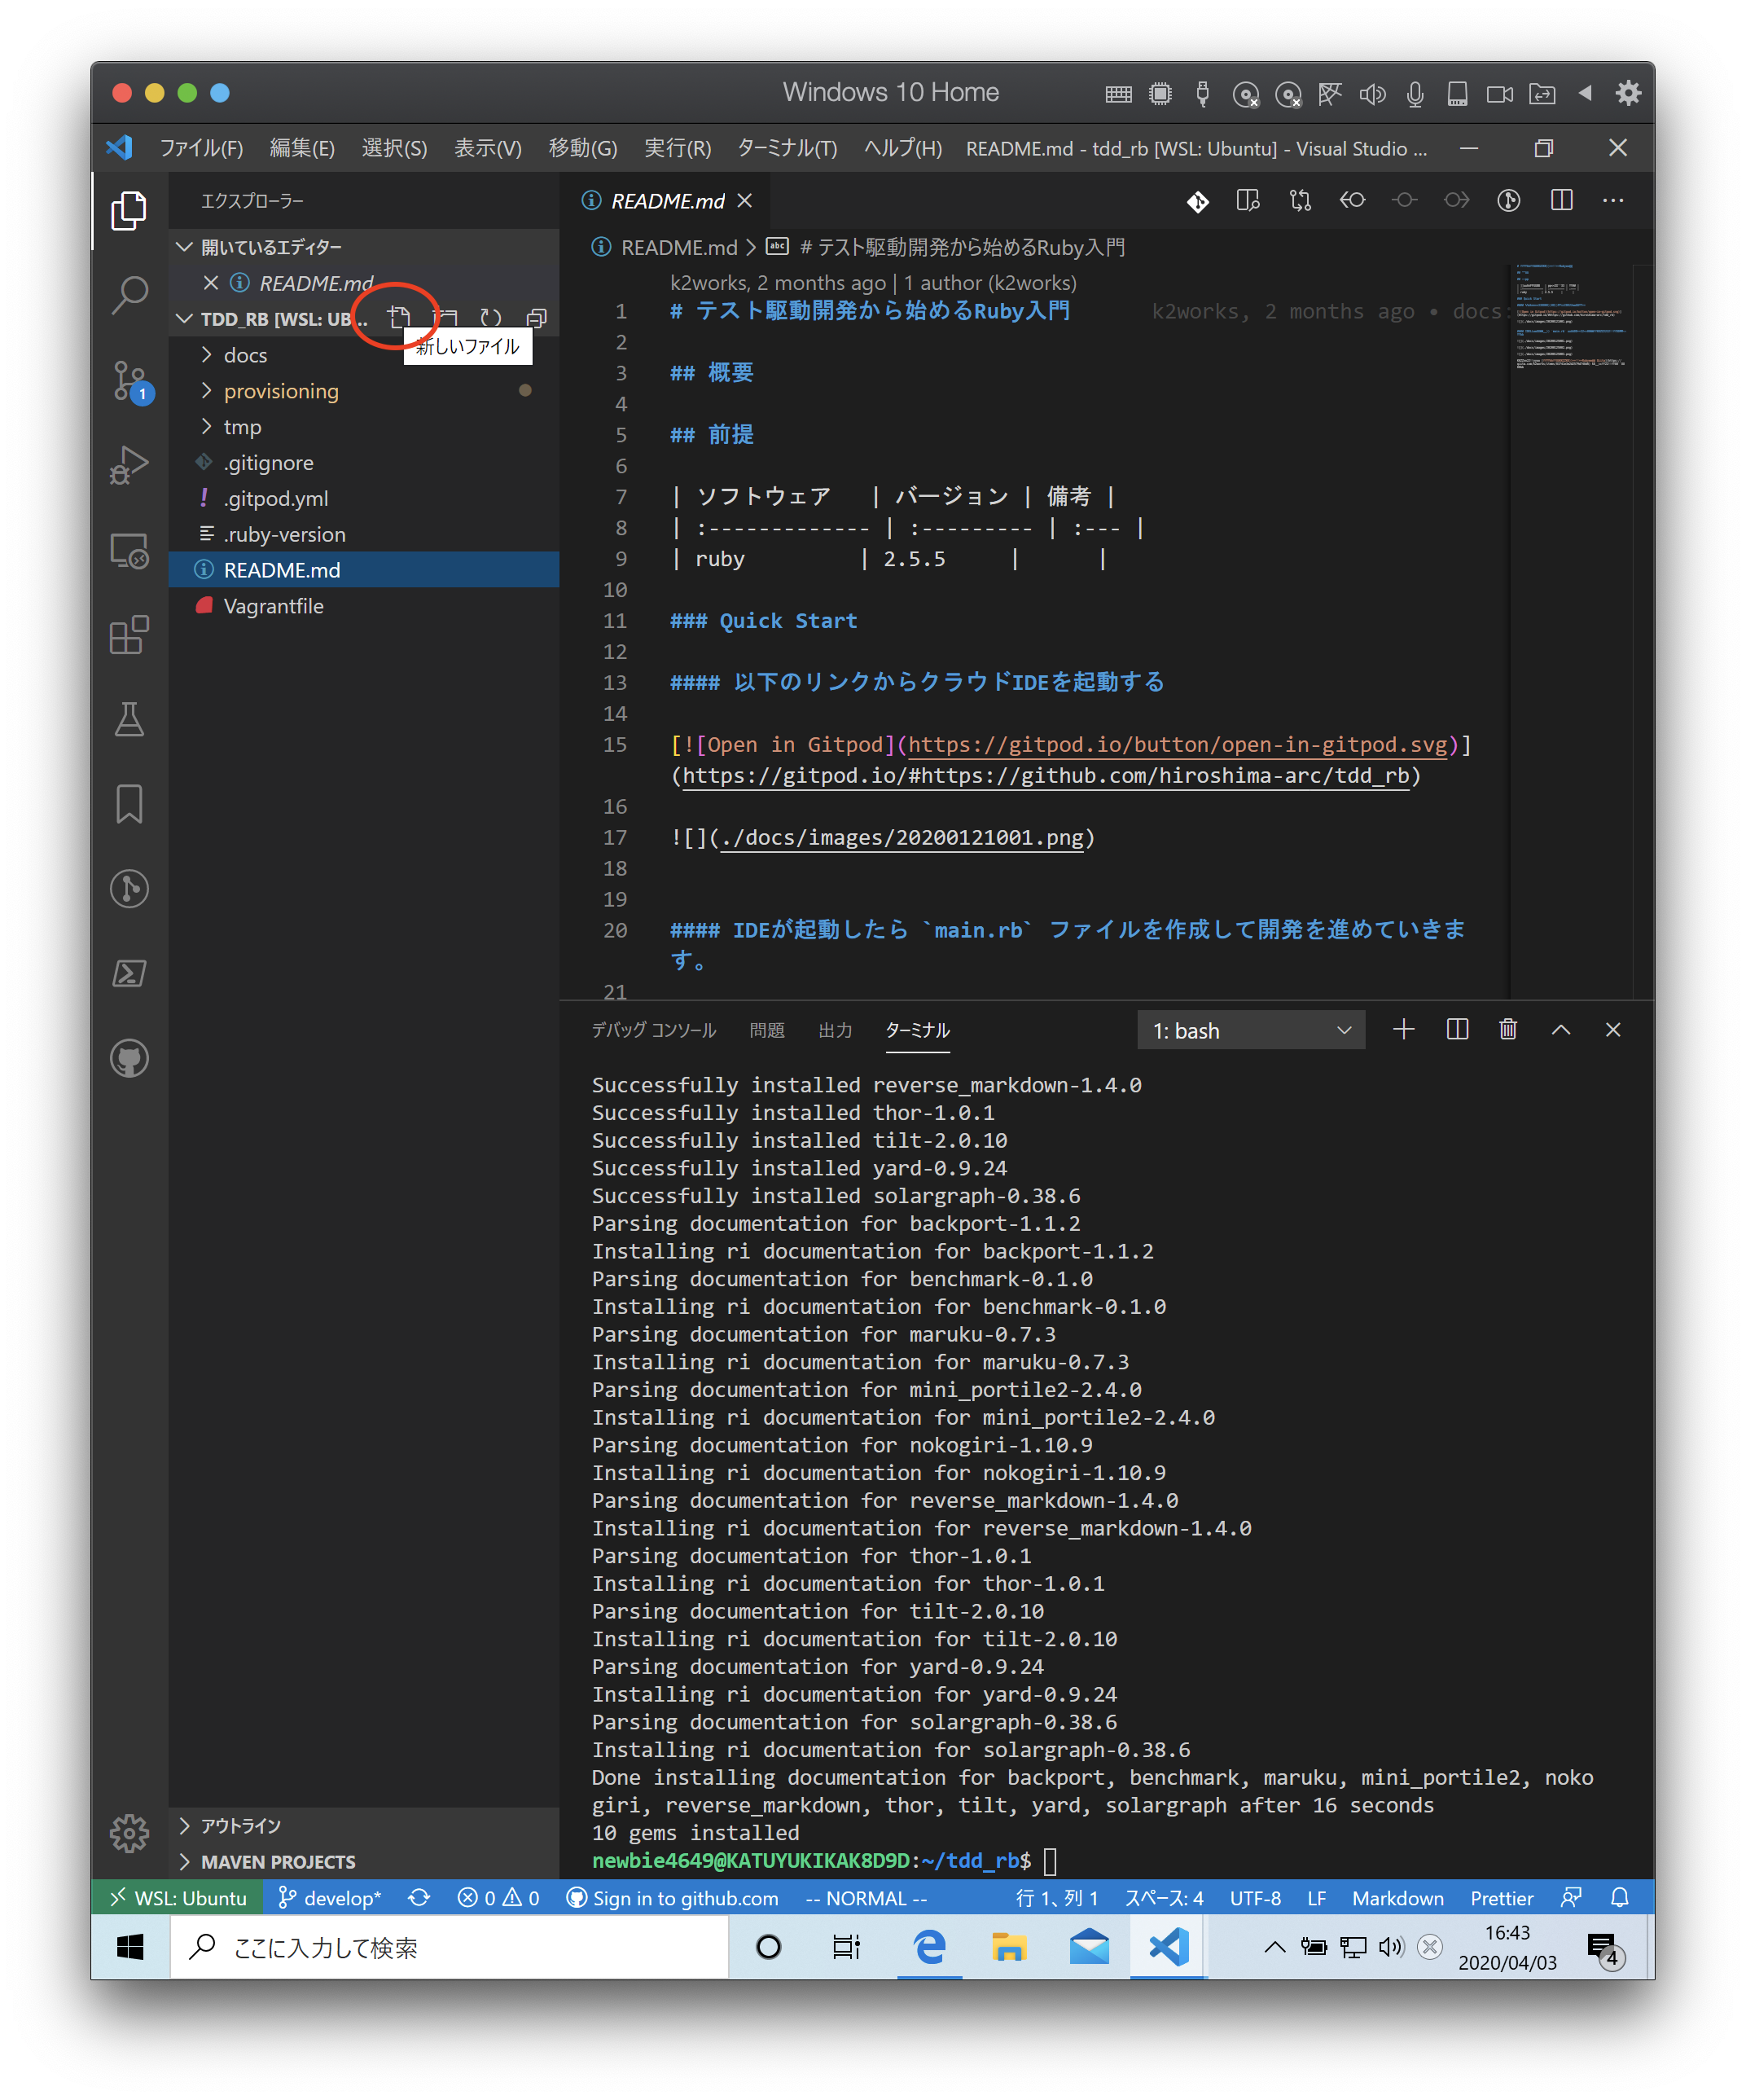
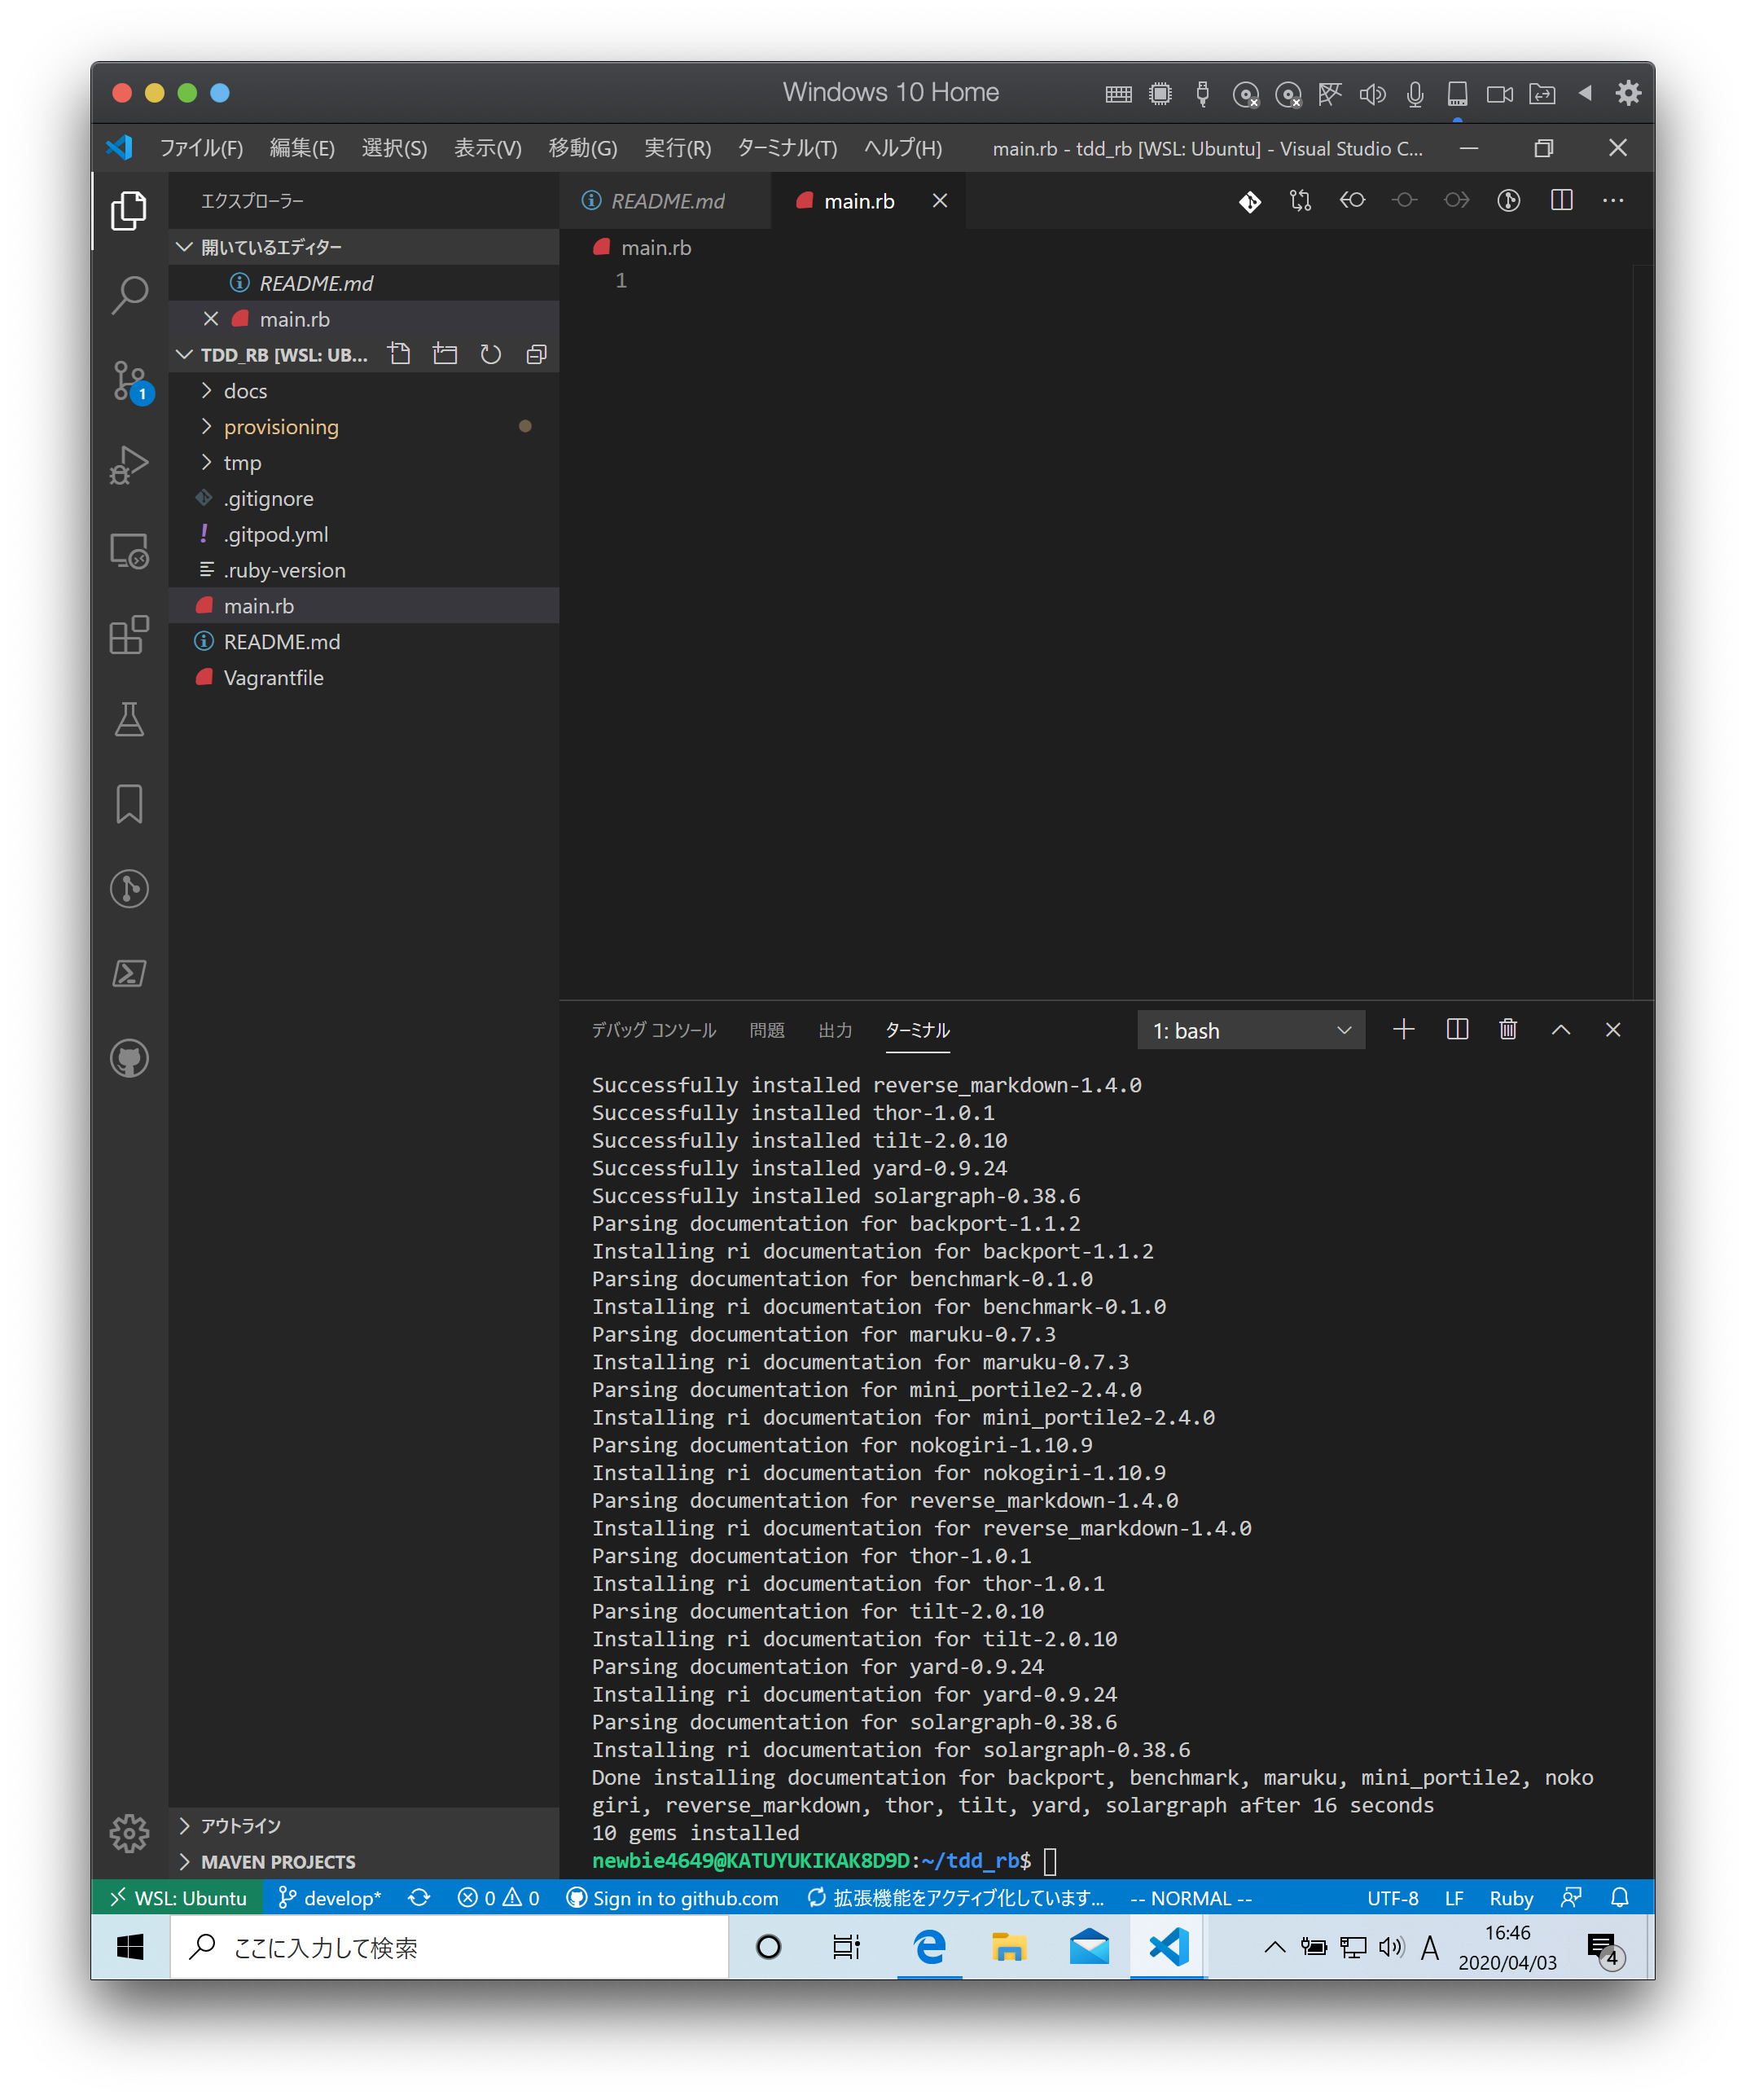
ファイル名は main.rb とします。
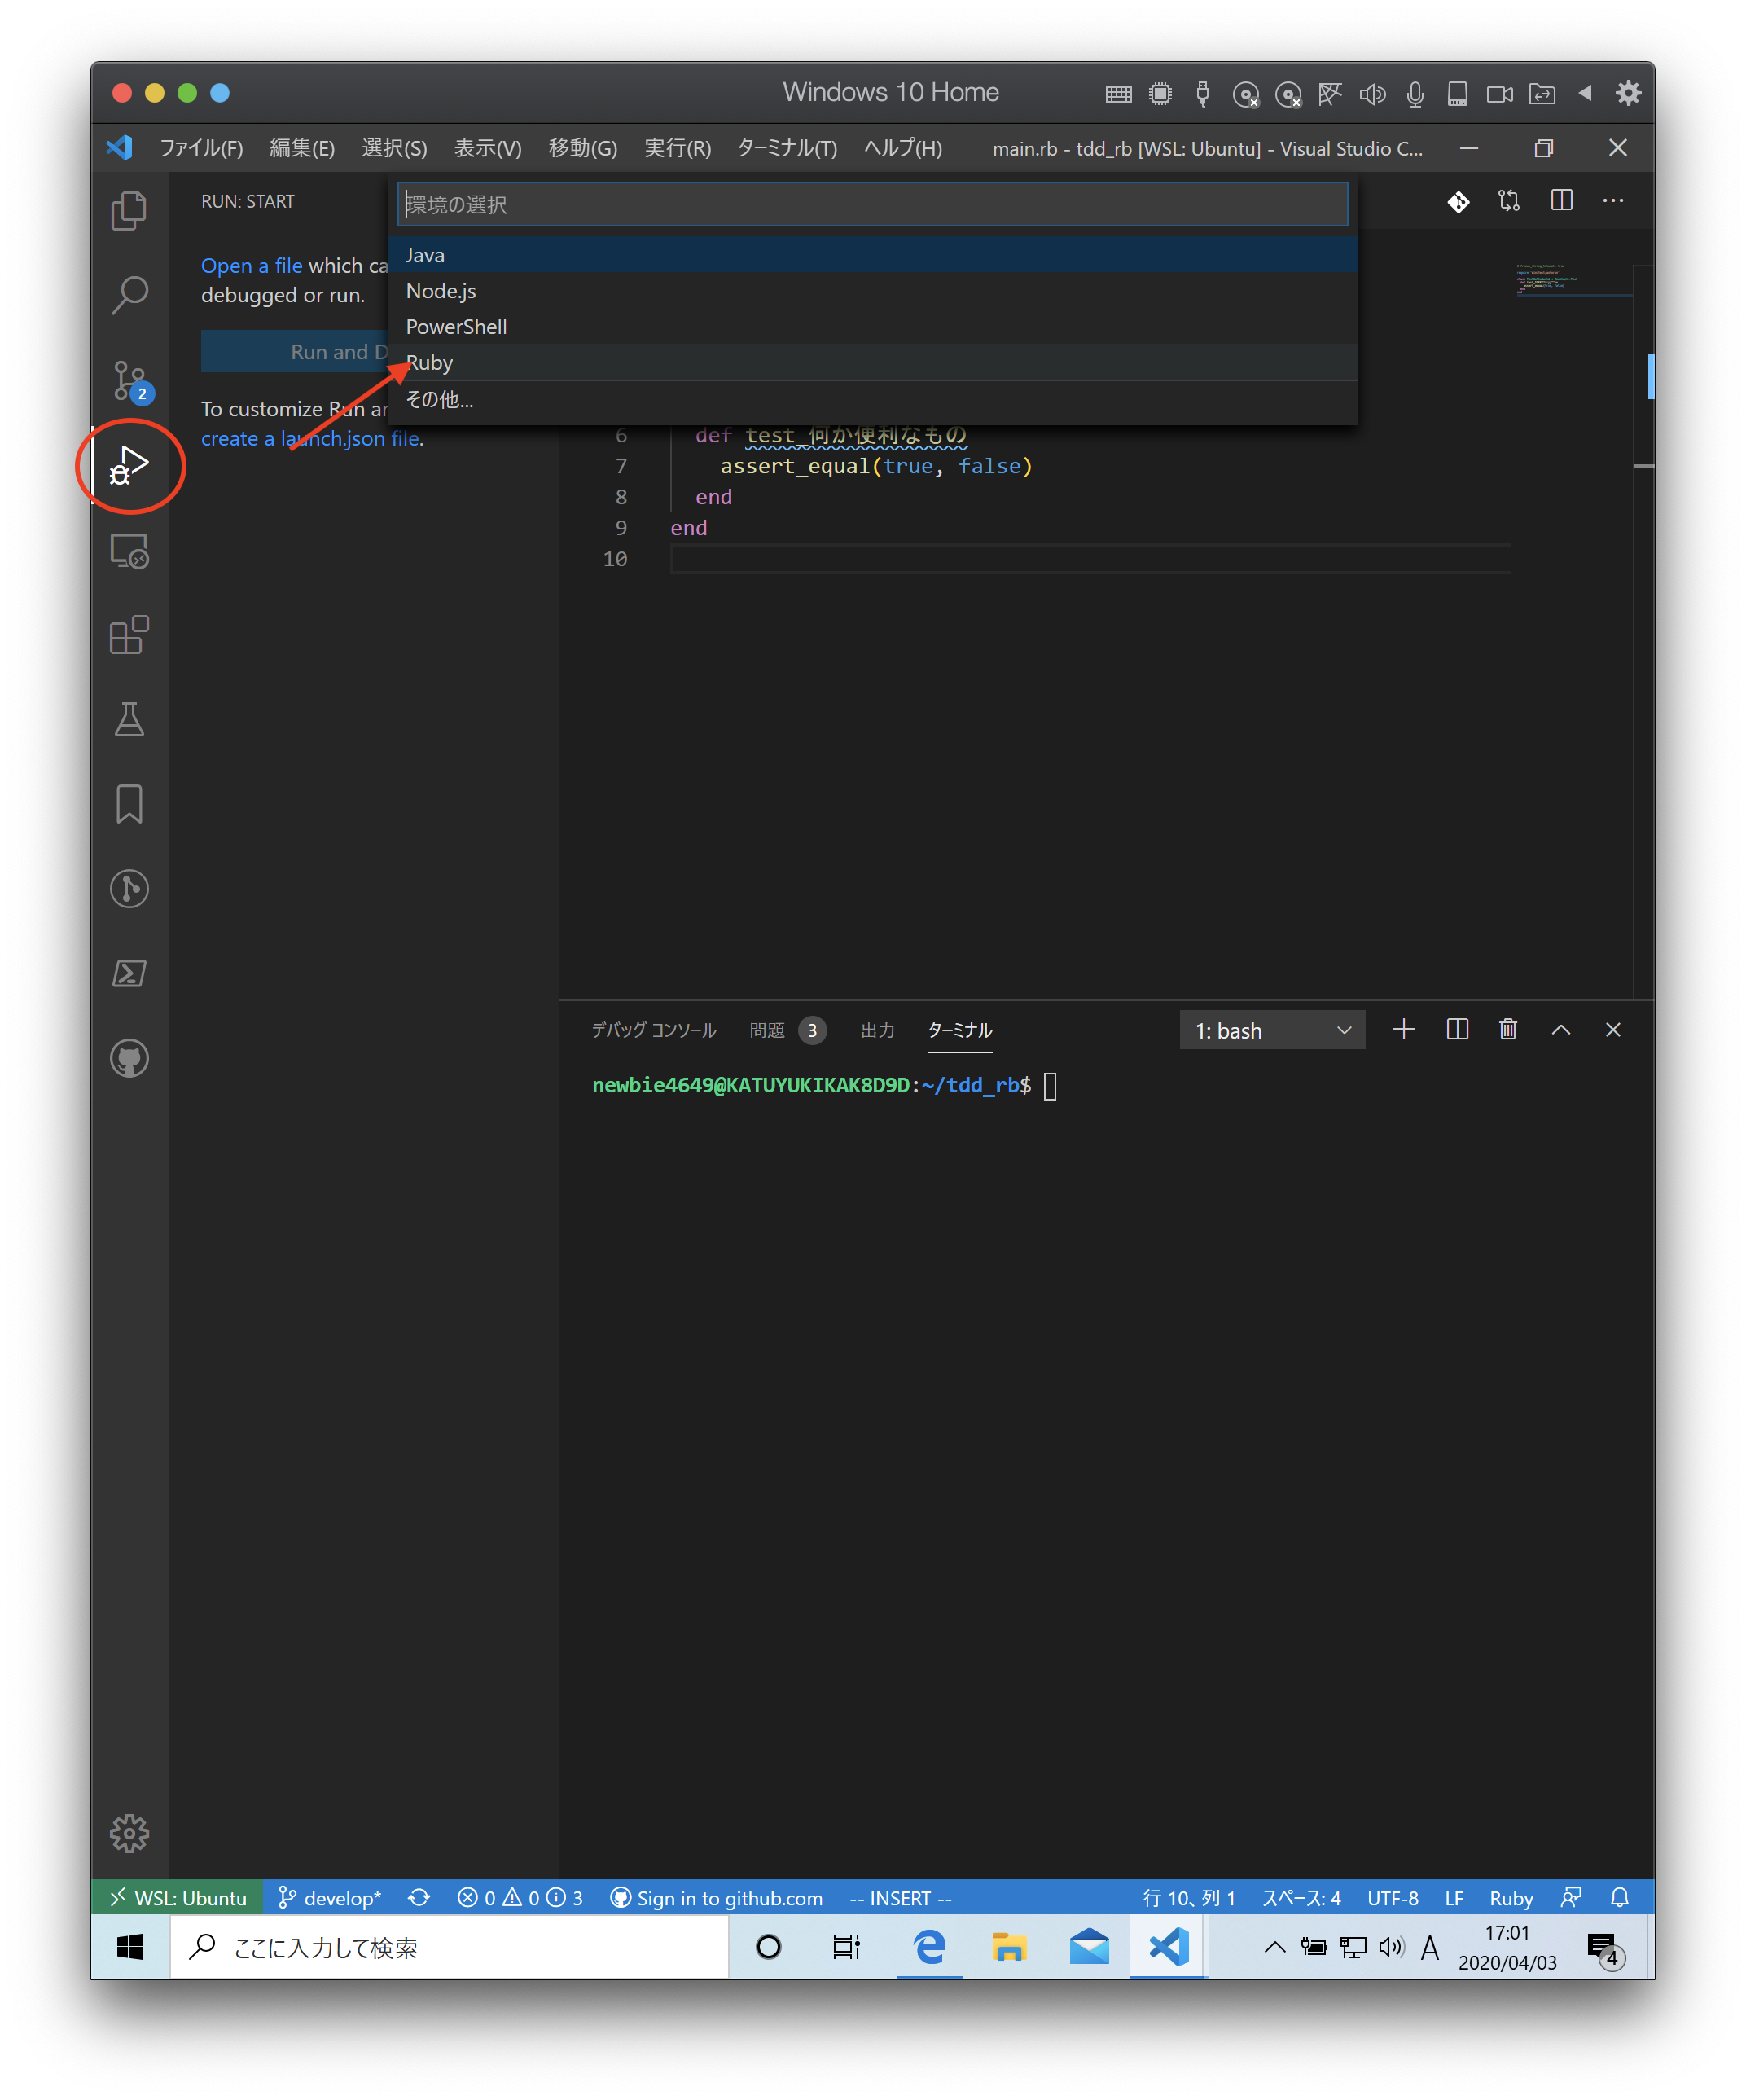
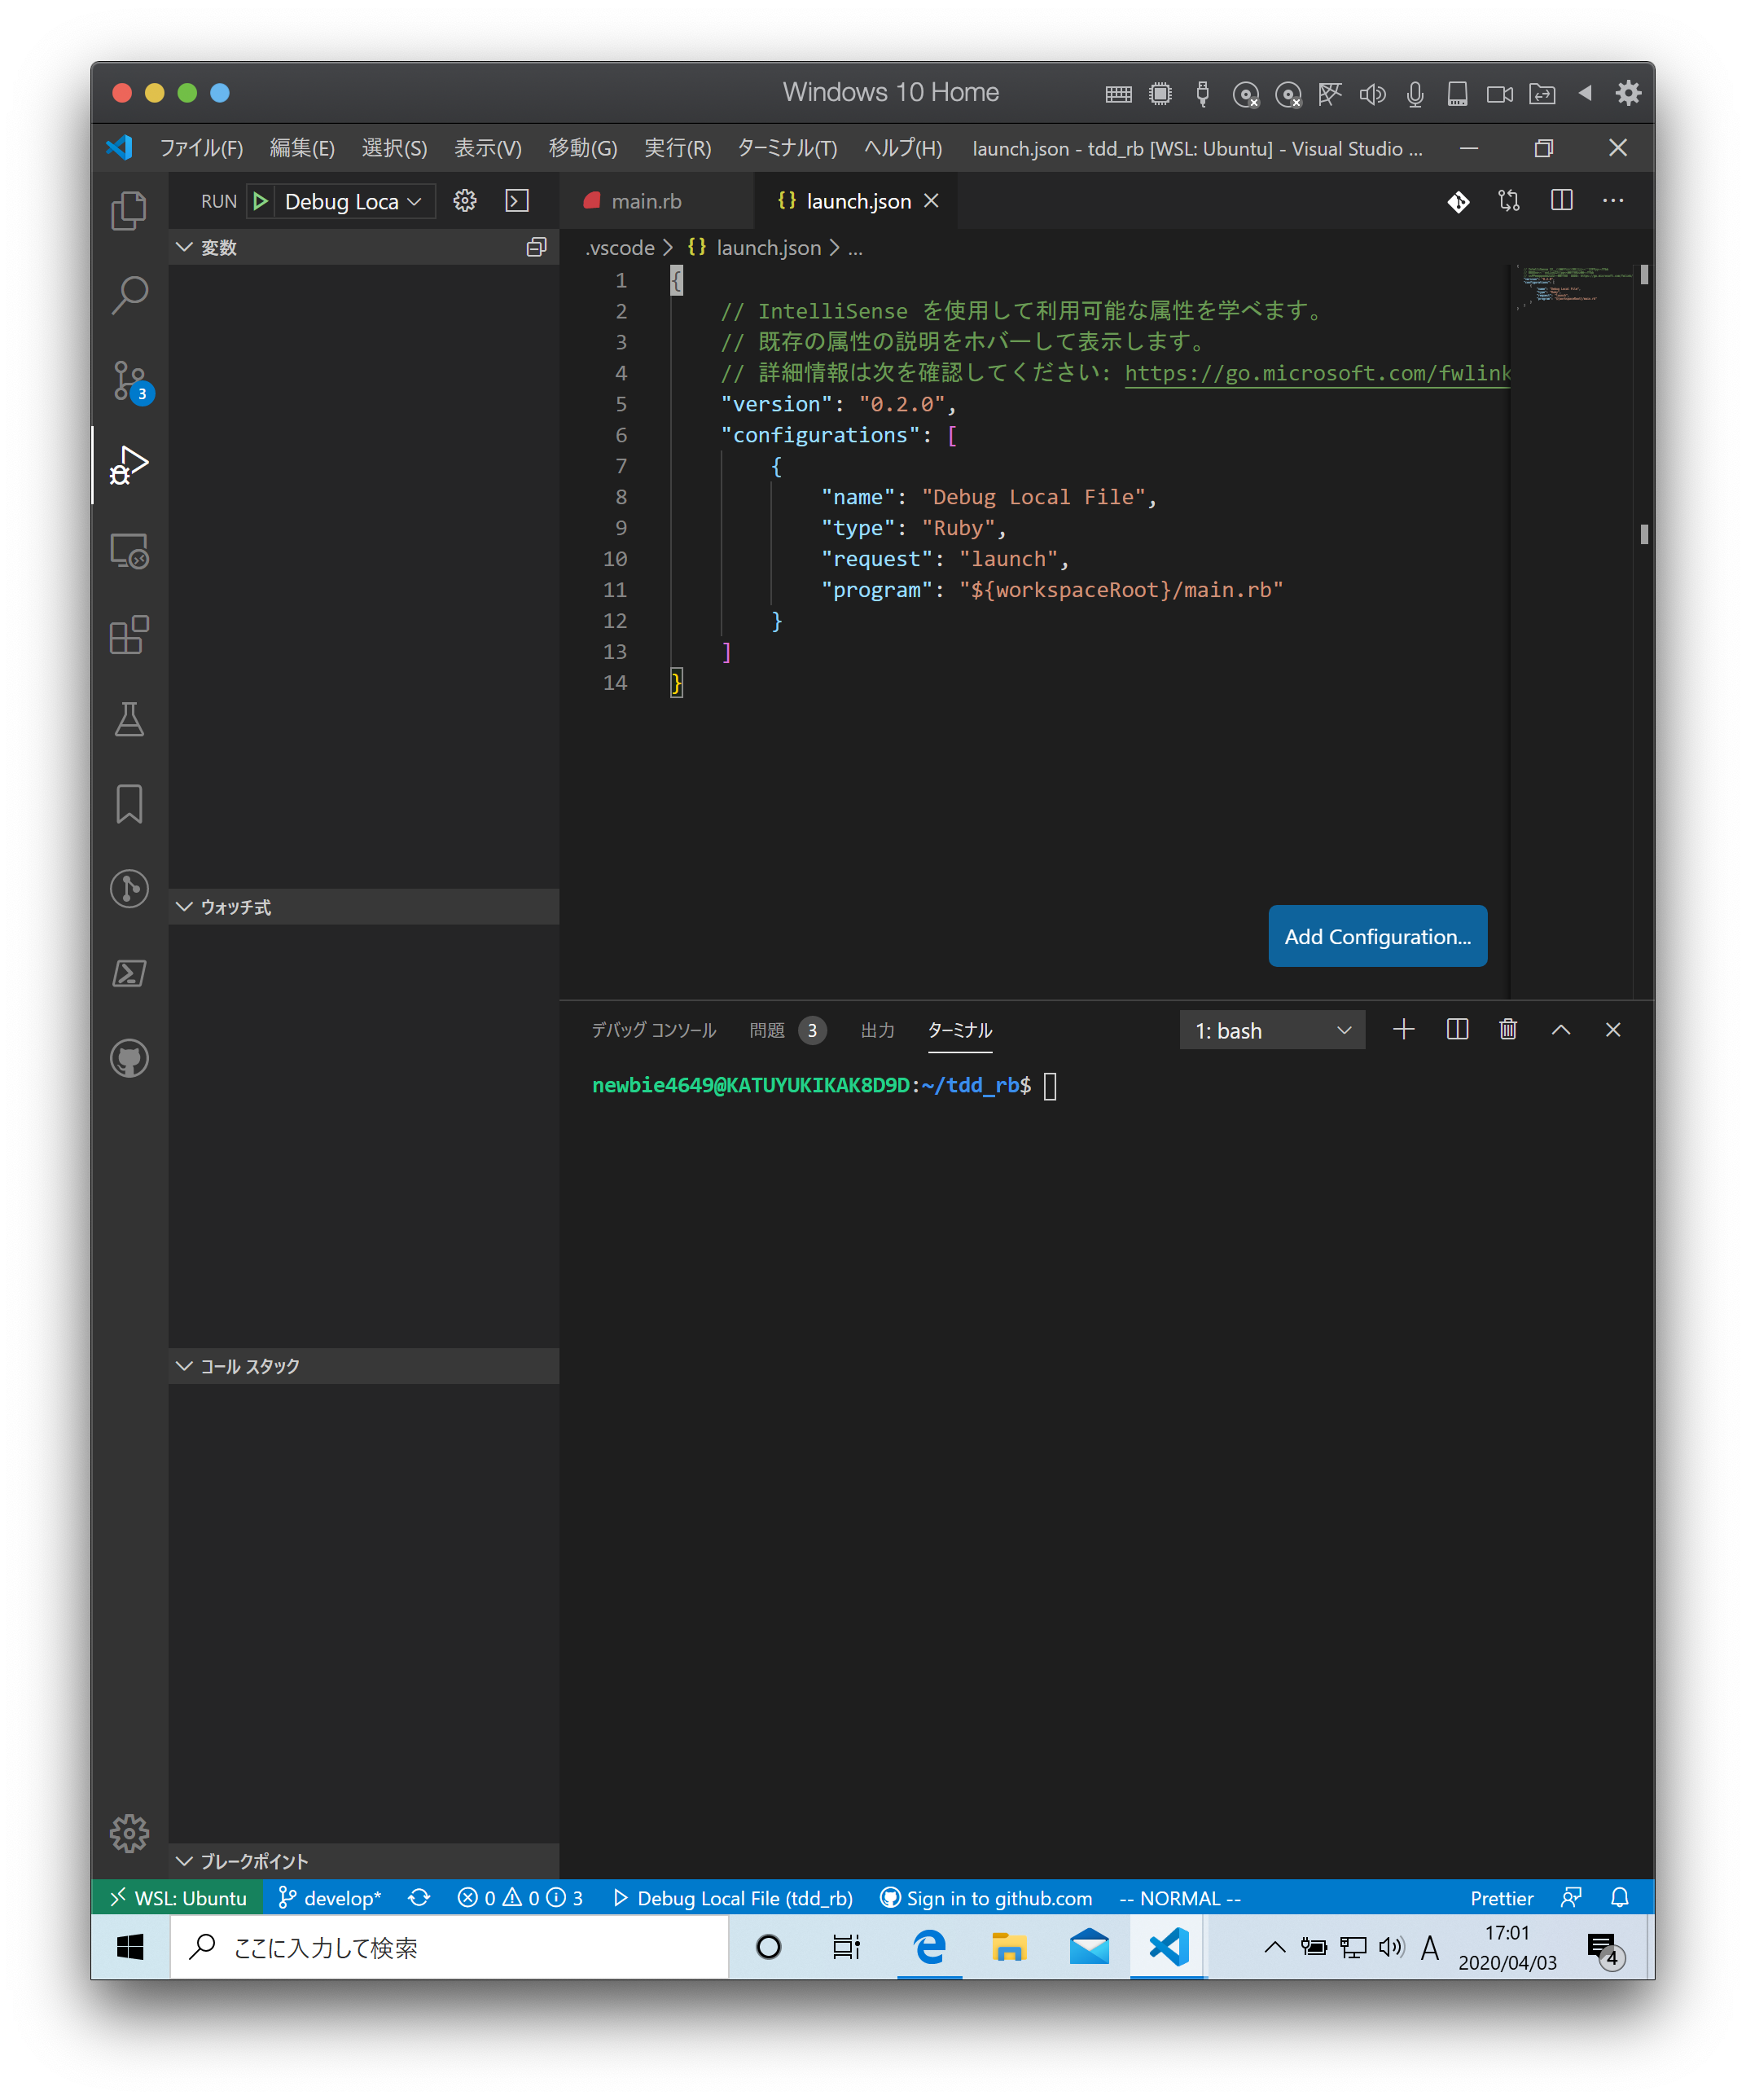
ファイルに以下のコードを入力したら Run アイコンを選択して create a launch.json file を押してメニューから Ruby を選択します。
1 | require 'minitest/autorun' |
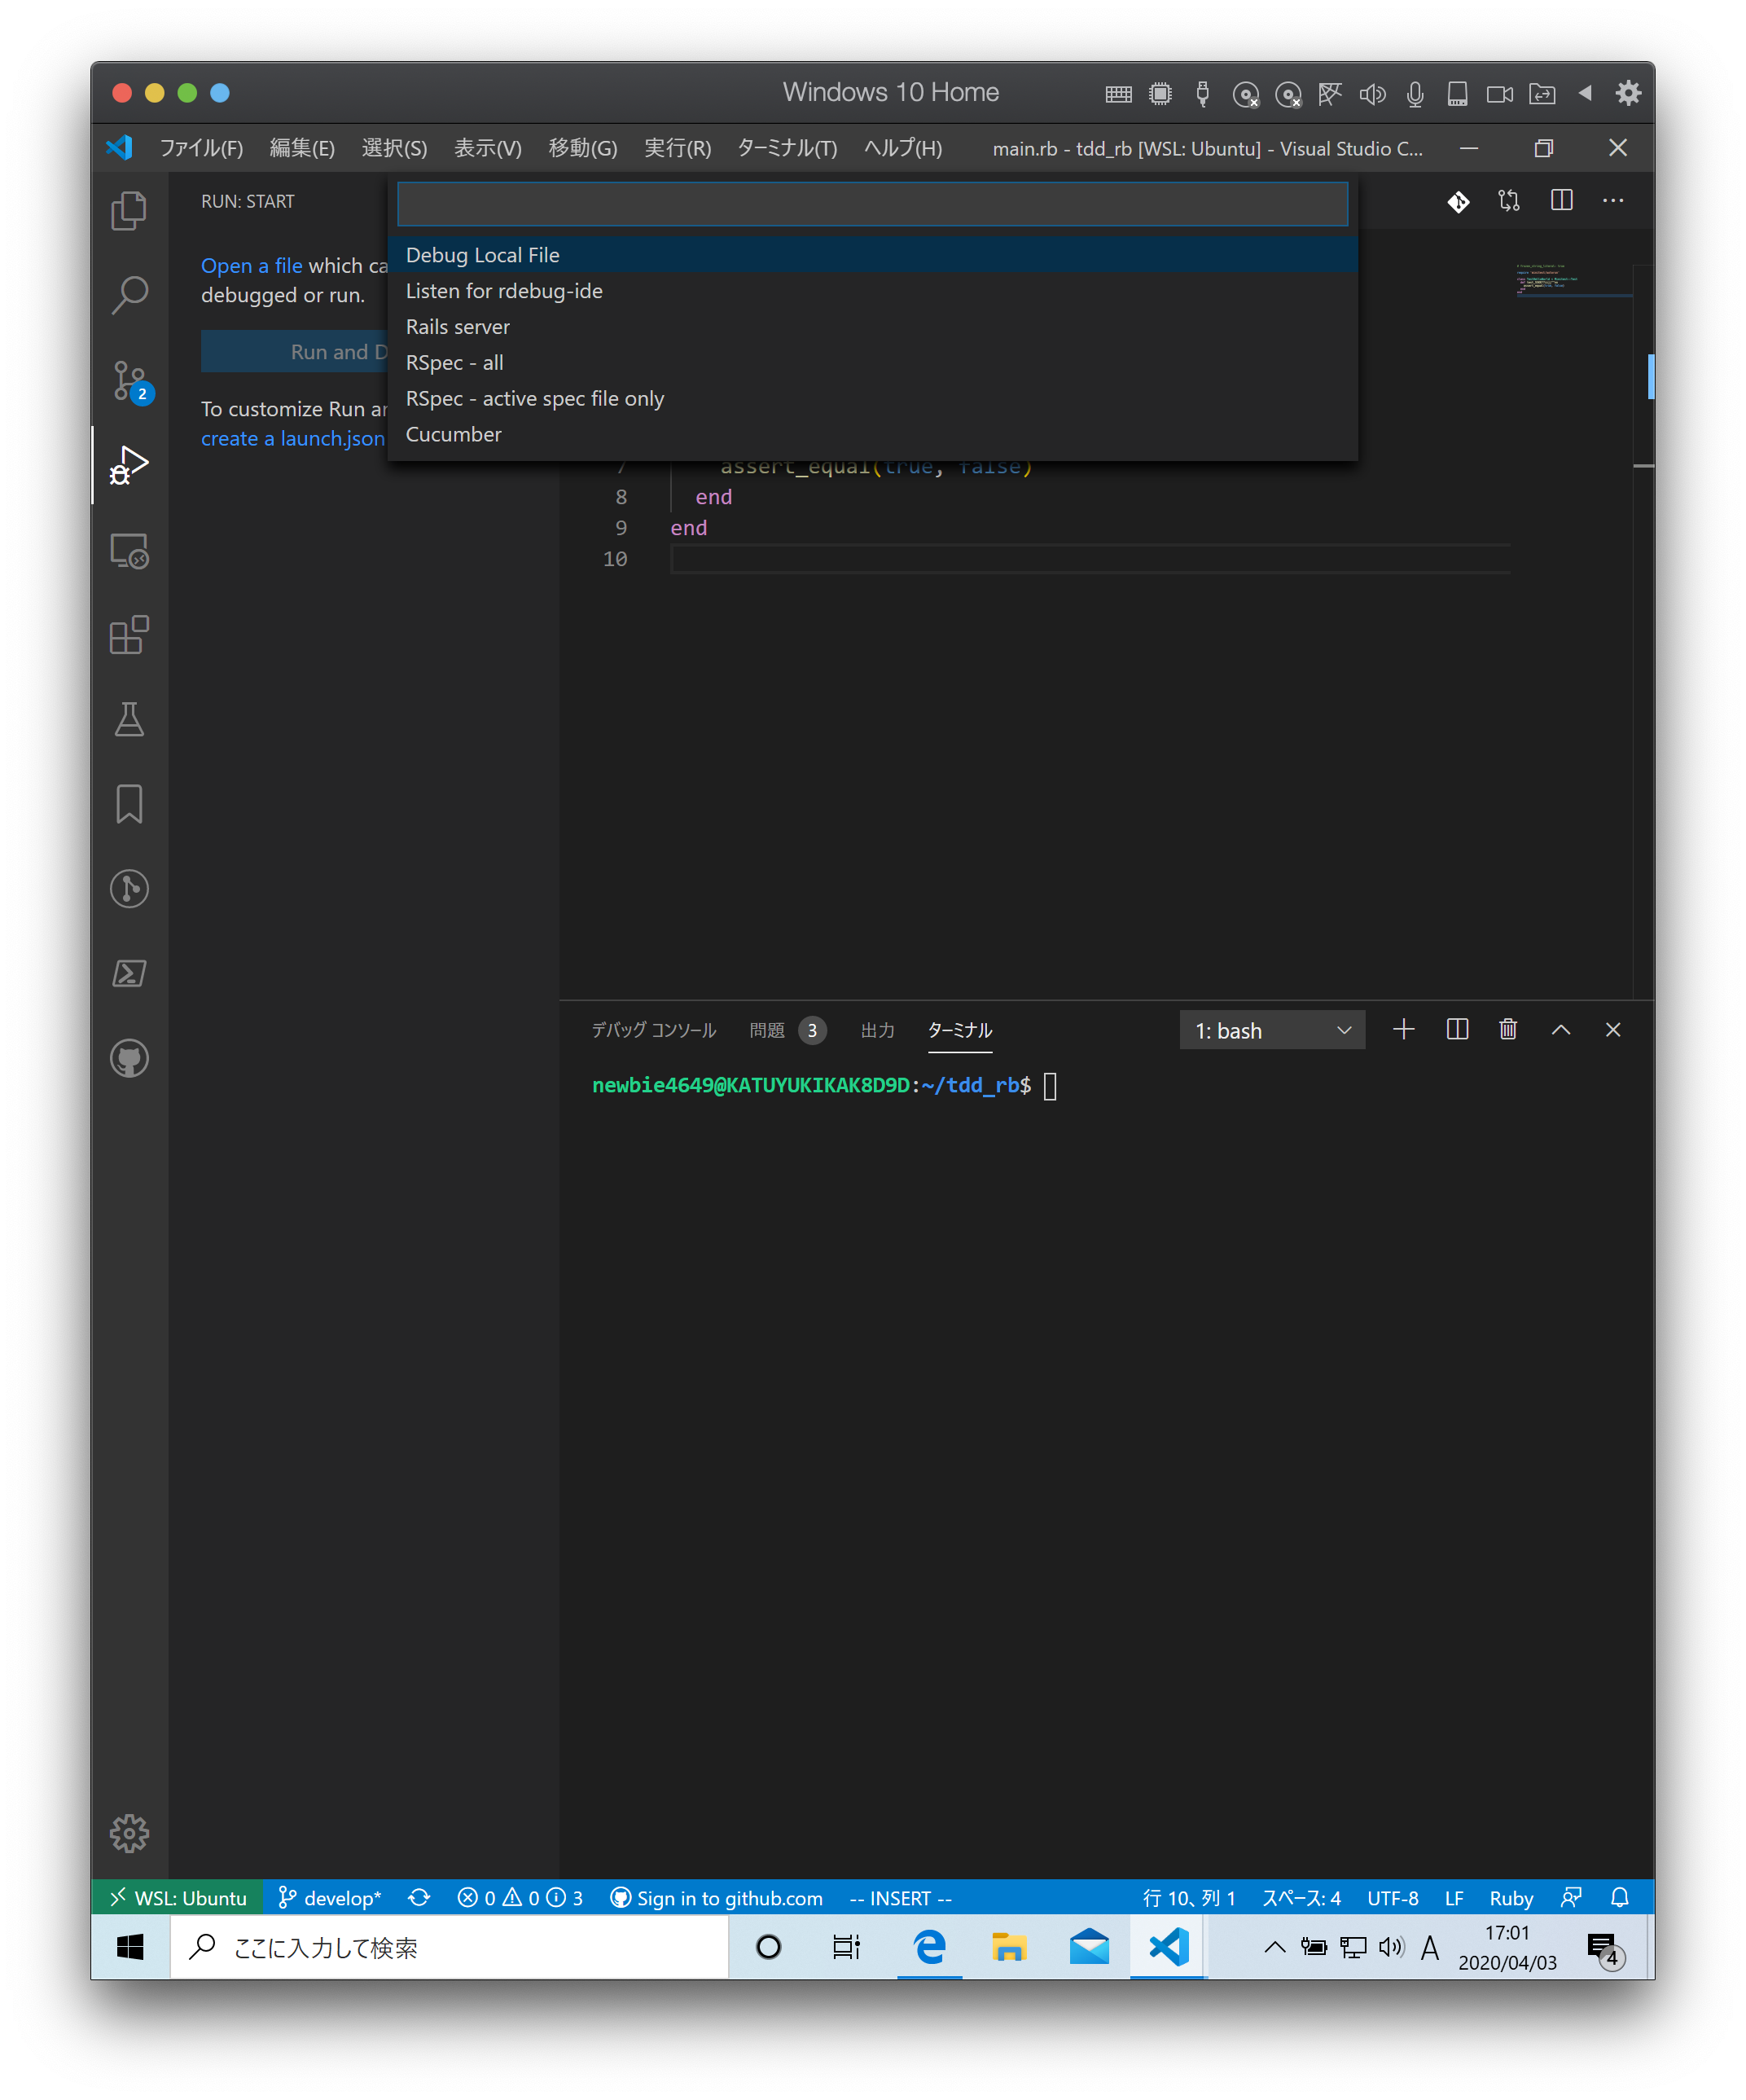
Debug Local File を選択します。
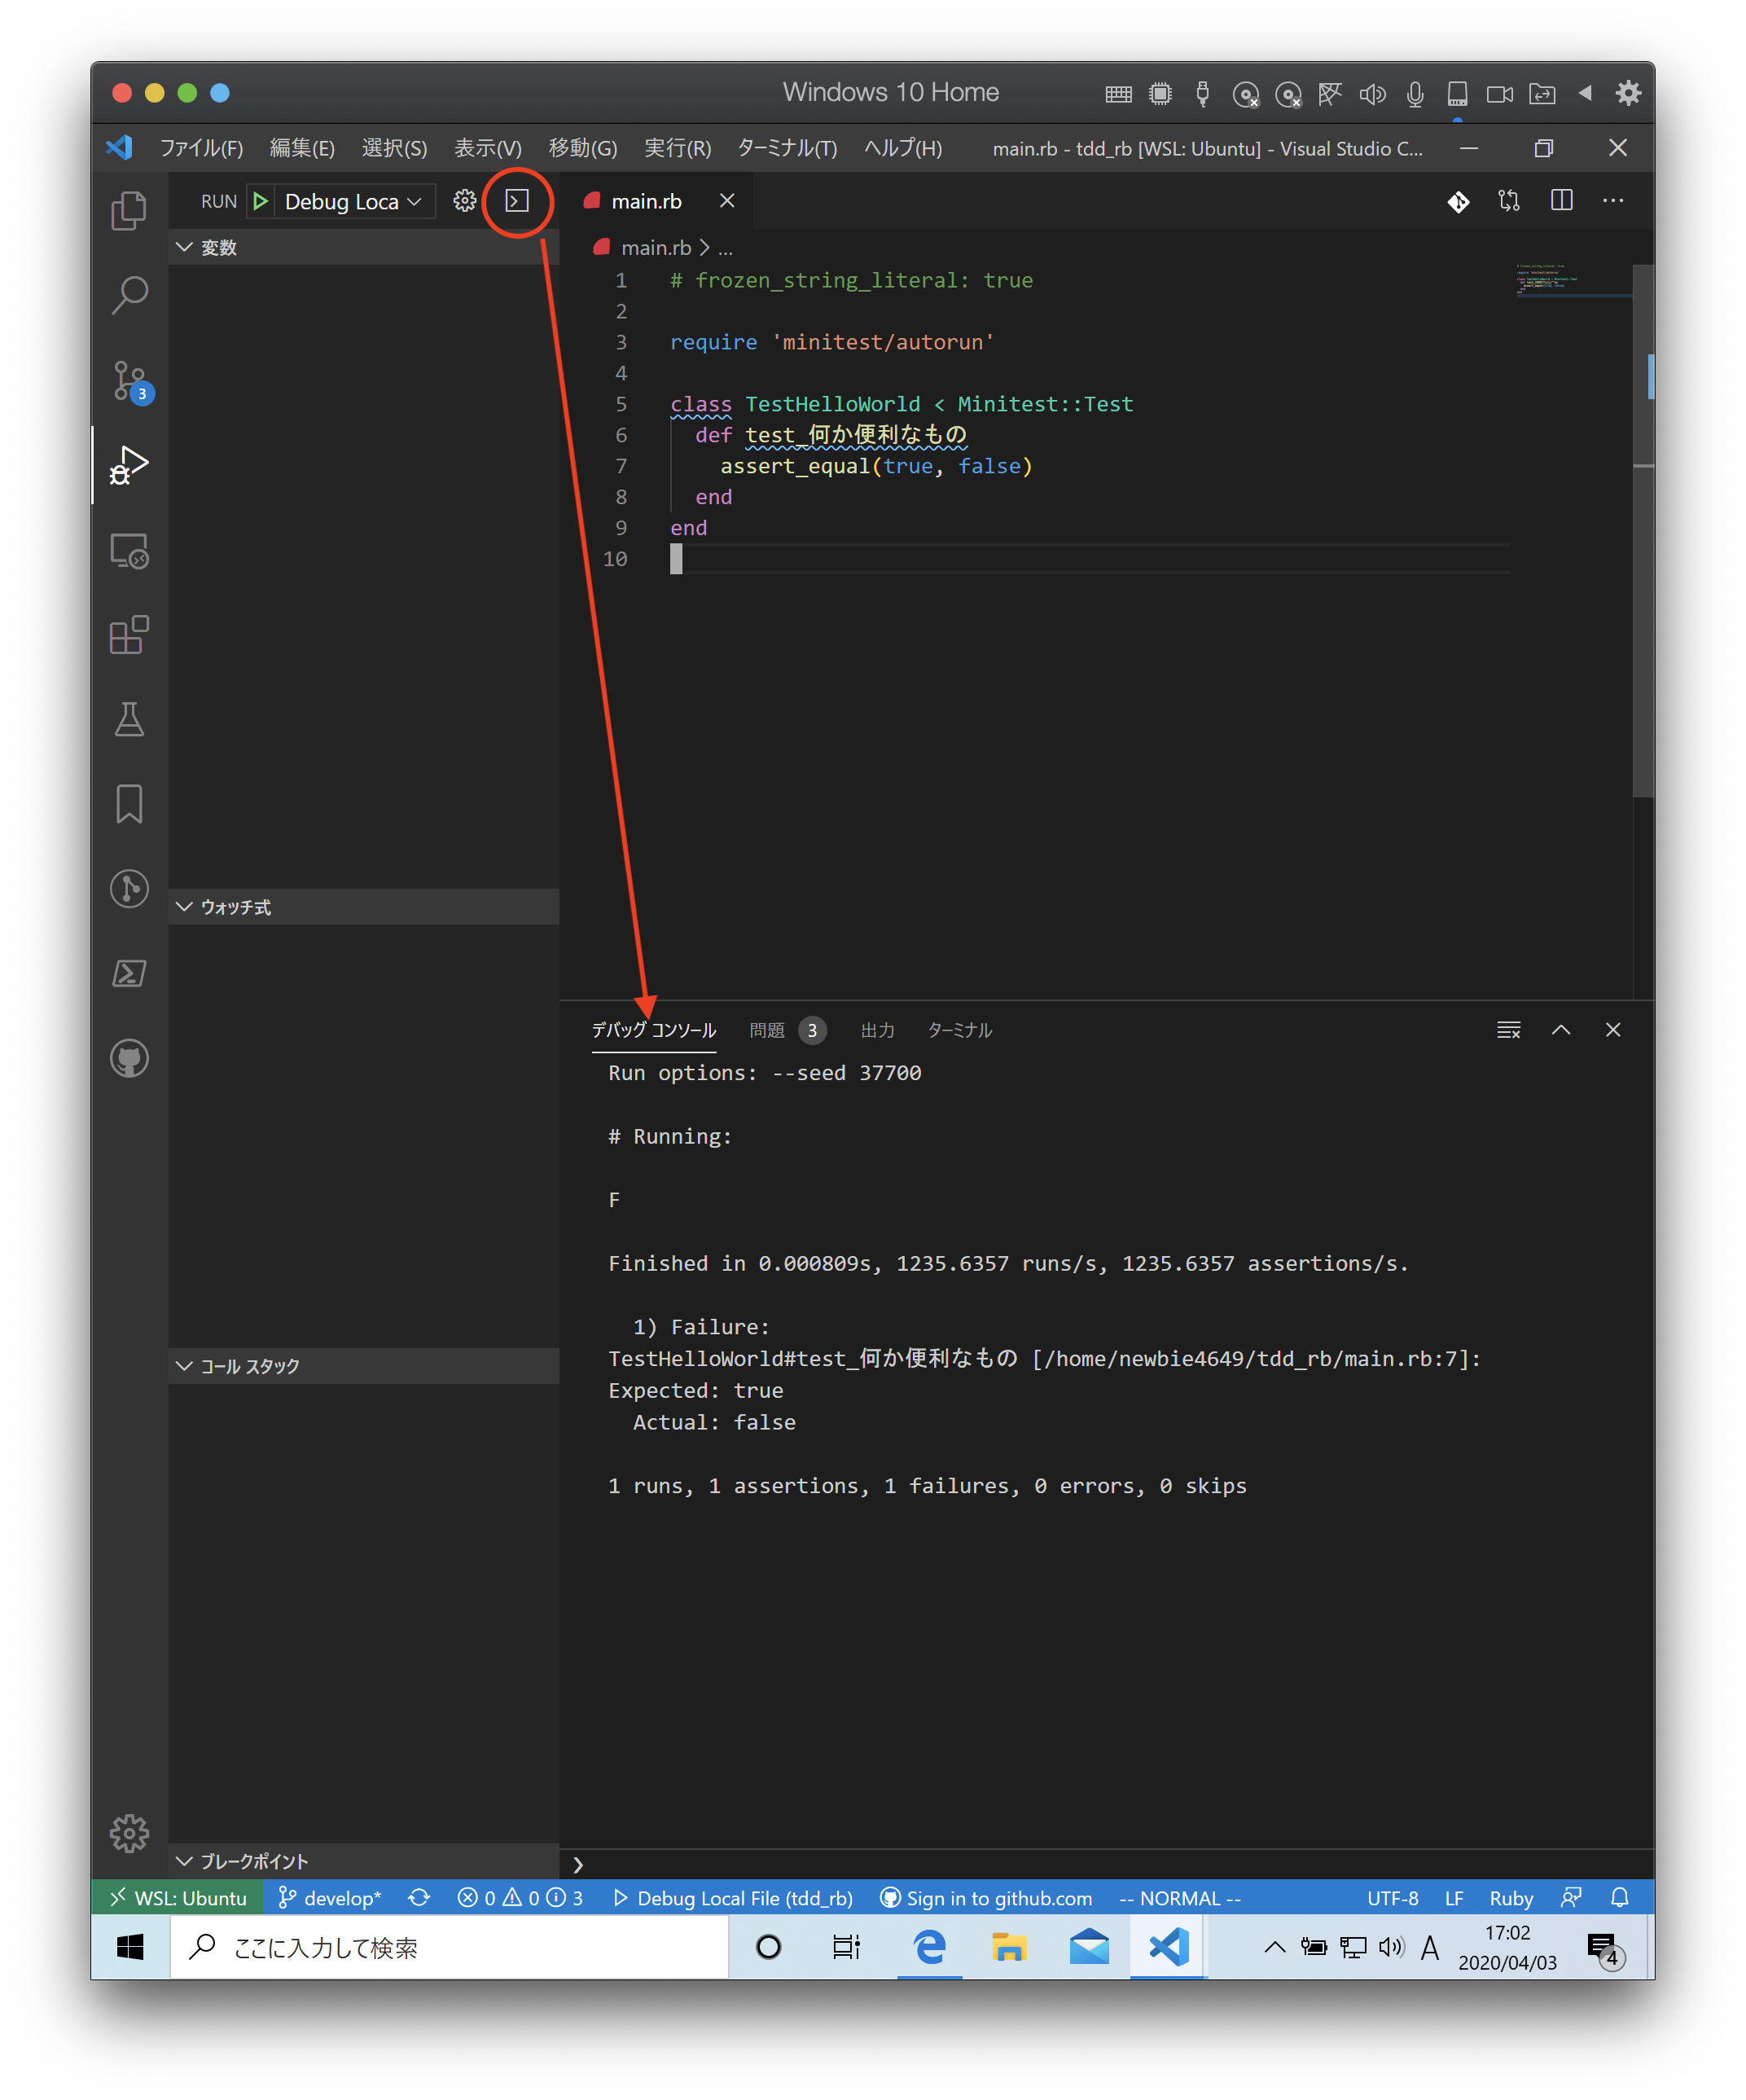
launch.json ファイルが作成されたら main.rb タブに戻って F5 キーを押します。
デバッグコンソールに実行結果が表示されれば準備完了です。
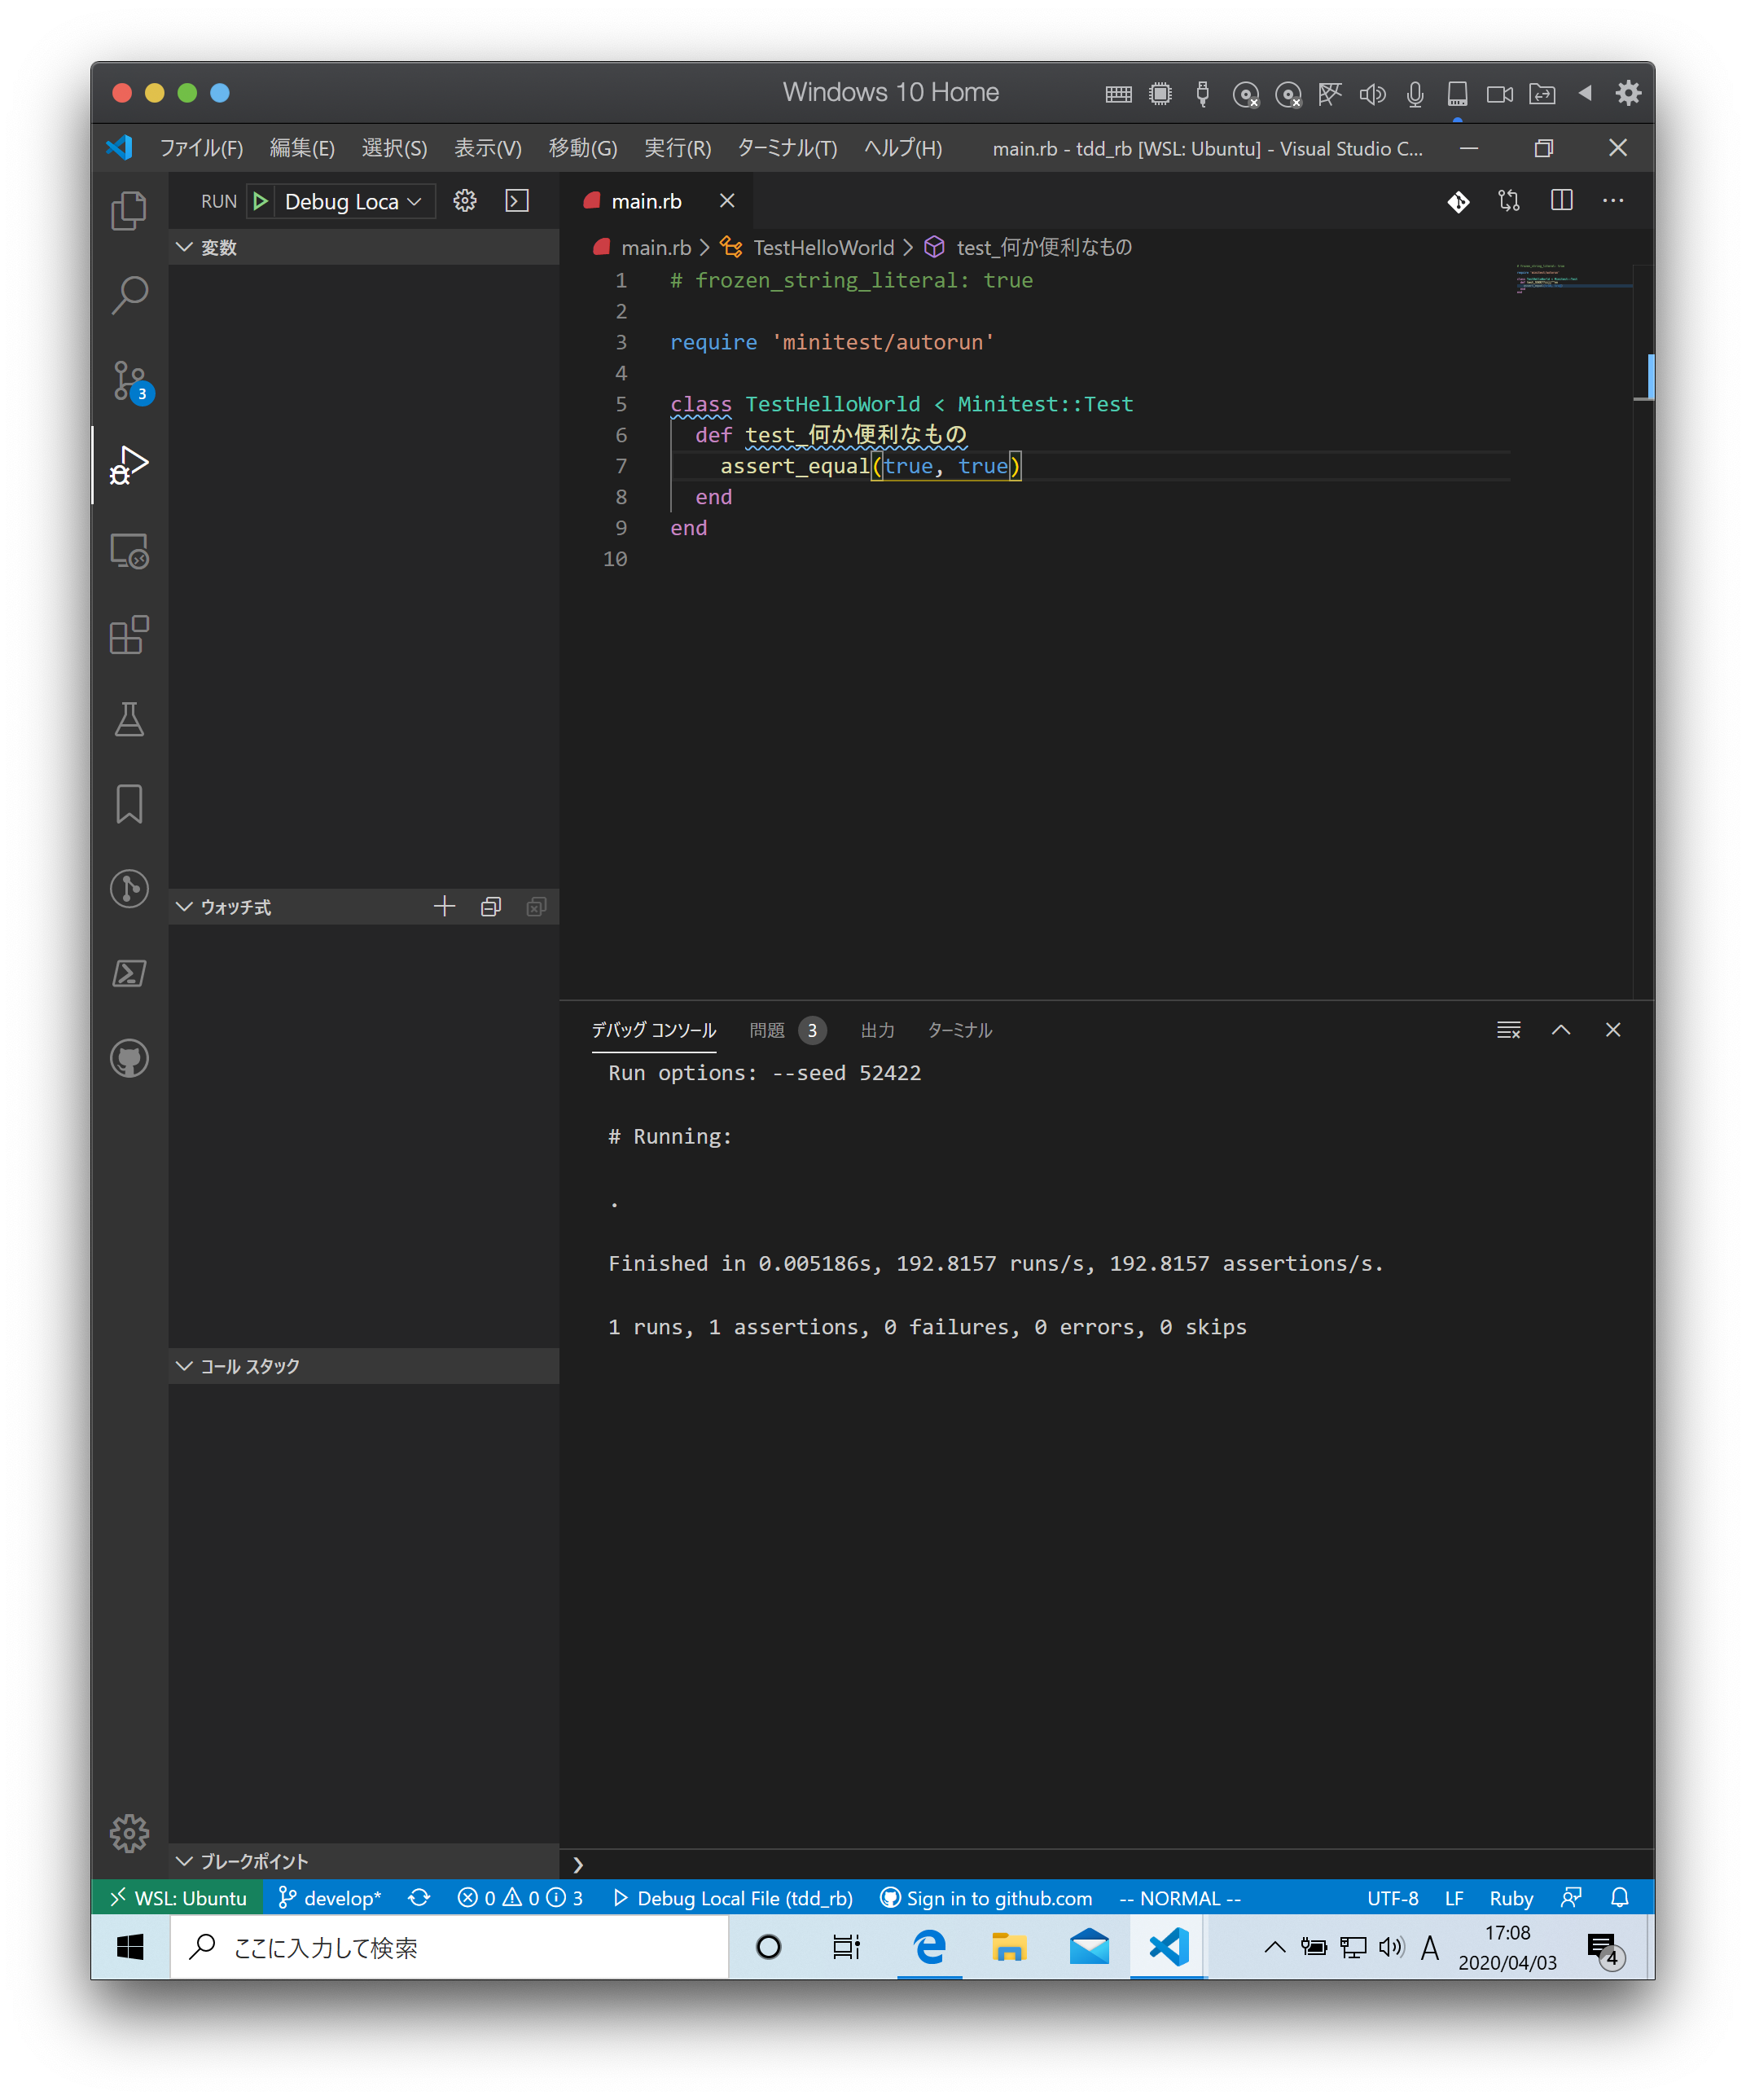
テストをパスするようにコードを修正して F5 キーを押します。
1 | require 'minitest/autorun' |
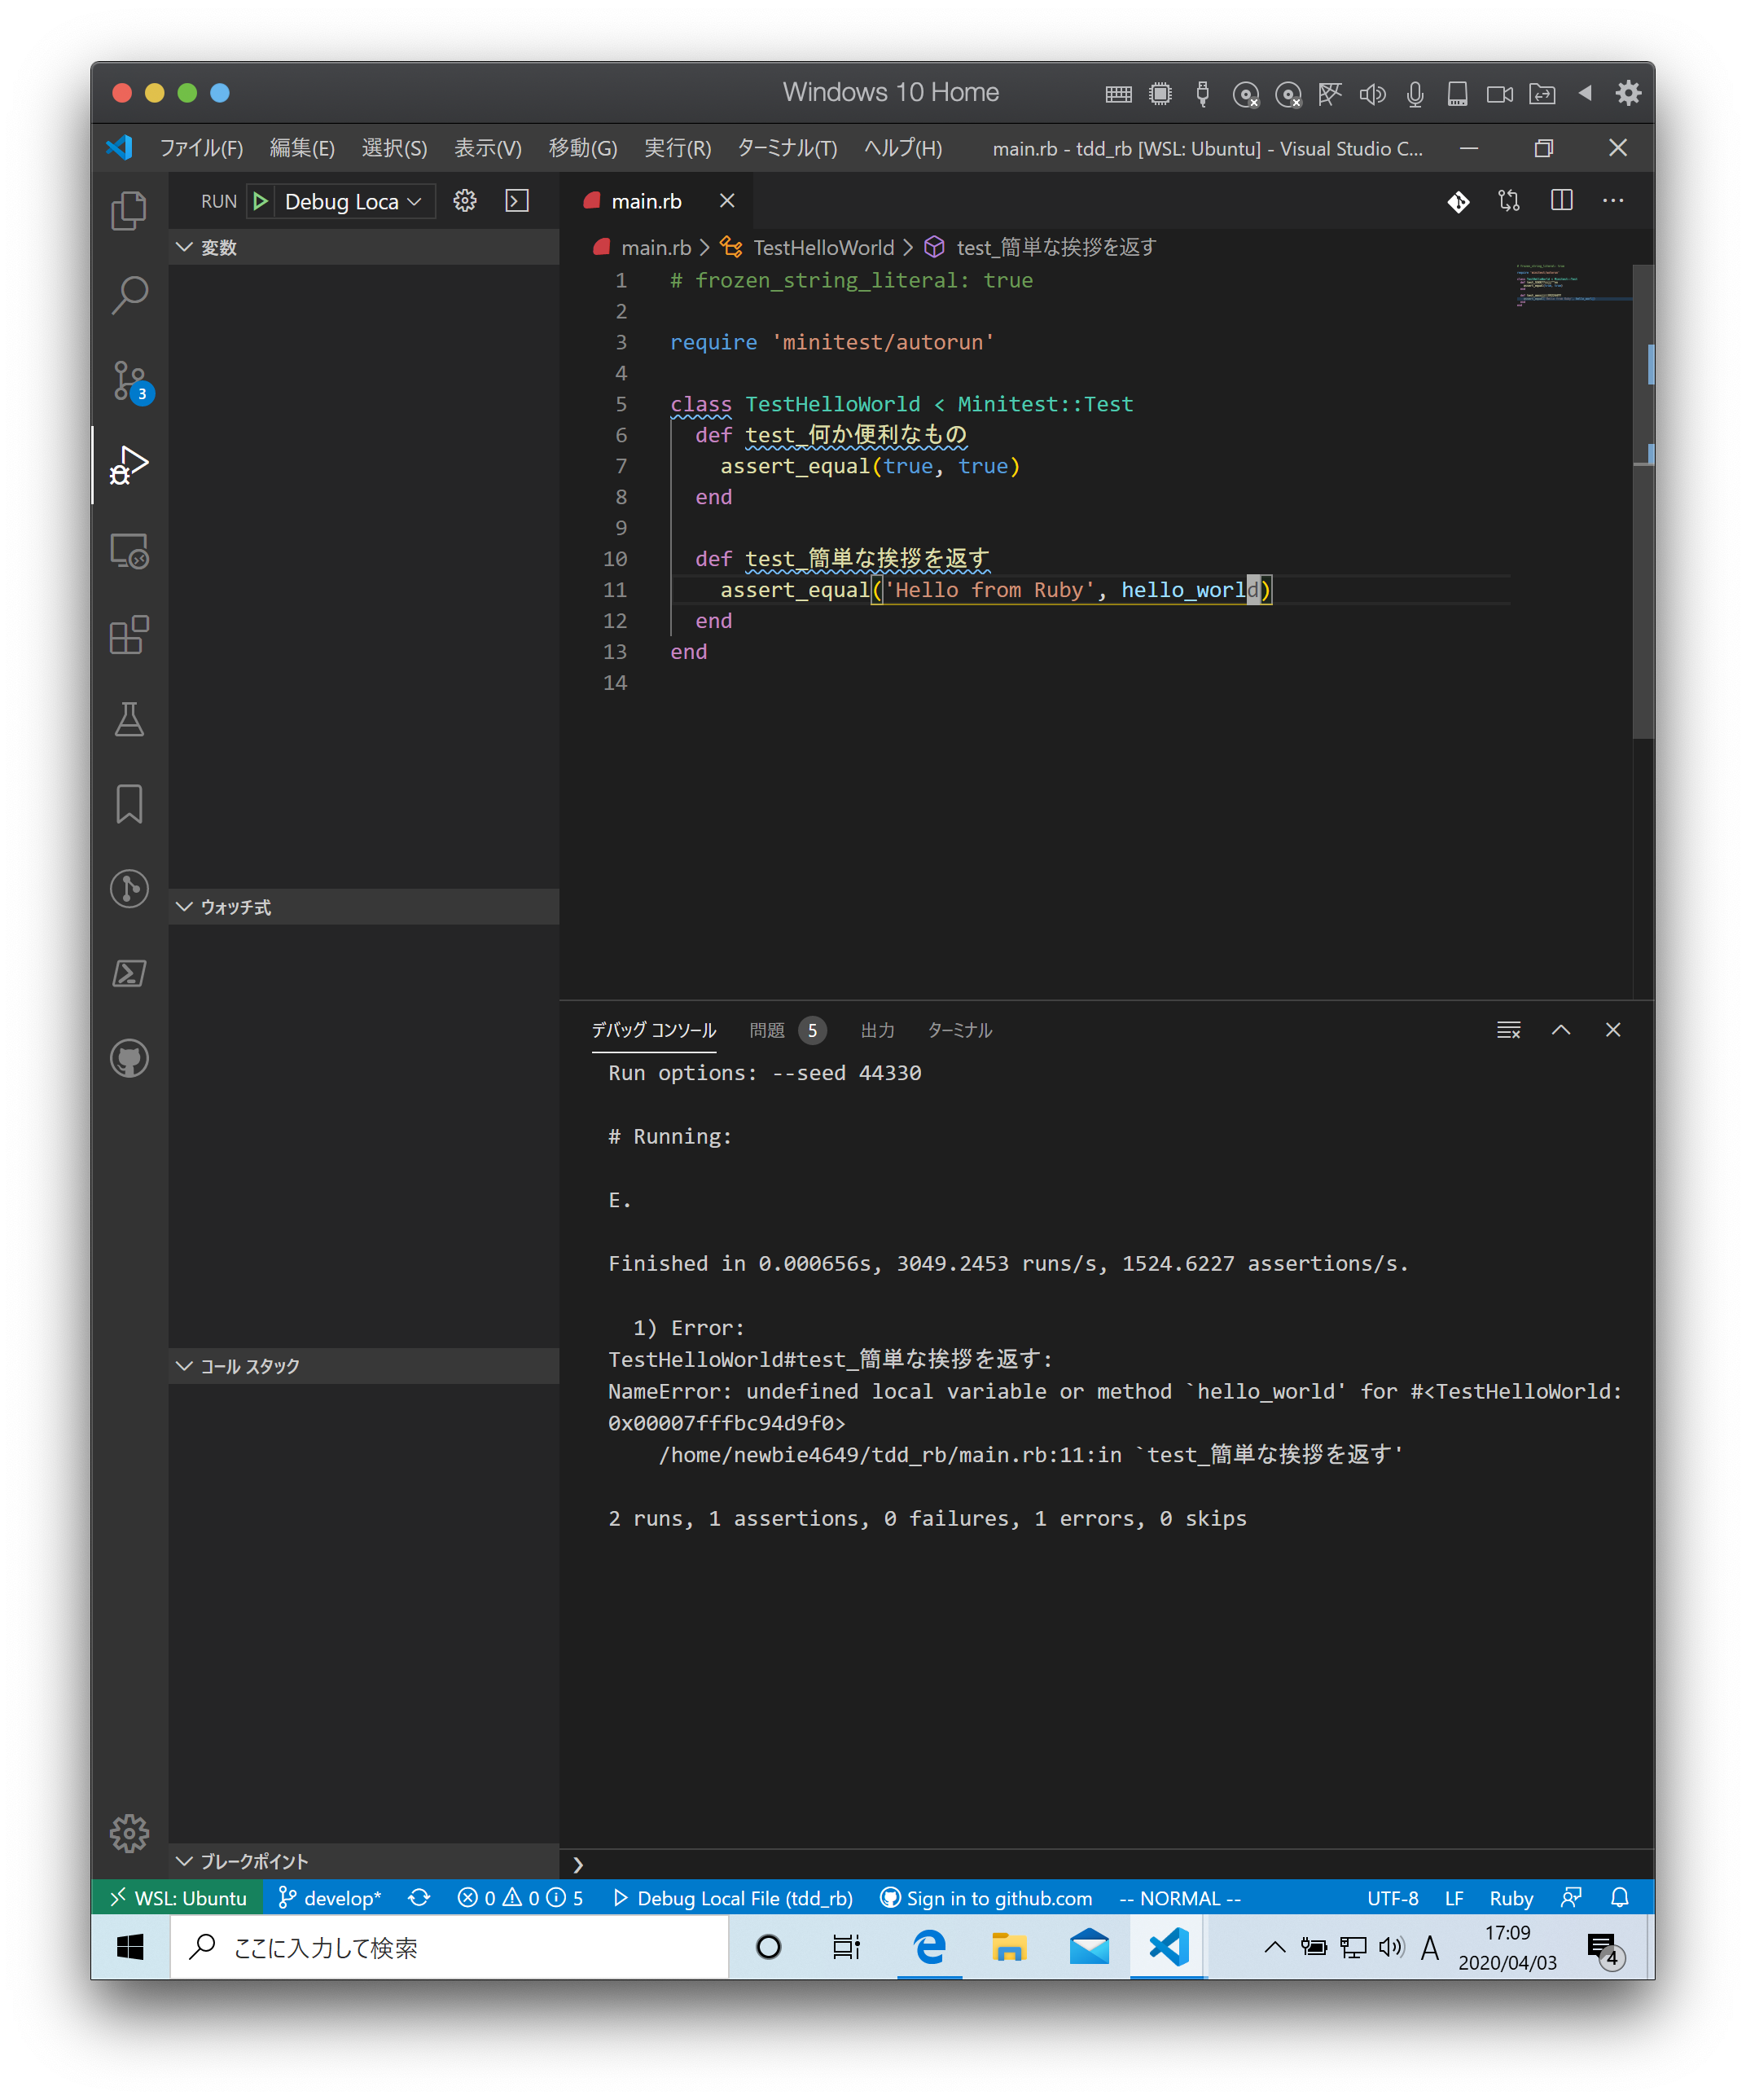
テスティングフレームワークの動作が確認できたので hello_world 関数の作成に入ります。まず以下のコードを追加して F5 キーを押してテストが失敗することを確認します。
1 | require 'minitest/autorun' |
hello_world 関数を追加してテストをパスさせます。
1 | require 'minitest/autorun' |

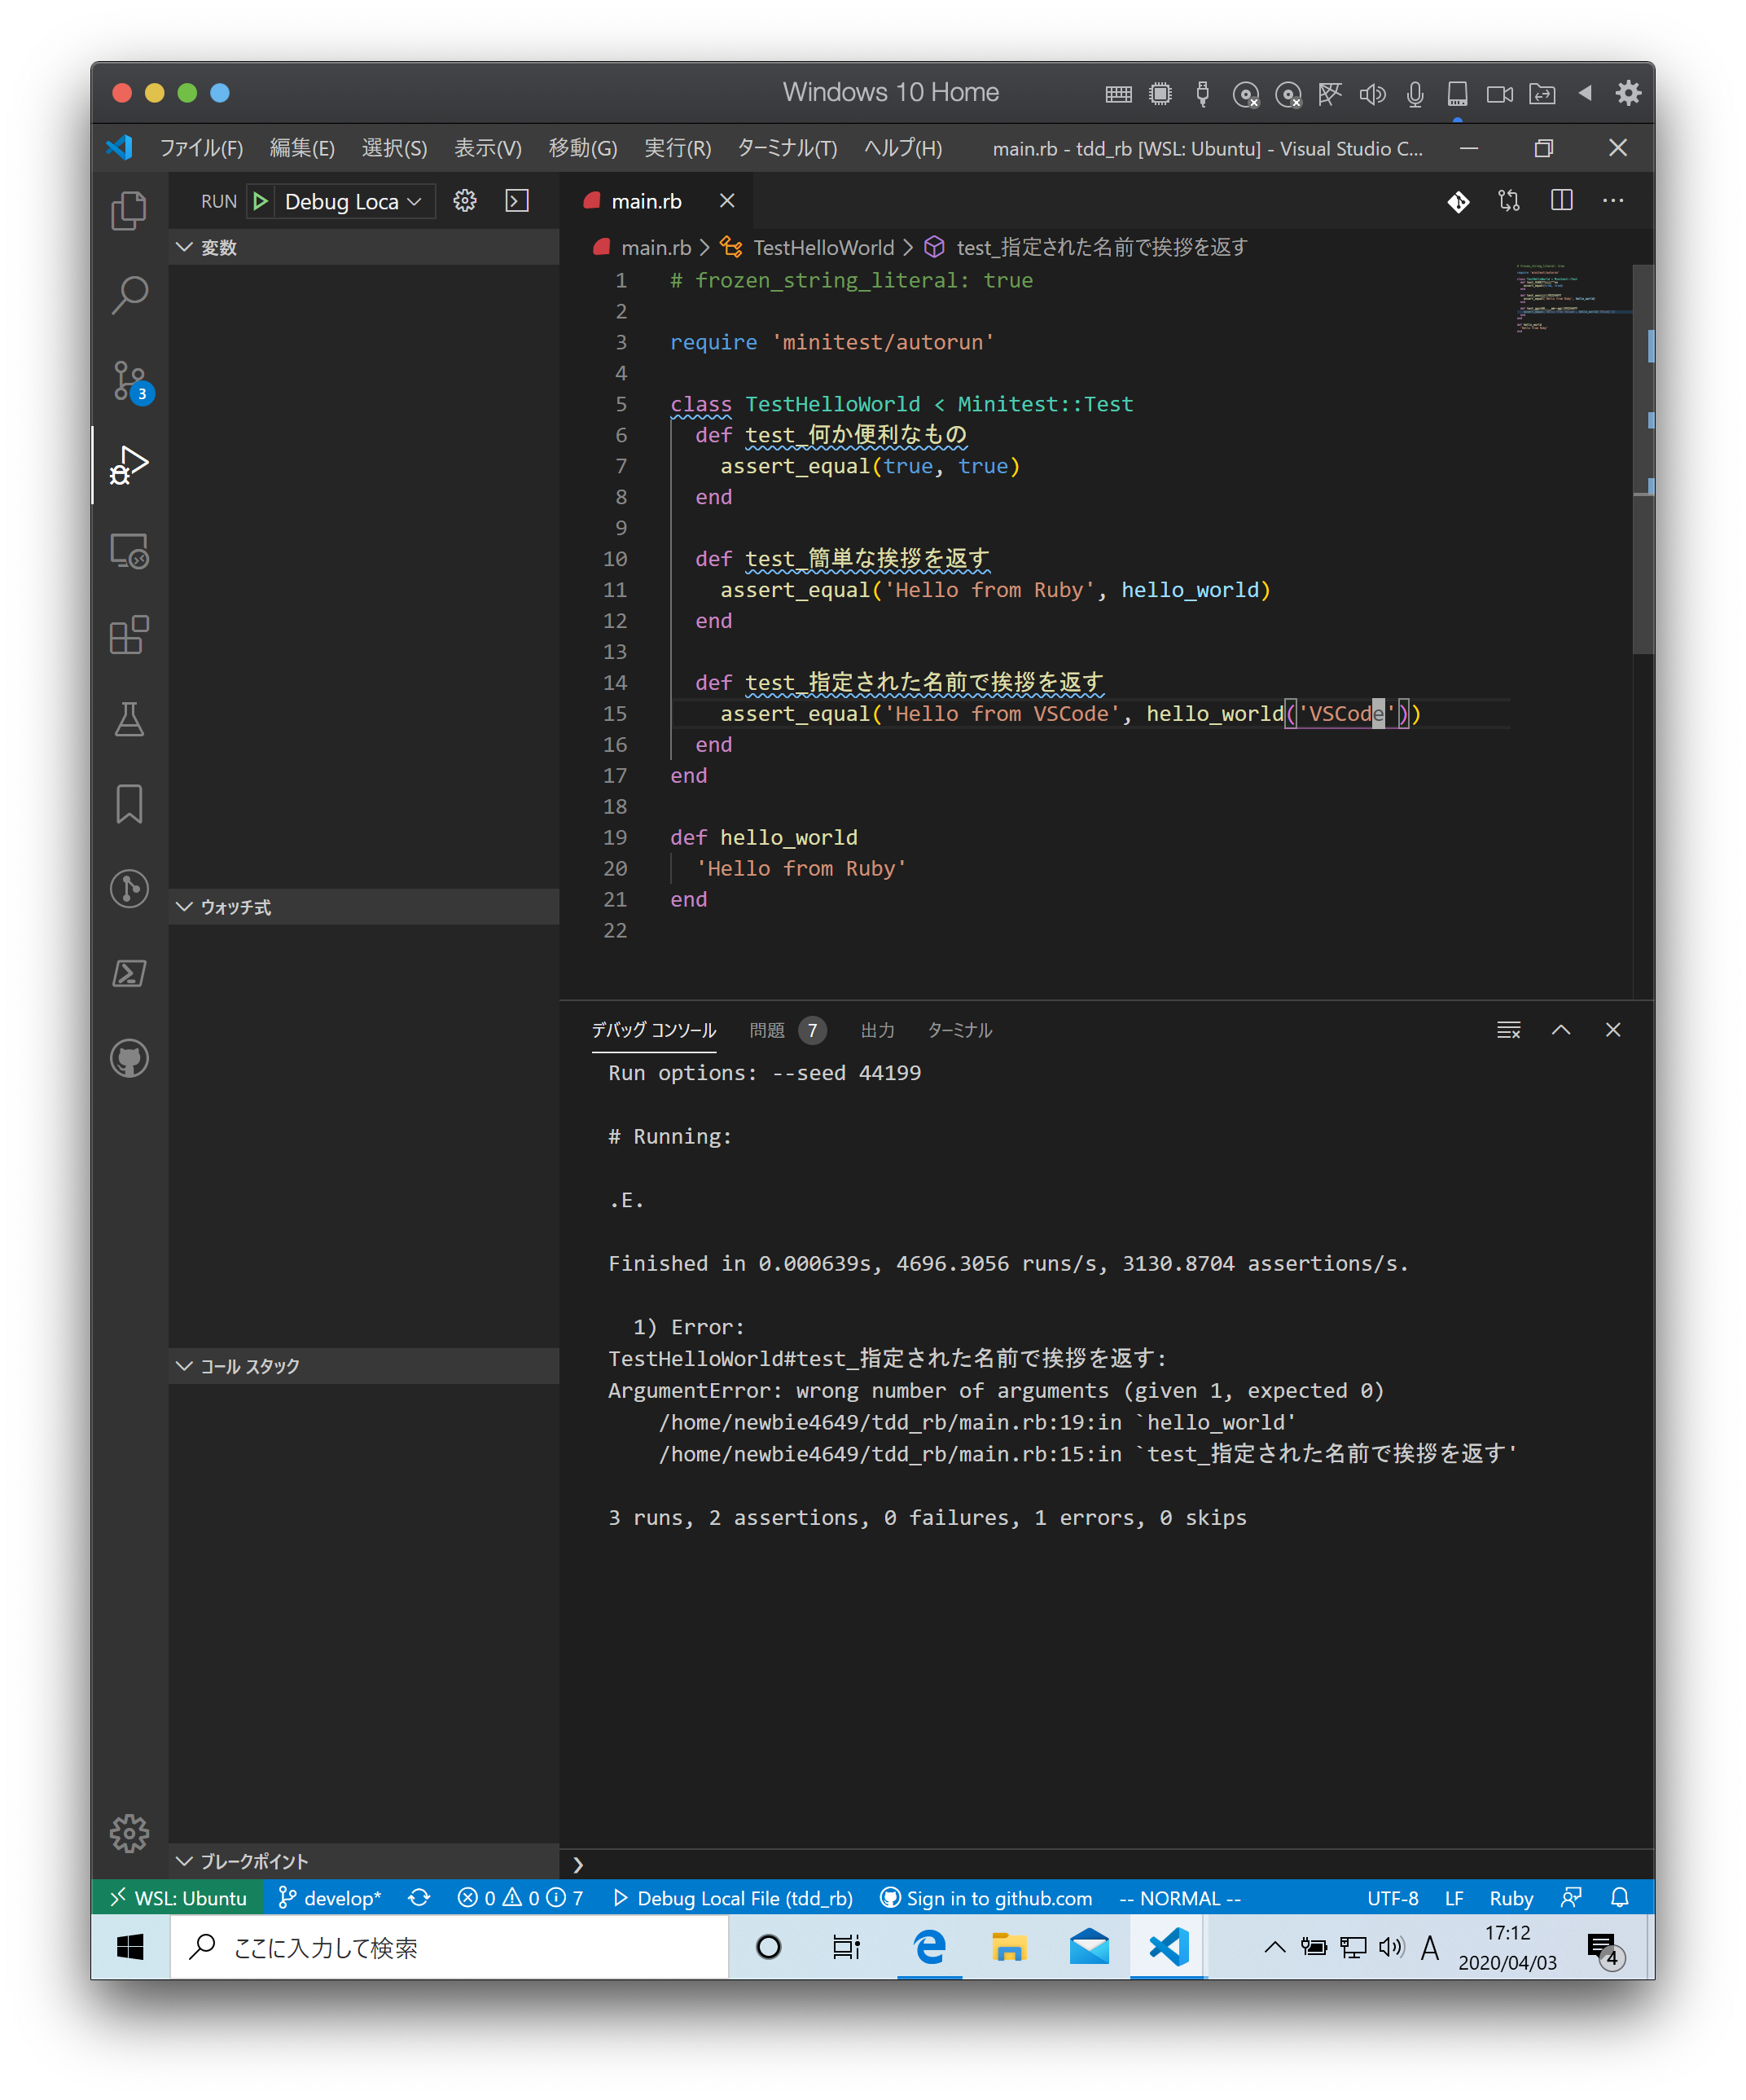
指定された名前で挨拶を返すようにします。
1 | require 'minitest/autorun' |
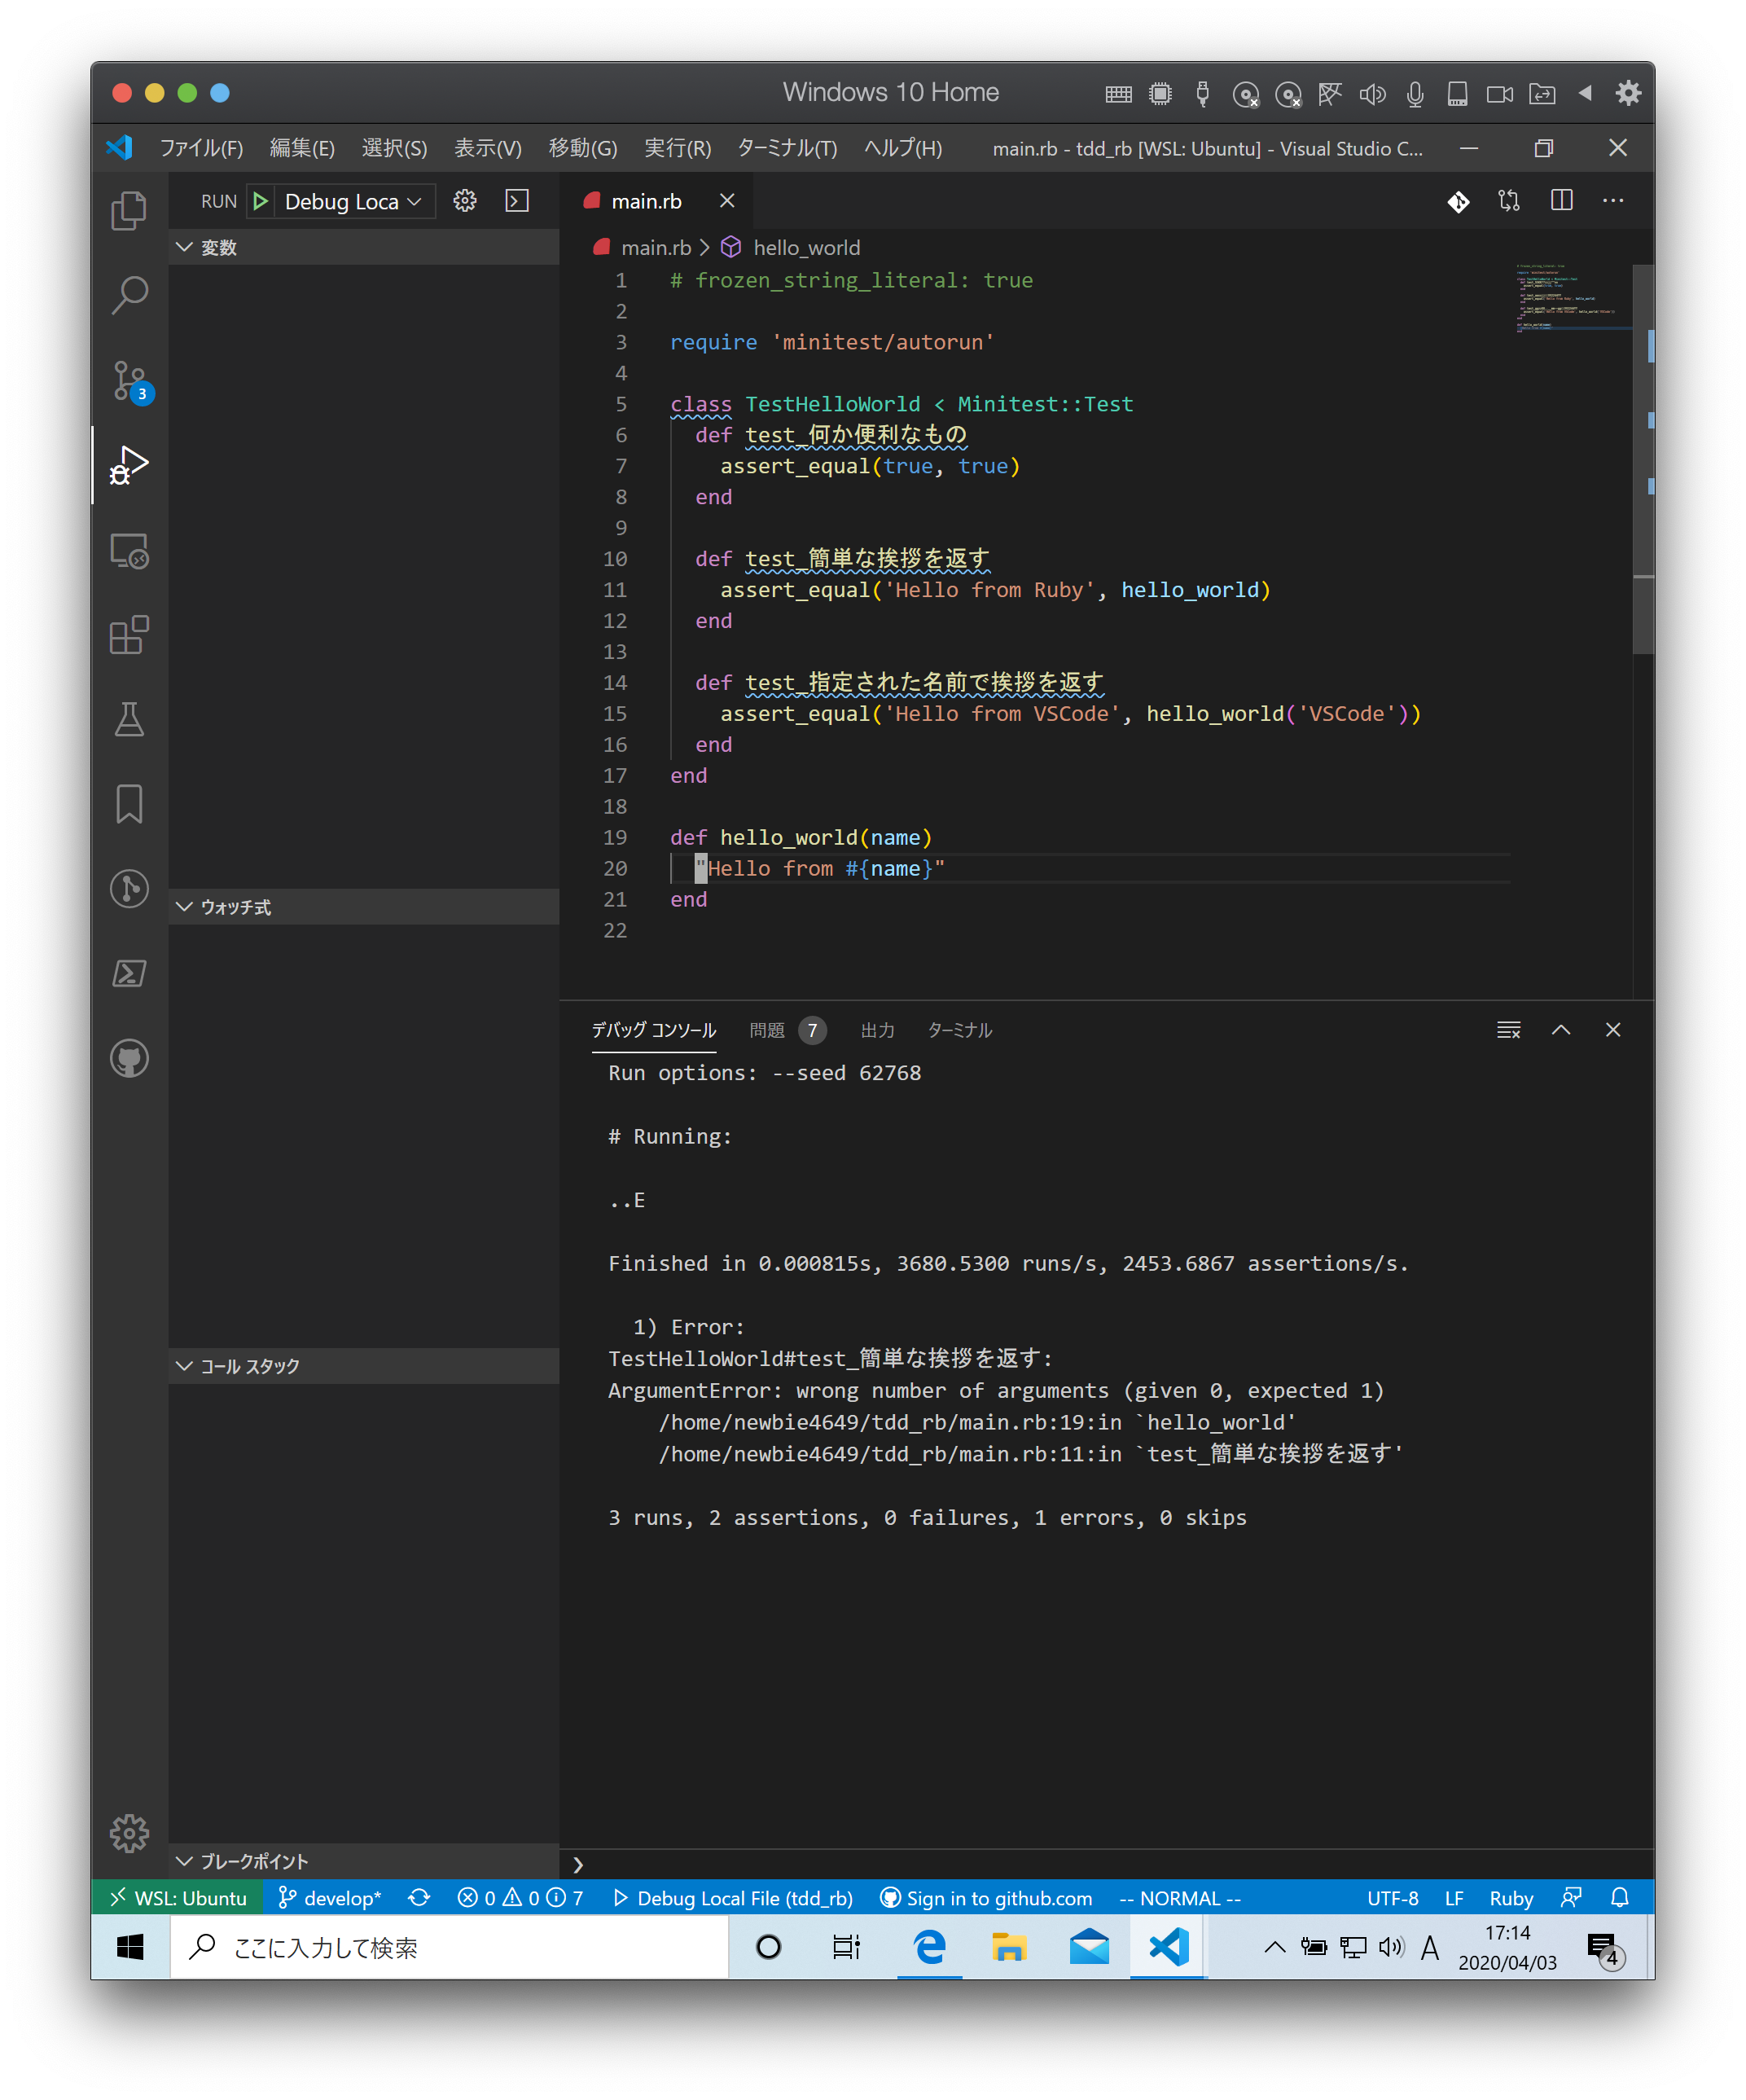
関数に引数を追加します。
1 | require 'minitest/autorun' |
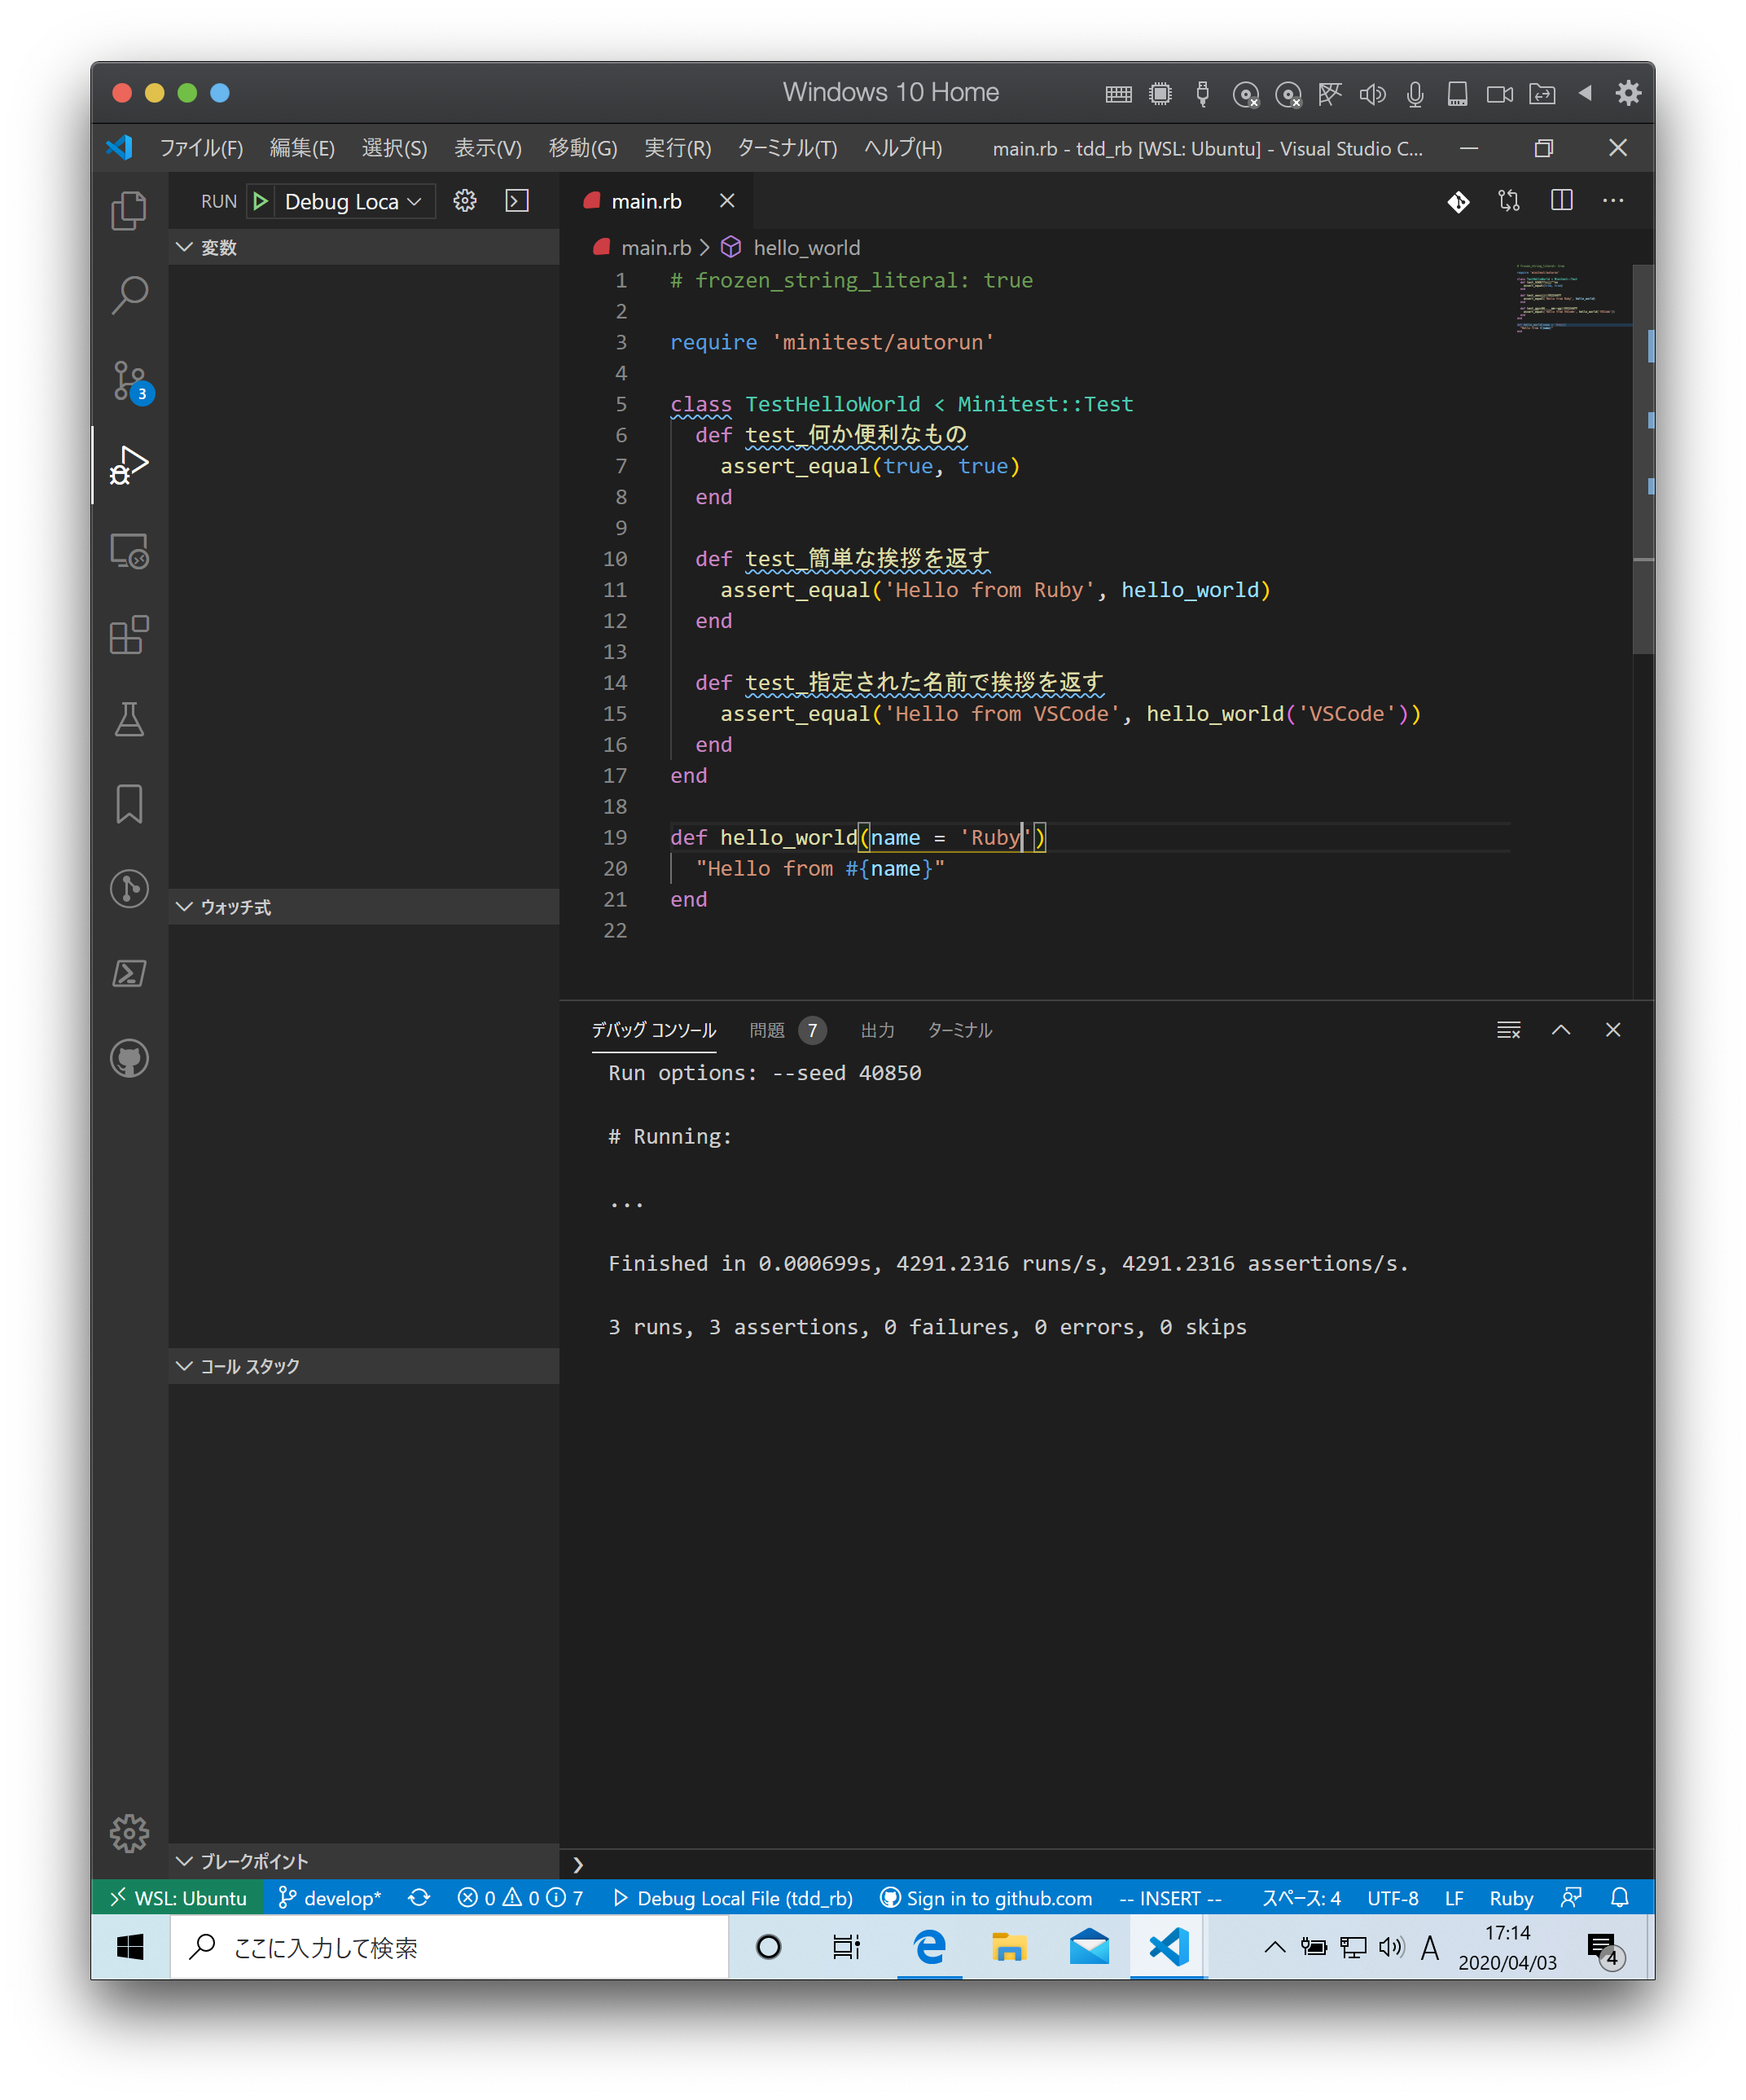
指定された名前で挨拶を返す テストはパスしましたが今度は 簡単な挨拶を返す テストが失敗するようになりましたのでデフォルト引数を設定してテストをパスするようにします。
1 | require 'minitest/autorun' |
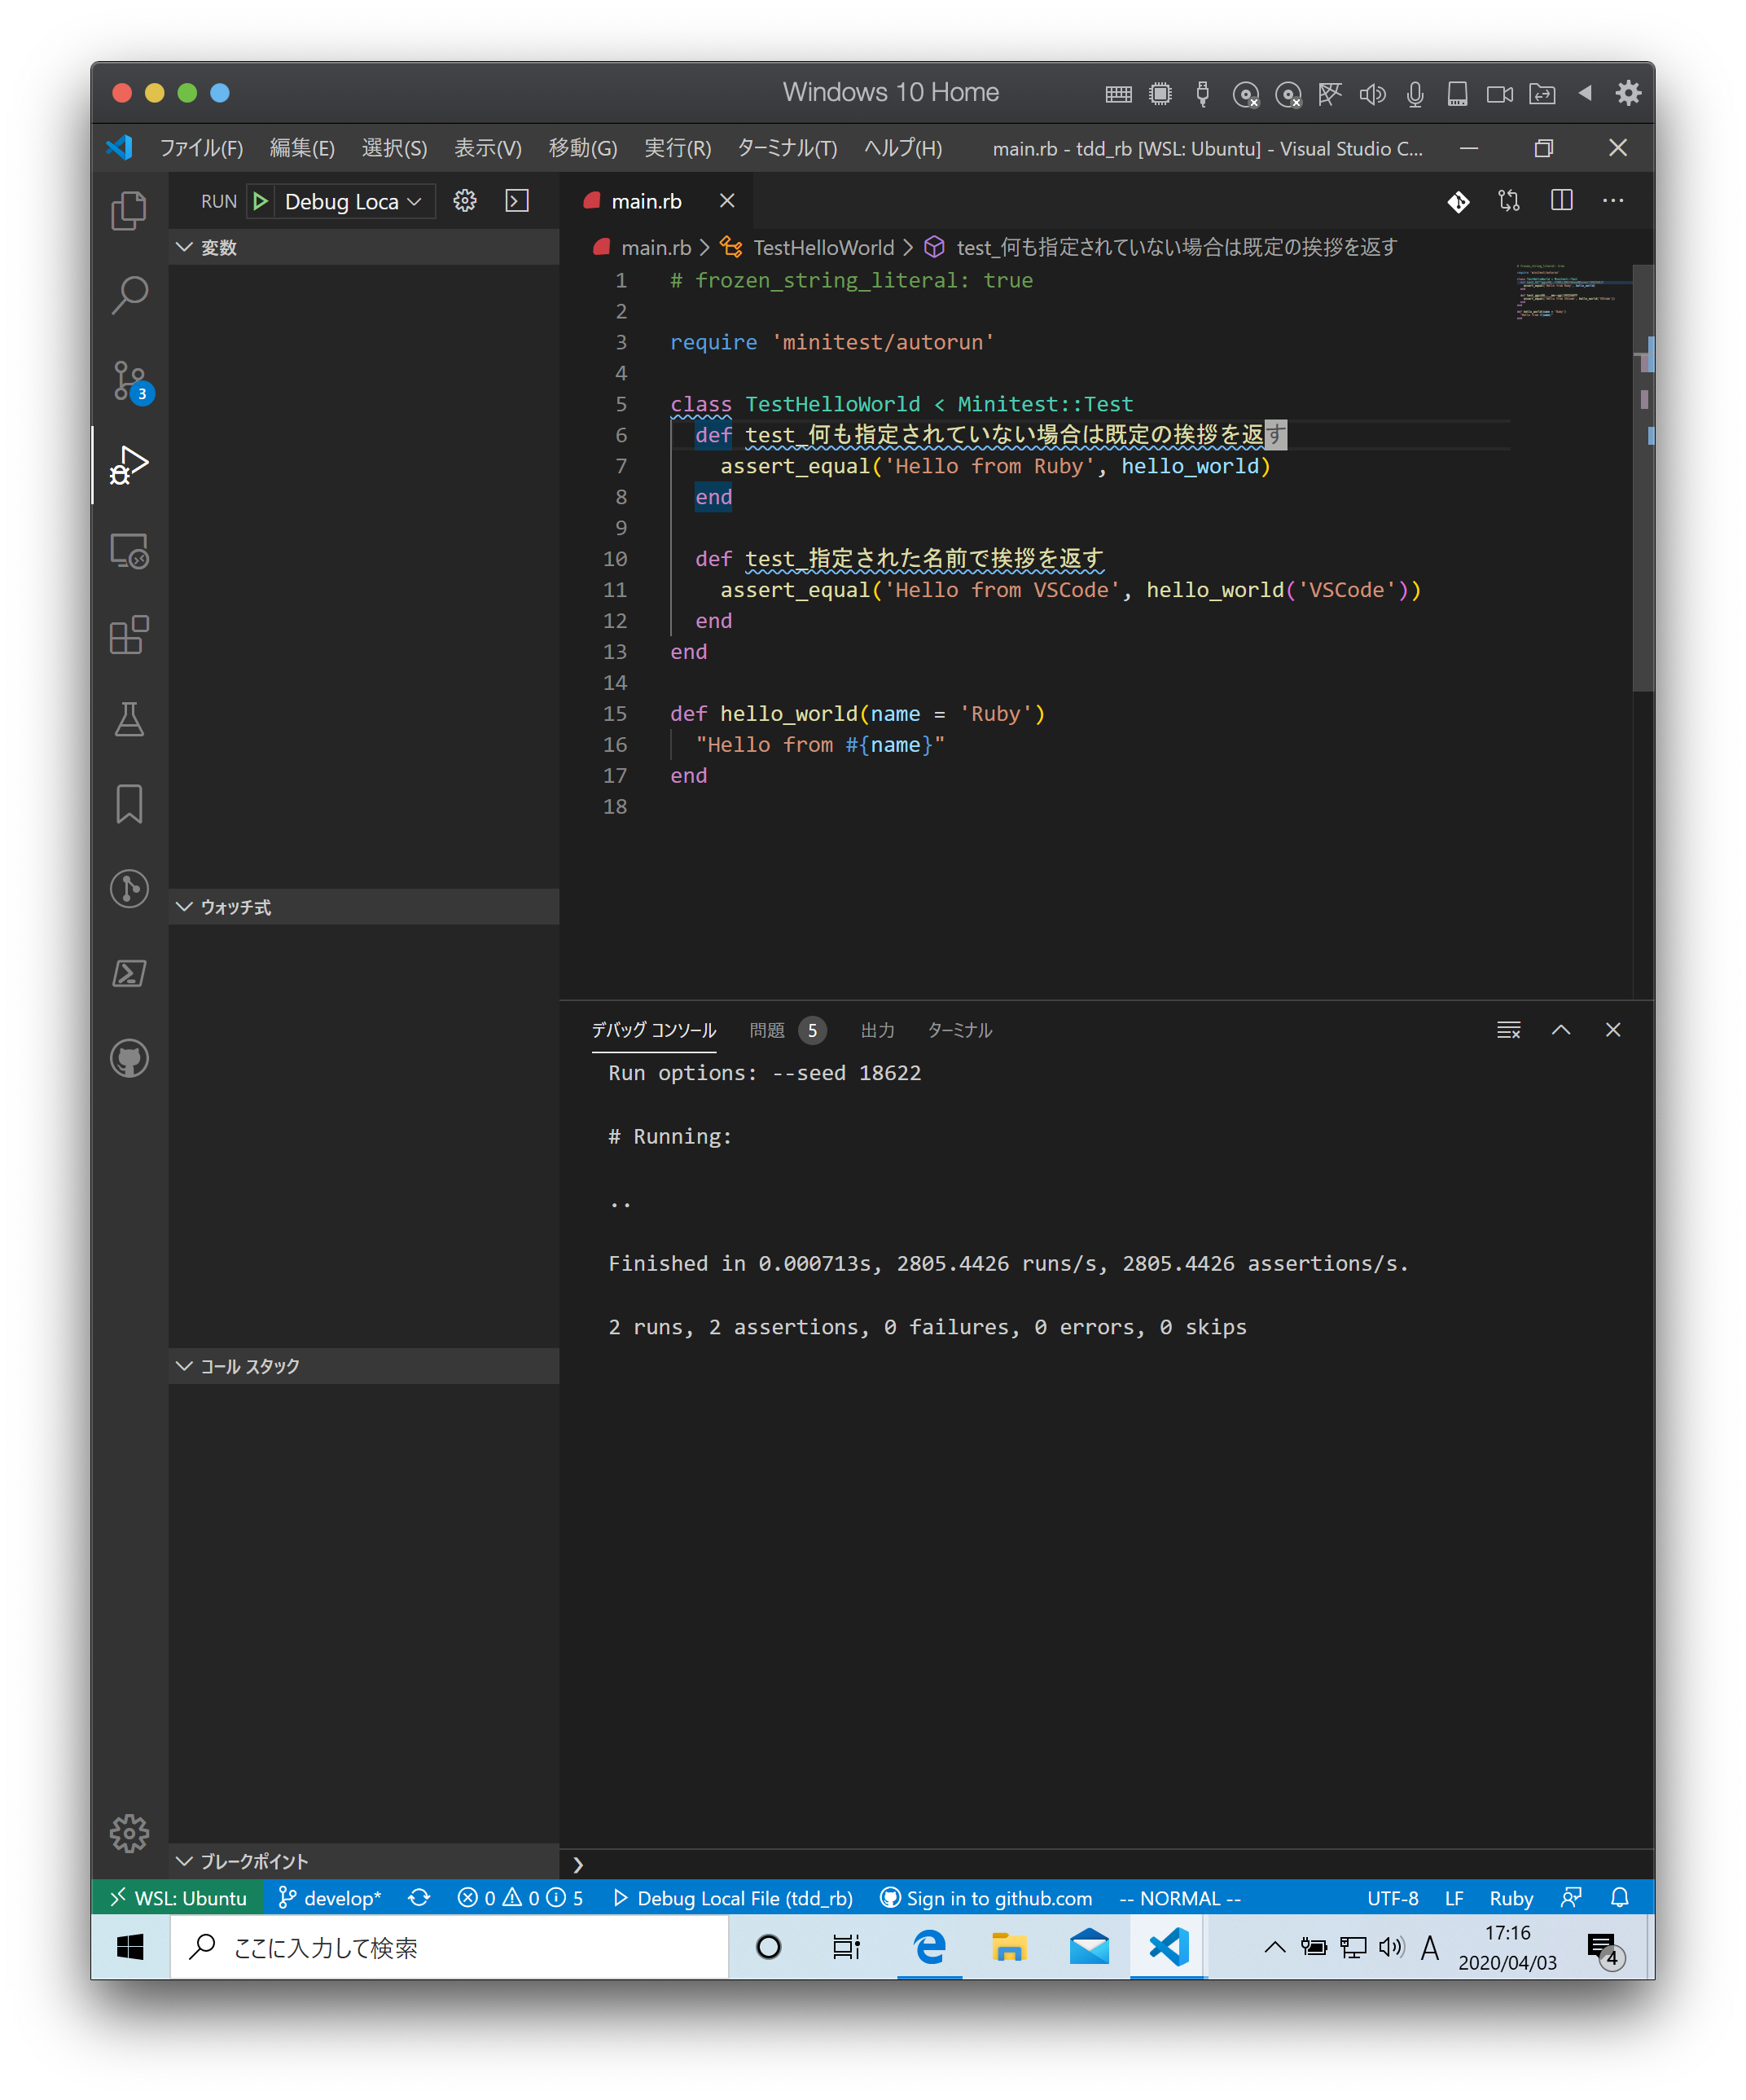
仕上げに不要なテストを削除してテストケースの文言をわかりやすくしておきます。
1 | require 'minitest/autorun' |
プログラムをデバッグする
まず確認したいプログラムの行を左部分を押してブレークポイント(赤丸)を設定します。
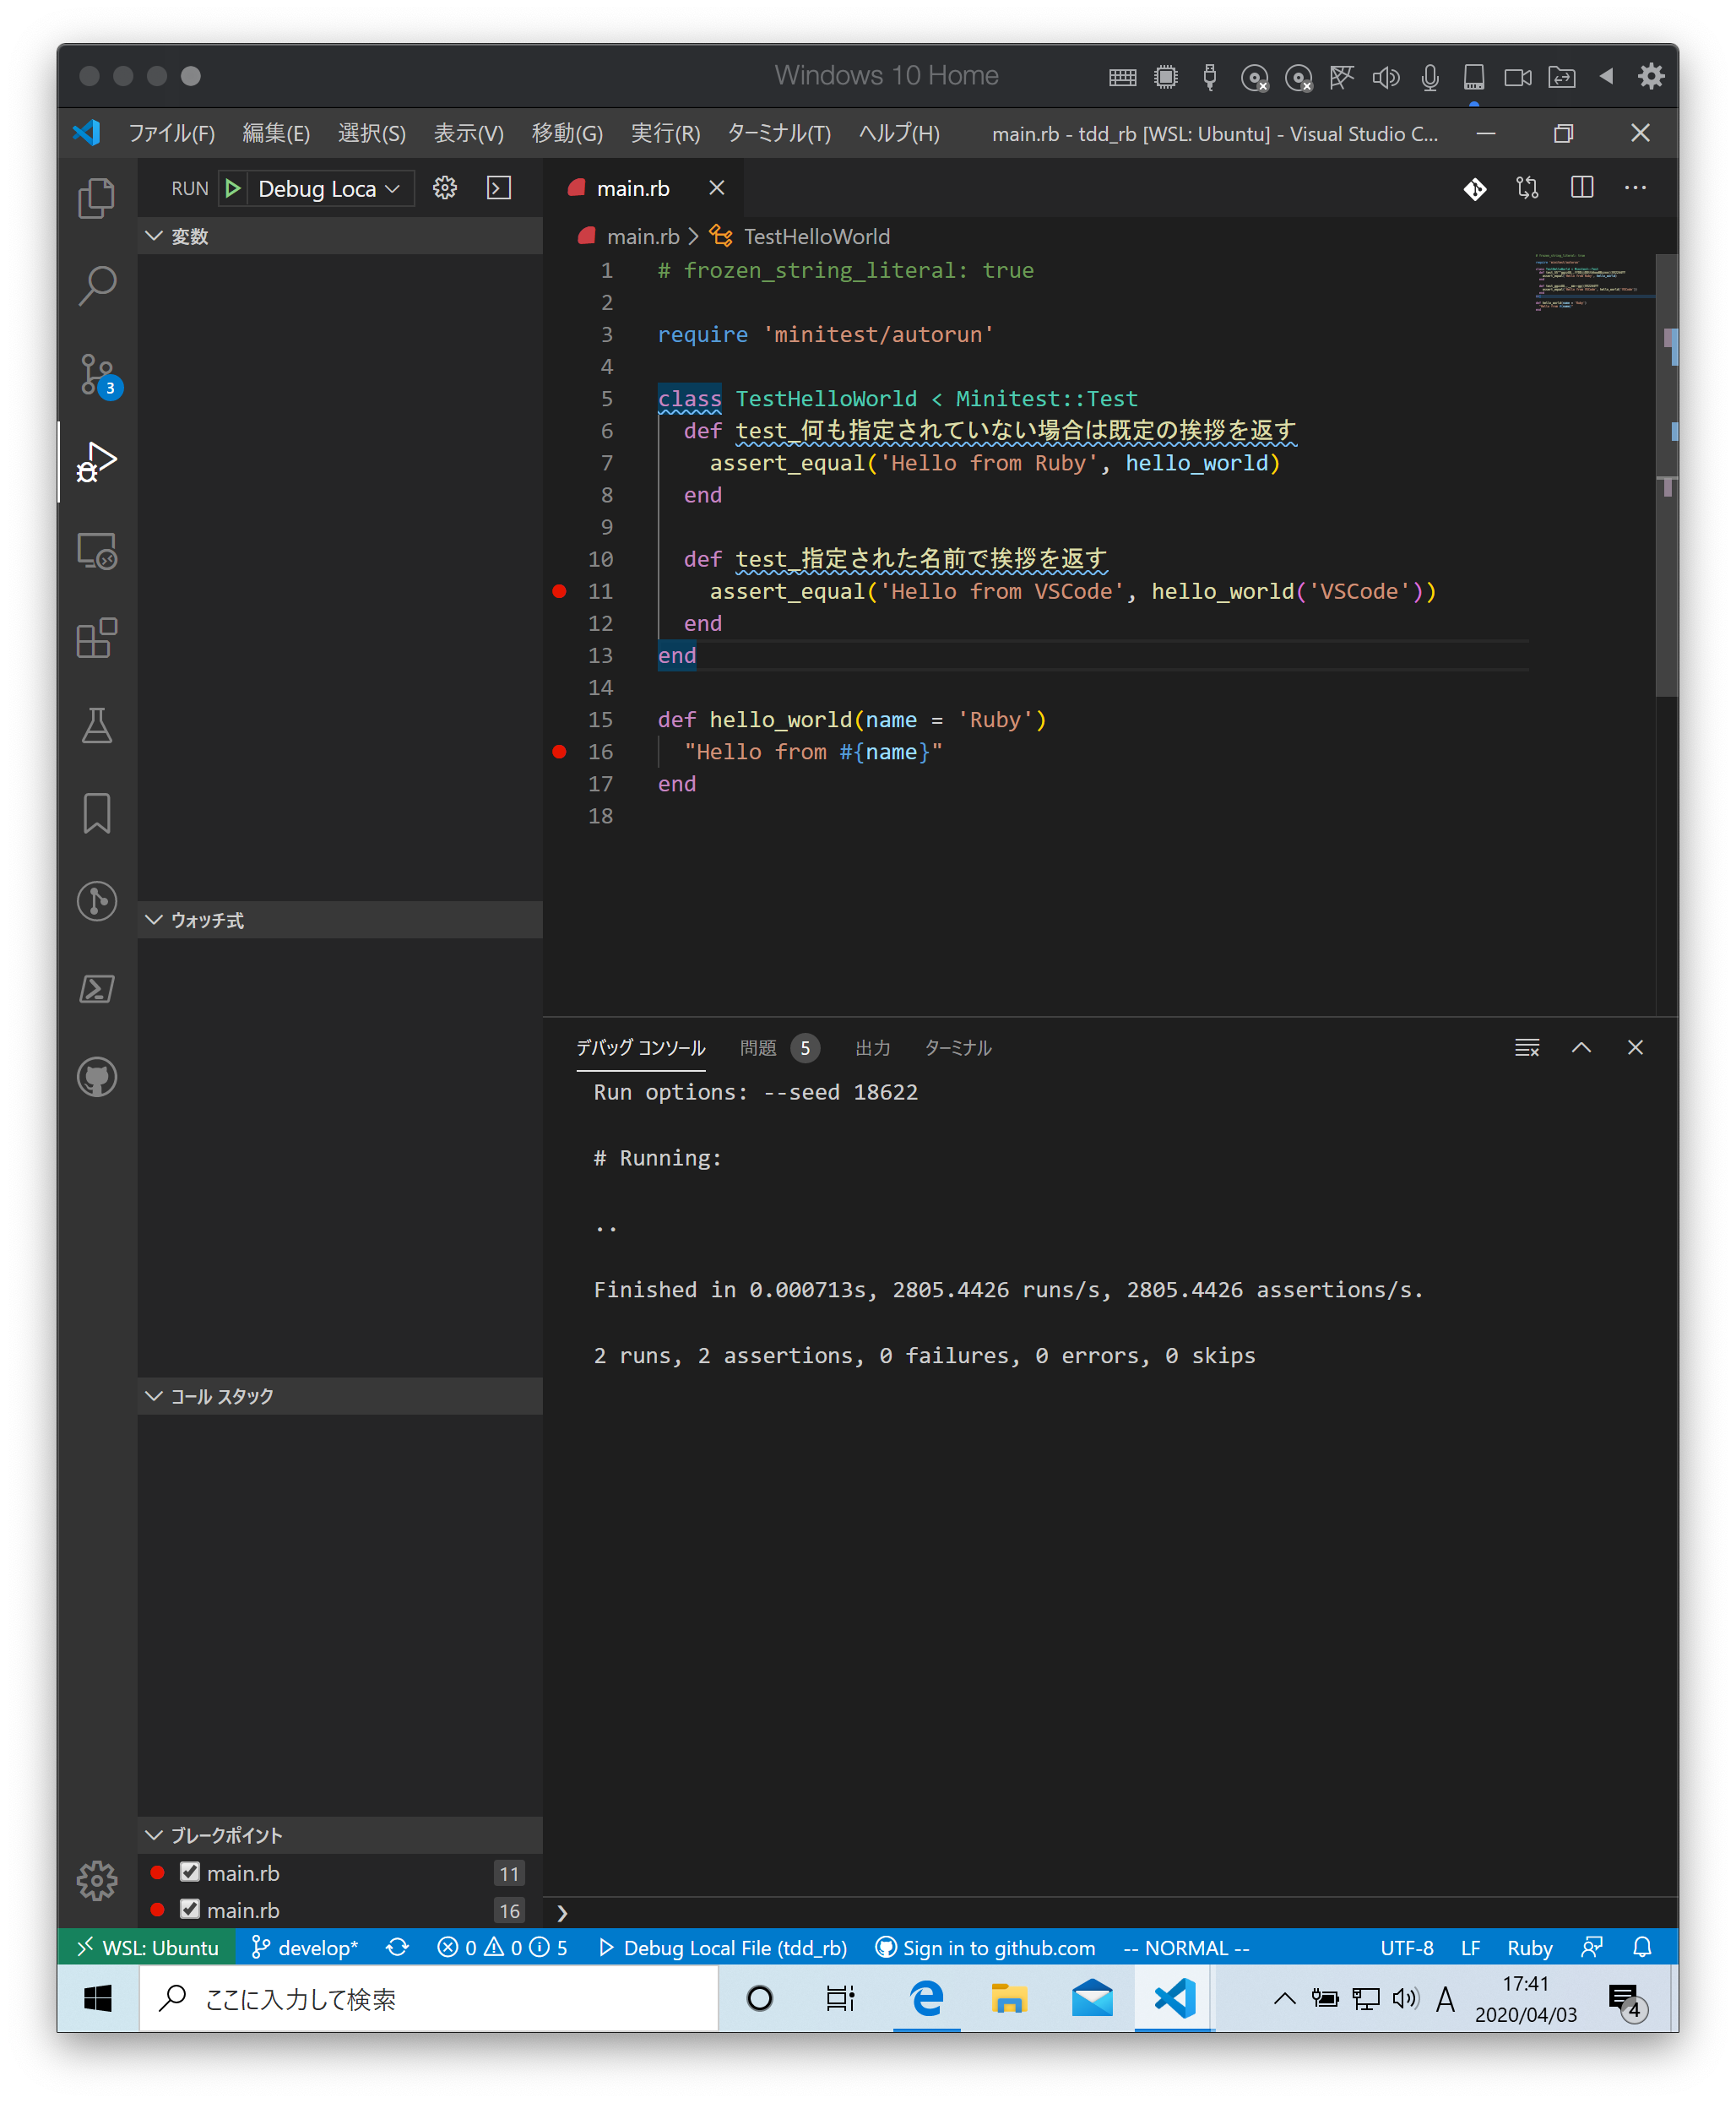
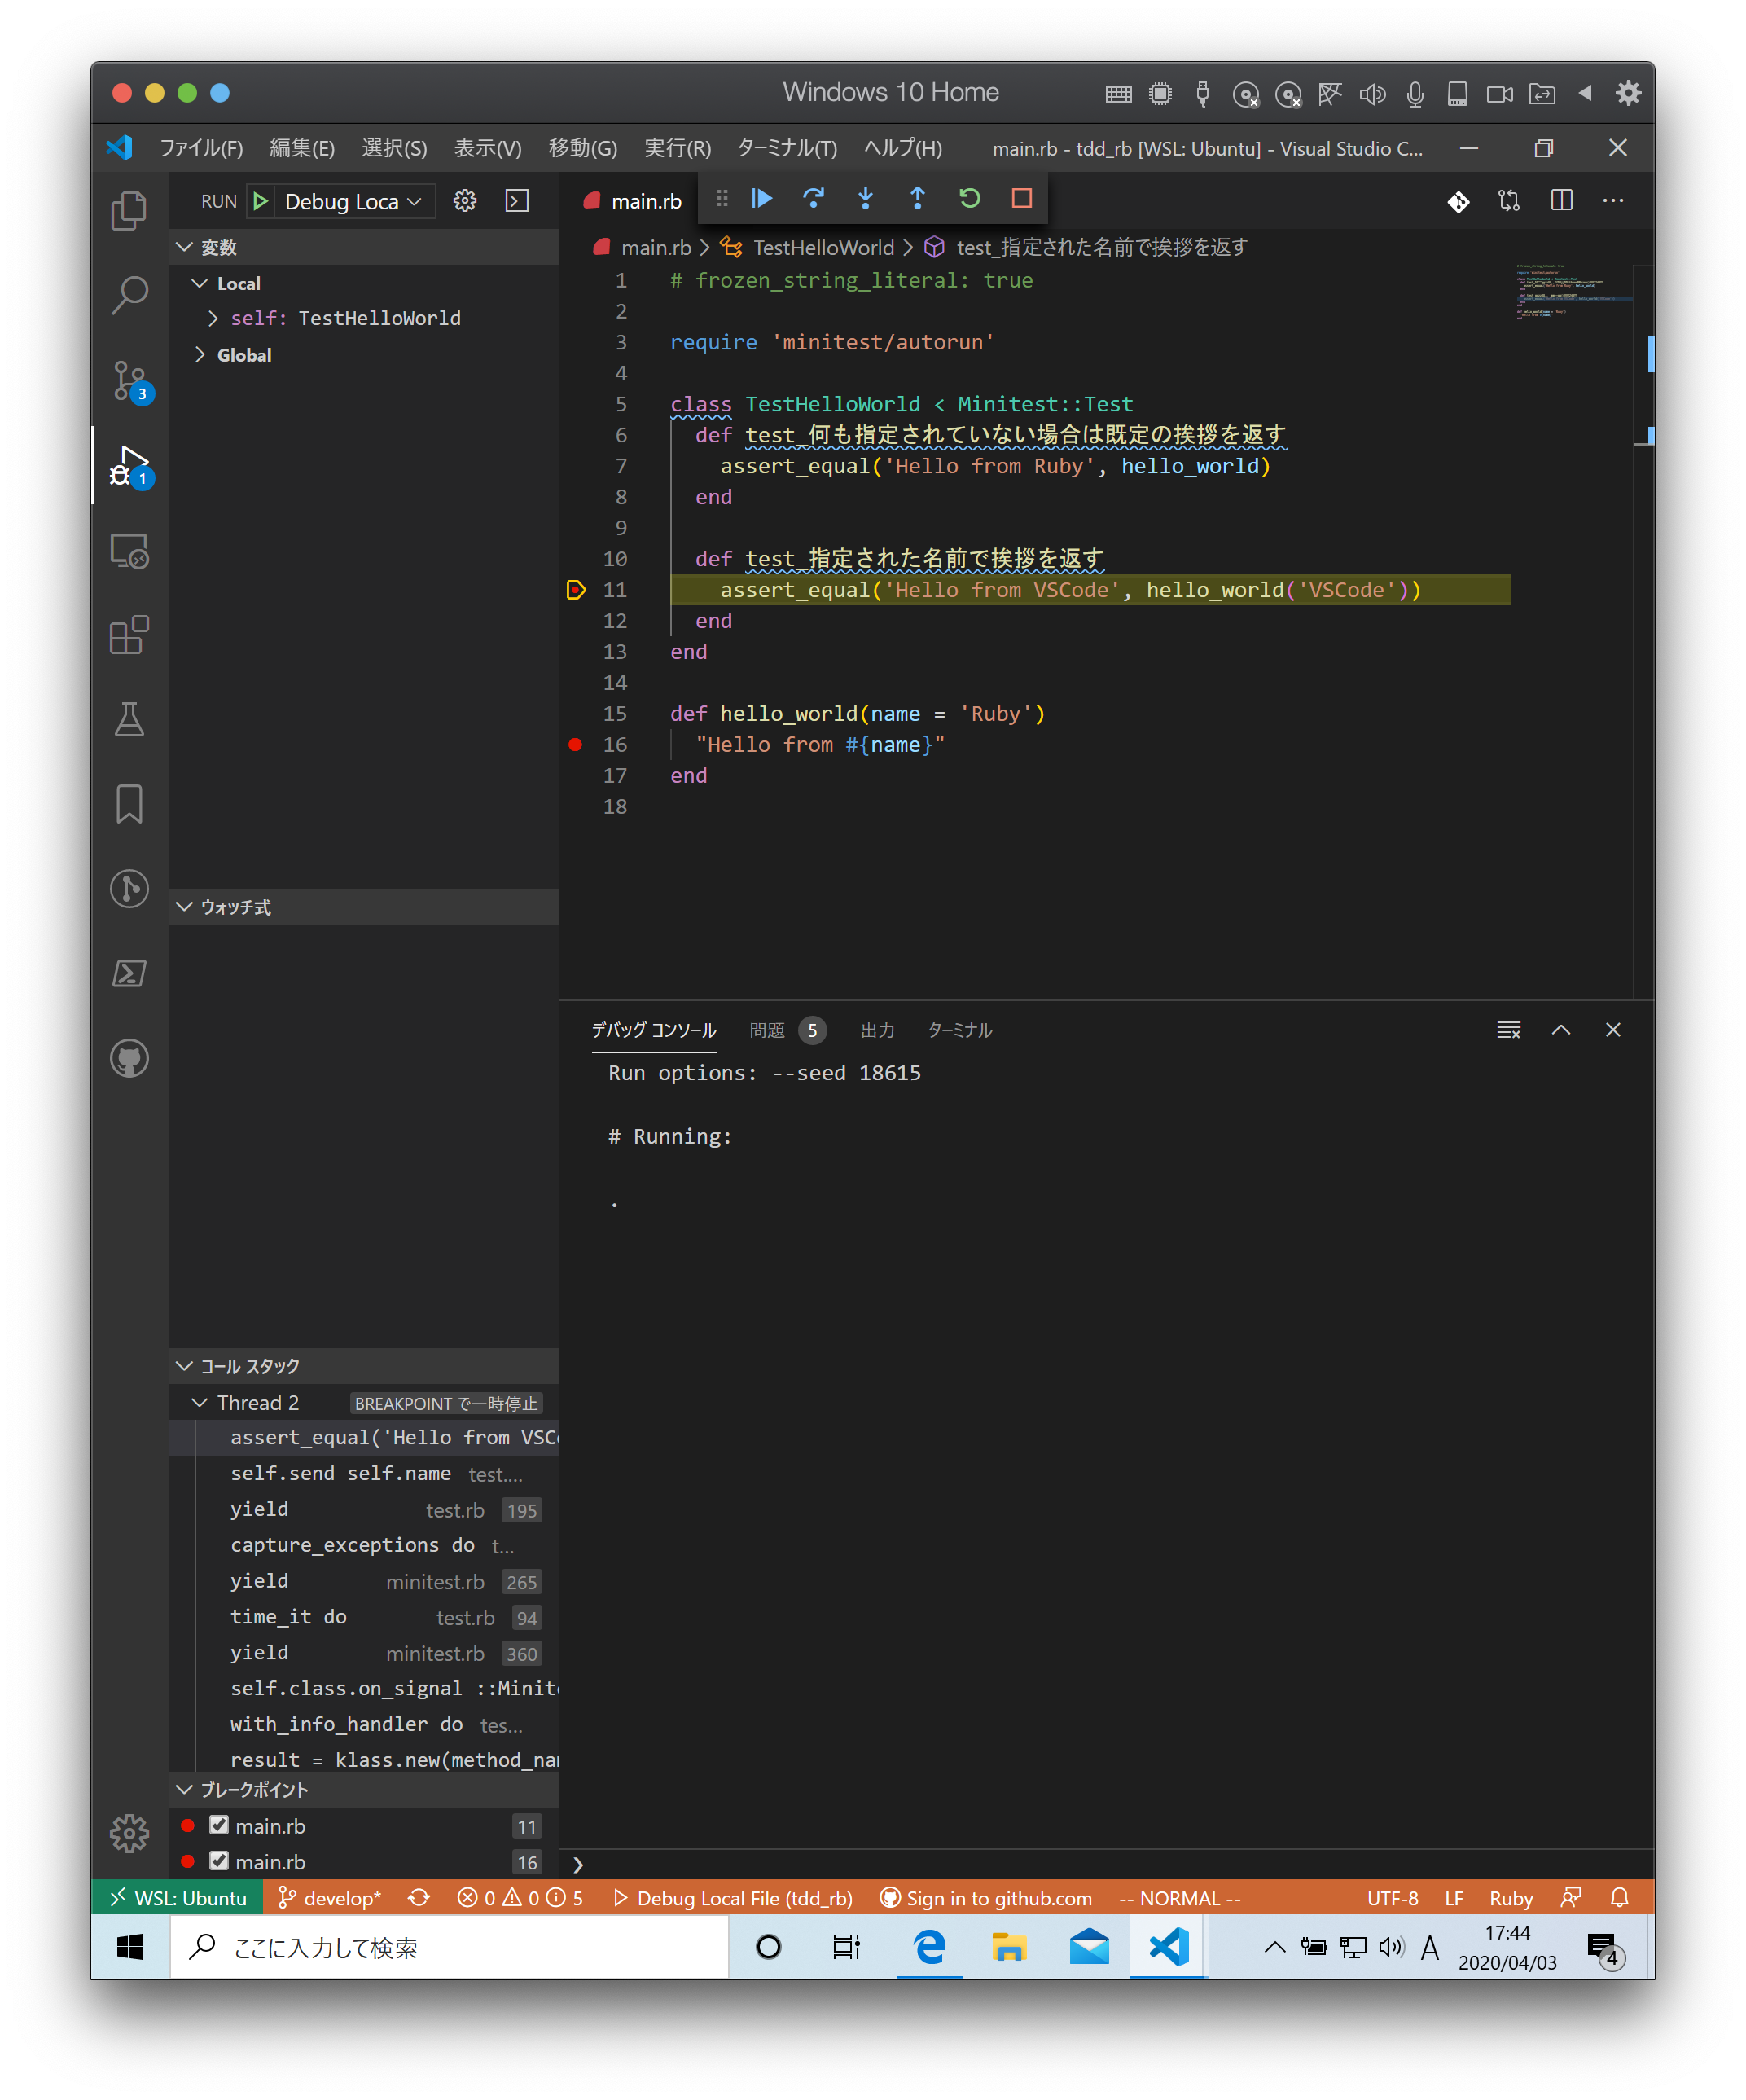
ブレークポイントを設定したら F5 を押してプログラムの実行します。そうするとブレークポイント部分でプログラムが停止して変数などの情報が確認できるようになります。

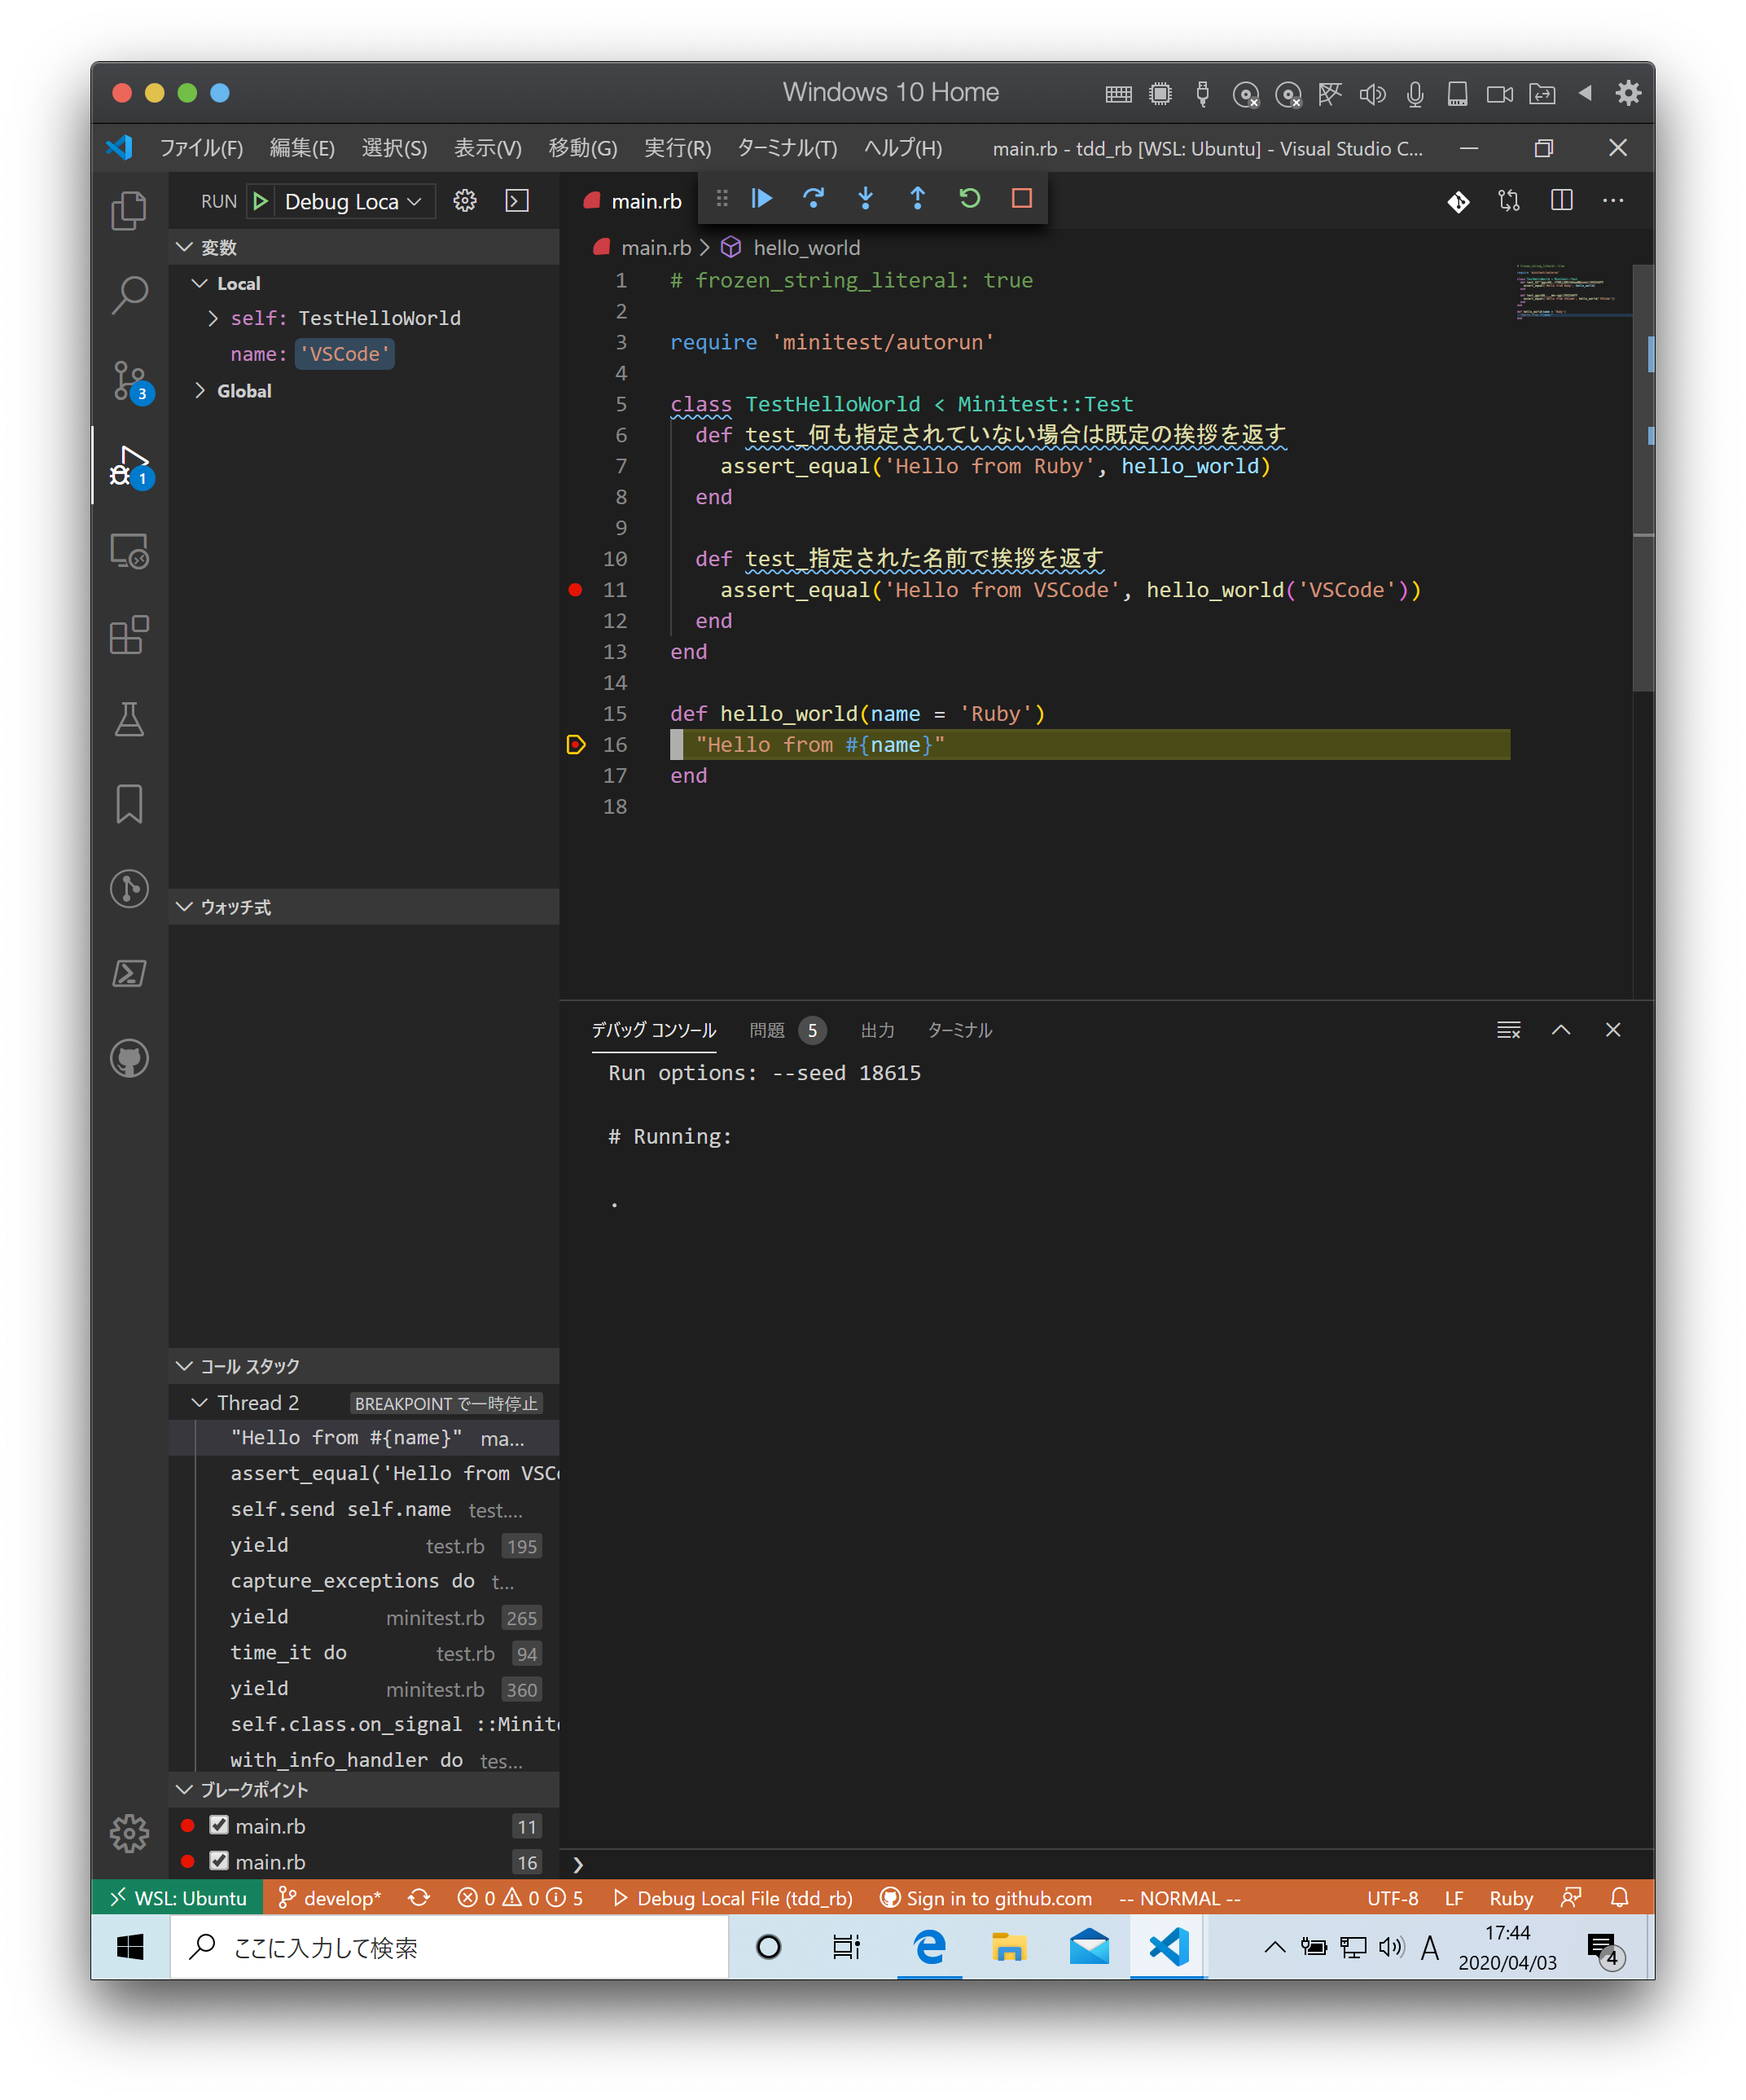
画面上の実行ボタンを押すと次のブレークポイントに移動します。
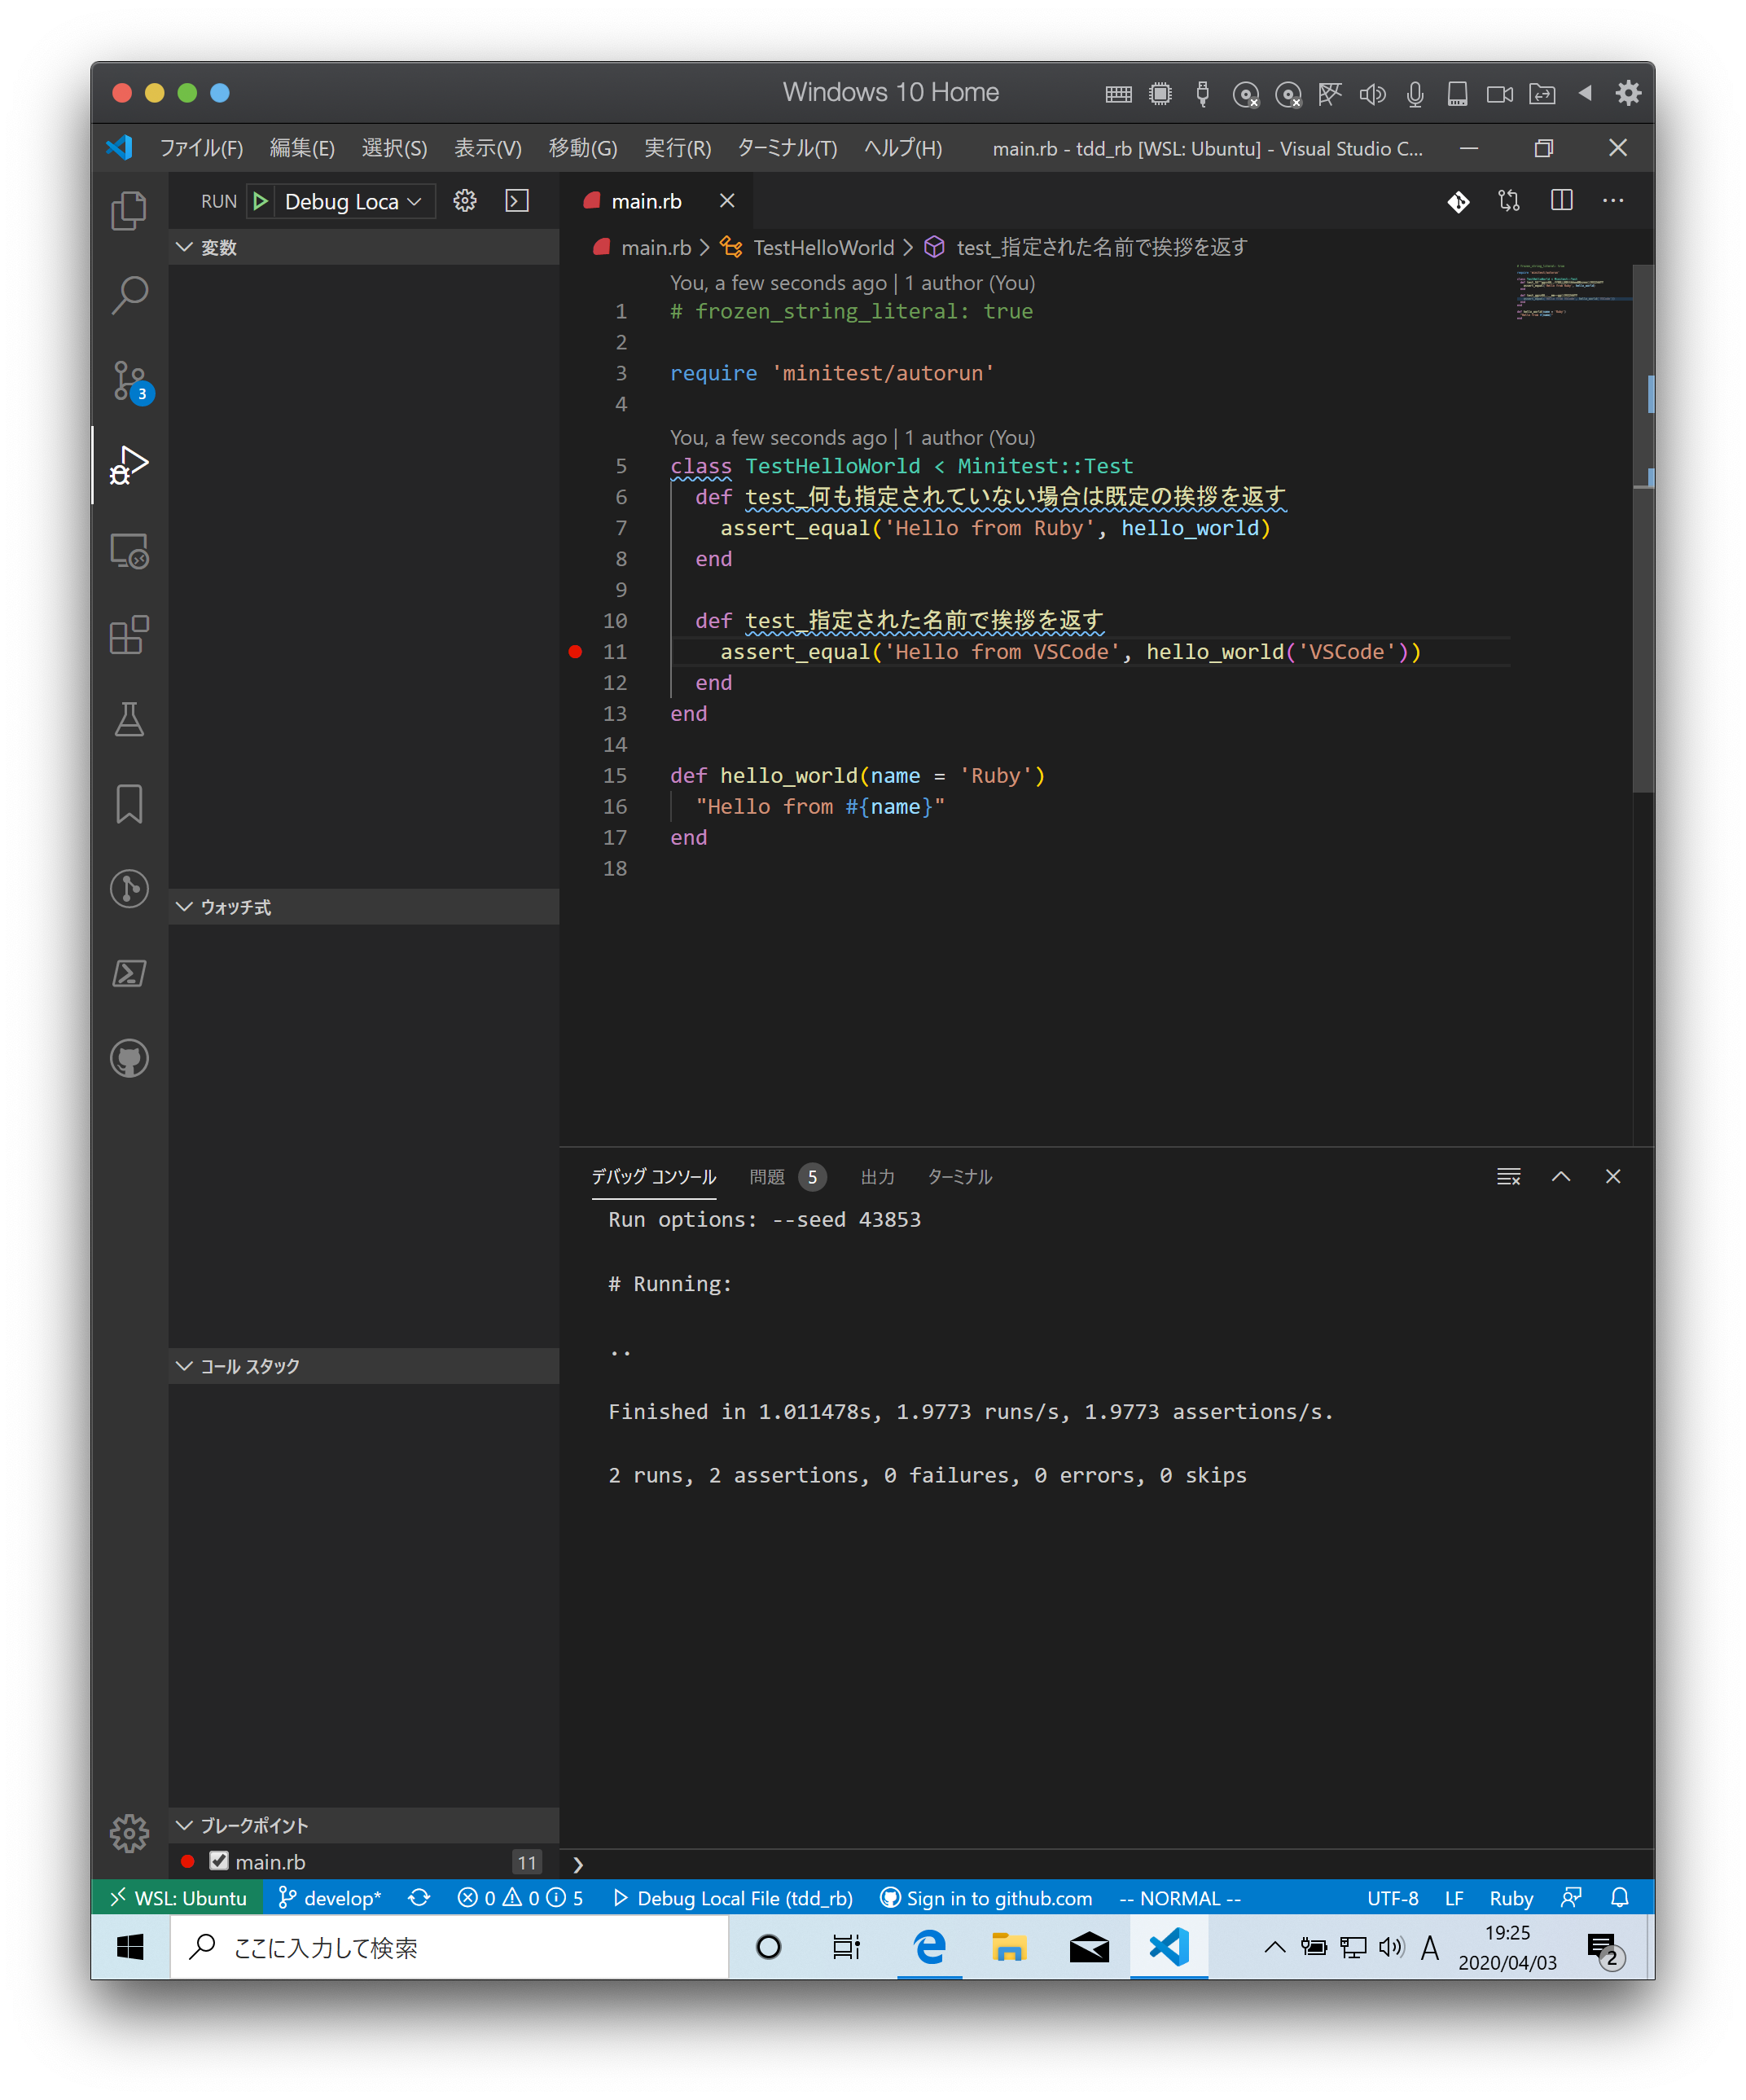
デバッガを終了するには終了ボタンを押します。
ブレークポイントを再度押すことで解除ができます。
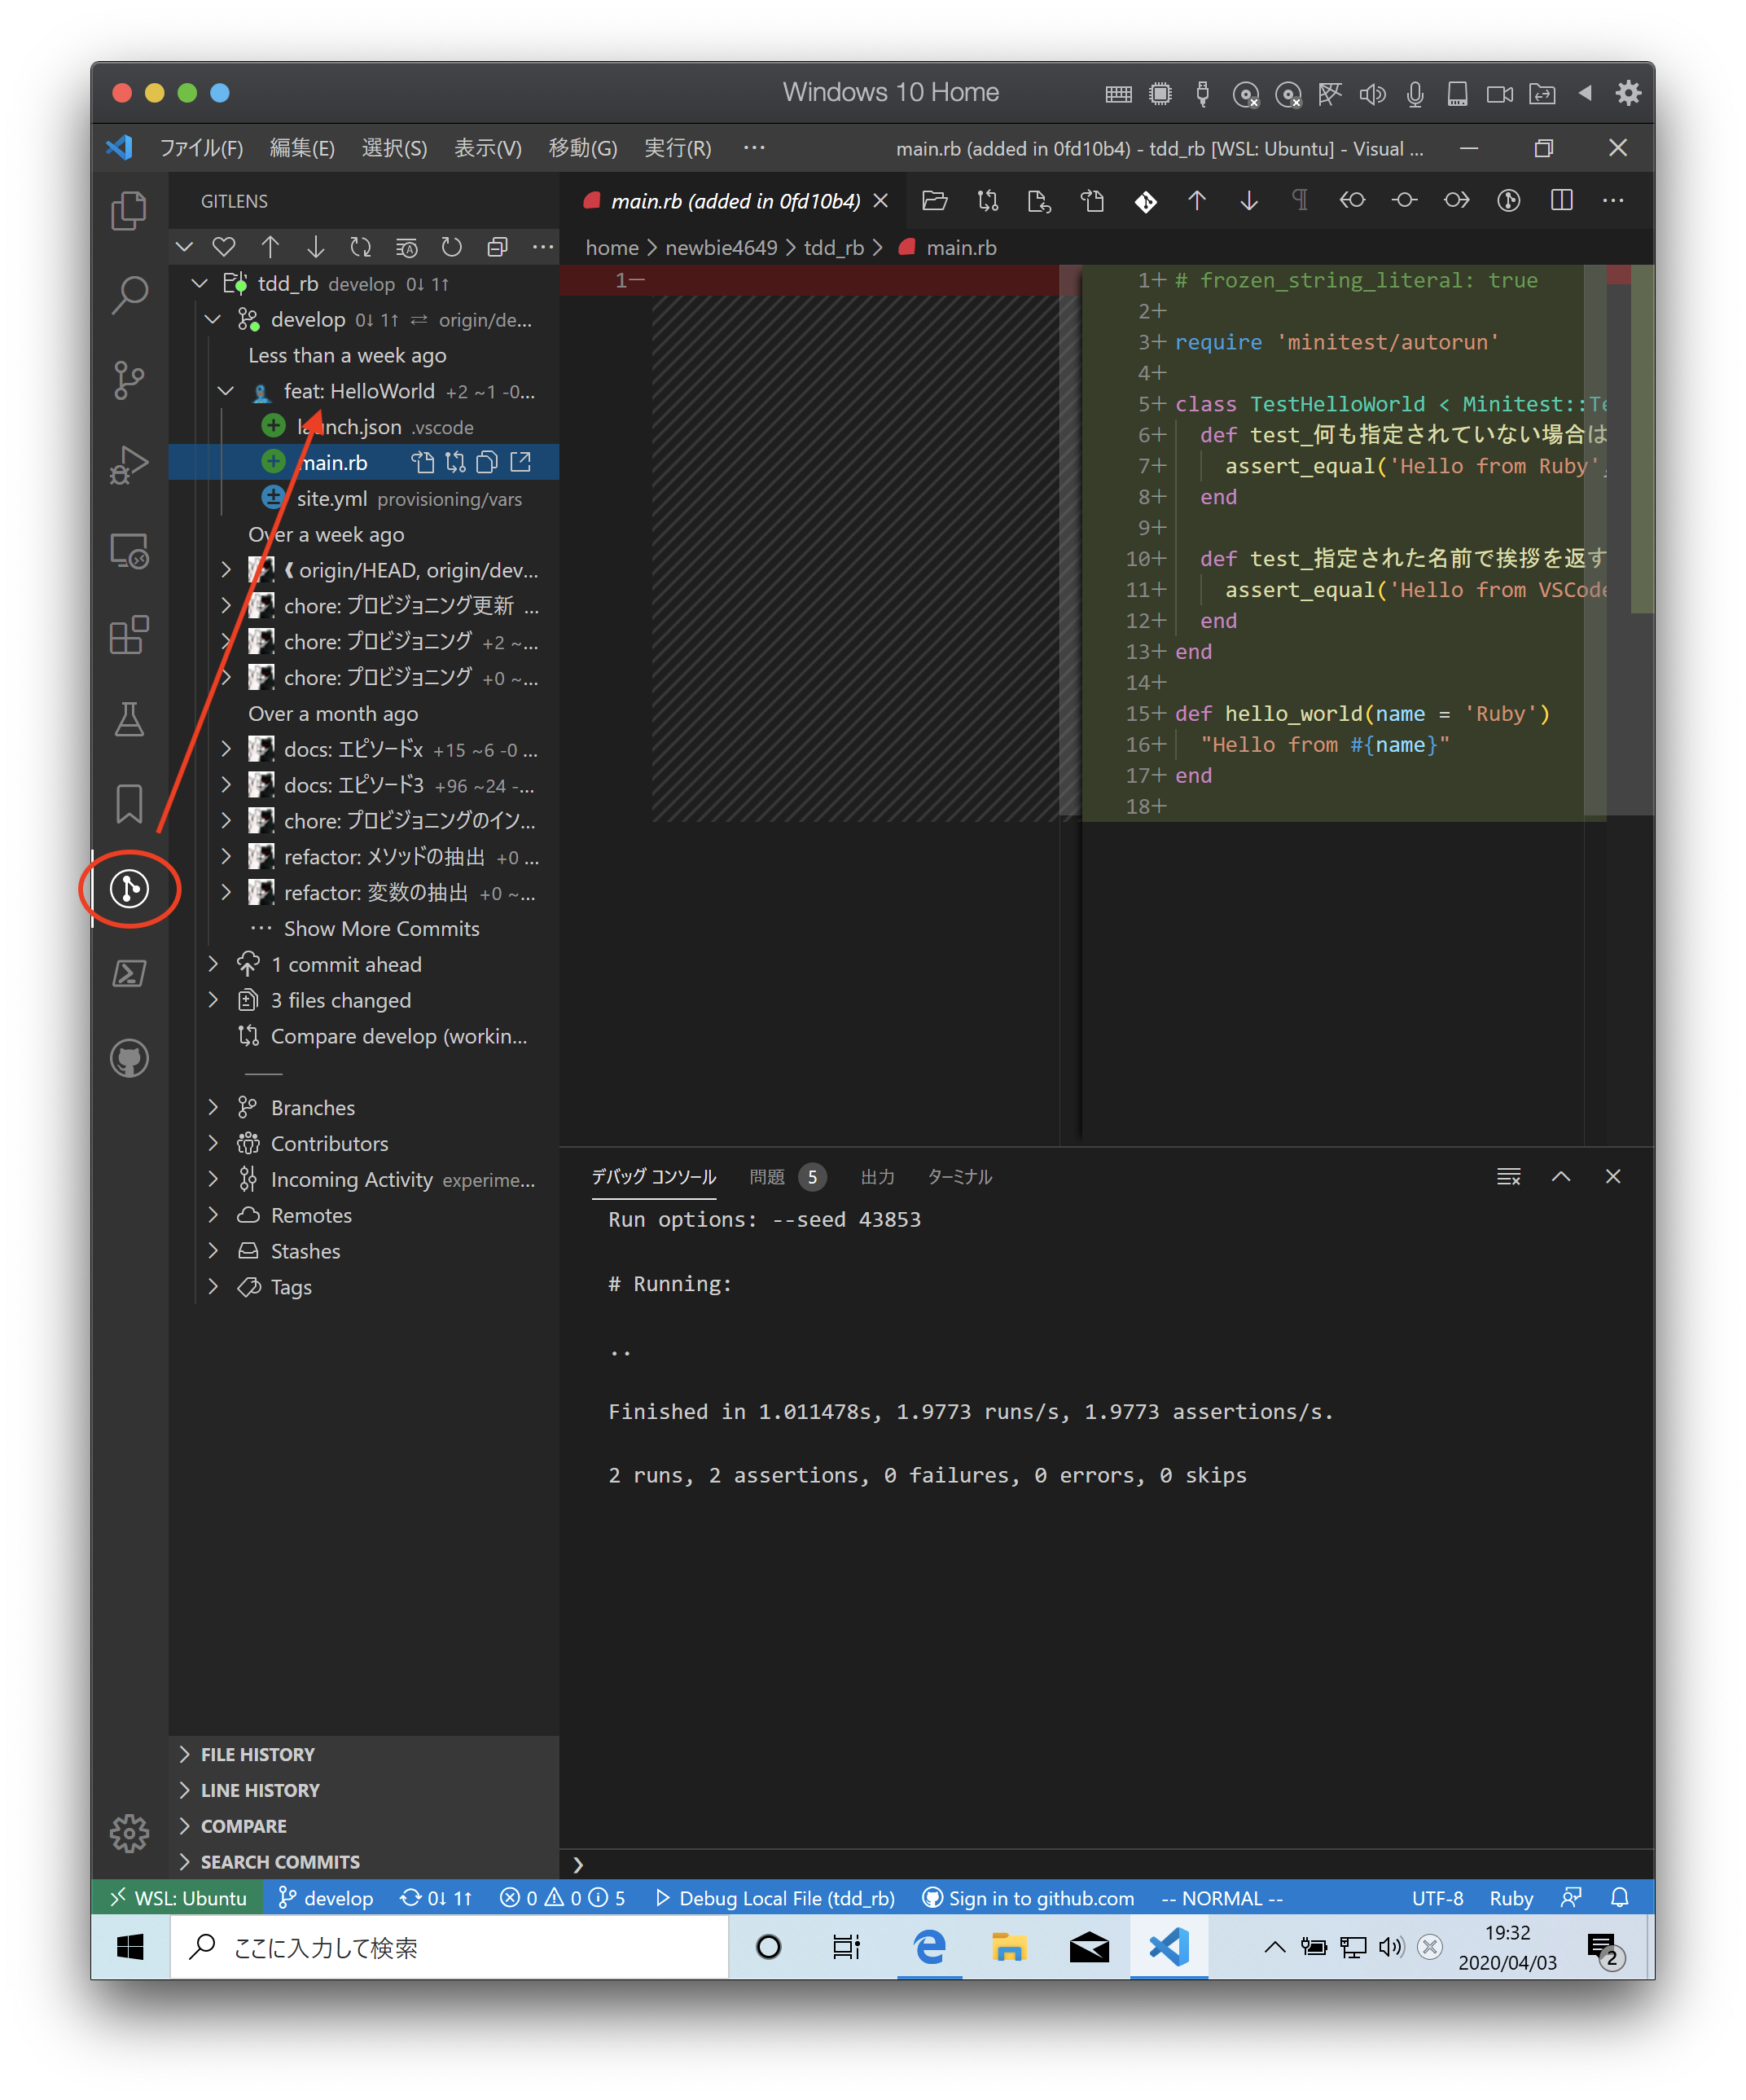
プログラムをレポジトリに保存する
全ての変更をステージ を選択します。

変更内容に feat: HelloWorld と入力して コミット を押します。

変更内容は GitLens から確認できます。